
Lawn
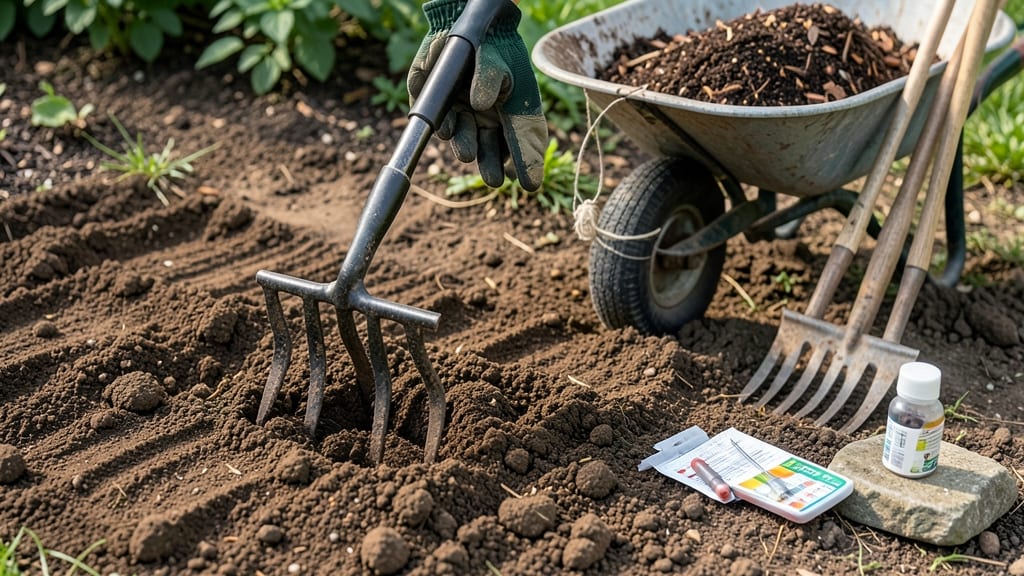
Preparing your seed bed right means seeds sprout twice as fast—no more waiting weeks for stubborn sprouts. 🌱 The key is breaking up compacted soil, leveling the surface, and creating the perfect crumbly texture that seeds love to root into.
I learned this the hard way after planting carrots in rocky soil and watching them struggle for weeks to emerge. You’ll need basic tools: a garden fork or tiller to loosen soil, a rake for smoothing, and a hoe to clear debris.
For small areas, a spade works just as well. The goal is 1-inch-deep fluffy soil where roots can spread without resistance. Think of it like preparing a cozy nest—seeds need room to breathe and grow. Once the bed is ready, water it gently until moist but not soggy.
This prevents seeds from drying out or washing away when you plant. Different seeds need different depths: tiny herbs like basil go in ¼-inch deep, while large seeds like beans need 1-inch coverage. The right spacing keeps plants from crowding as they grow.
Common mistakes include overworking the soil (which releases too many nutrients at once) or skipping the leveling step (which causes uneven germination). For clay-heavy soil, mix in 2-3 inches of compost to improve drainage. Now your seeds have the perfect start!
📚 In This Guide
- What you need
- Instructions
- Tips and common mistakes
- Wrapping up and next steps
What you need
- ● Garden fork or broadfork: 1 (essential for breaking up compacted soil without turning it over). Opt for a heavy-duty, 18-24" tines model.
- ● Hoe (stirrup or action hoe): 1 (for weeding and refining the soil surface). A stainless-steel blade is ideal for durability.
- ● Rake (bow or leaf rake): 1 (to level and smooth the soil). Choose a wide, flexible-tine rake for efficiency.
- ● Garden trowel: 1 (for small adjustments or planting starter seeds). A sturdy, 6-8" model works best.
- ● Wheelbarrow or bucket: 1 (for hauling soil amendments or debris). A 10-12 gallon capacity is perfect.
- ● Gloves: 1 pair (heavy-duty work gloves to protect your hands). Look for gardening-specific gloves with reinforced palms.
- ○ Water source (hose or watering can): 1 (for moistening soil before and after prep). A soaker hose is optional but highly efficient.
- ● Compost: 2-3 inches (spread evenly). Use well-aged, shredded compost (avoid fresh manure).
- ○ Peat moss or coconut coir: Optional (1-2 inches). Helps retain moisture in sandy soils.
- ○ Perlite or vermiculite: Optional (½ cup per sq. ft.). Improves aeration in heavy clay.
- ○ Slow-release fertilizer: Optional (follow package rates). Look for a balanced 10-10-10 or 5-10-5 NPK ratio.
- ○ Lime (if soil is acidic): Optional (test soil pH first!). Use pelletized lime for easy application.
- ○ Soil test kit: 1 (optional but recommended). Test for pH, nitrogen, phosphorus, and potassium before amending.
- ○ Weed barrier cloth: Optional (for invasive weeds). Lay down if your area is heavily overrun.
- ● Sunlight assessment: Confirm the area gets at least 6 hours of sunlight daily (critical for seed bed success!).
- ● Weather check: Plan for a dry, calm day to avoid mud or erosion during prep.
Step-by-Step guide to preparing a loose seed bed for faster growth
Loose soil means roots spread easily—here’s how to create the perfect foundation your plants will love.
🌱 Step 1: Clear the Area of Debris and Weeds
Start by removing all rocks, sticks, and weeds from your planting area. I like to use a sturdy garden fork to lift out stubborn weeds with their roots intact—this prevents regrowth. Spread a tarp over the cleared area if working in windy conditions to keep debris from blowing back in.
Look for any buried trash or old plant material that might harbor pests. A quick once-over with a rake helps too, breaking up any remaining clumps. The goal is a clean slate where roots can grow unobstructed. If weeds keep popping up later, that’s your sign to dig deeper next time—some roots run surprisingly deep.
🪴 Step 2: Loosen the Soil to a Depth of 8-12 Inches
Use a broadfork or digging fork to break up compacted soil without turning it over. I work the fork in vertically, then wiggle it side-to-side to create vertical cracks that improve drainage. Stop when the soil feels light and crumbly—you’ll know it’s ready when you can push your fingers in easily.
For particularly hardpan soil, I rent a rototiller for stubborn spots, but hand-forking works just fine for most gardens. Avoid walking on the loosened soil—your weight compacts it again. If the soil feels gummy when wet or like concrete when dry, you’ll need to add organic matter next.
💧 Step 3: Amend the Soil with Organic Matter
Spread a 2-3 inch layer of compost or well-rotted manure over the loosened soil. Work it in gently with your hands or a garden fork until it’s evenly distributed. I like to mix in a handful of perlite or coarse sand if the soil feels too dense—this helps with both drainage and aeration.
For sandy soil, add peat moss instead to improve moisture retention. The key is balance: you want soil that holds water but doesn’t stay soggy. After amending, give the bed a final light raking to create a smooth, level surface ready for planting.
☀️ Step 4: Level and Prepare for Planting
Use a level or your eye to check for high/low spots. I like to mound soil slightly in the center for sloped areas to prevent water pooling. For raised beds, ensure the edges are slightly higher than the center to contain soil during watering.
Run your fingers over the surface—it should feel uniformly loose, like crumbled cake. If you see any compacted spots, fork them again. Now’s also the time to mark planting rows if needed, using a simple stick or string line. Your seed bed is now ready for fast root establishment and vigorous growth.
⏰ Step 5: Water Lightly Before Planting
Give the prepared bed a gentle watering to settle the soil and remove air pockets. I use a fine rose attachment on my hose to avoid disturbing the loose surface. Stop when the top 2 inches feel evenly moist—this helps seeds make immediate contact with damp soil upon planting.
If the soil repels water (a sign of poor structure), mix in more compost and rewater. This final step ensures your seeds or seedlings will find ideal conditions right away. Now you’re ready to plant with confidence—roots will spread quickly in this perfect loose soil environment.
Tips & tricks for perfect loose soil preparation
Creating the ideal seed bed doesn't have to be complicated—just a few thoughtful steps make all the difference for your plants.
Weed Prevention: I've learned the hard way that removing weeds by their roots in Step 1 is worth the extra effort. If you leave even small root fragments, they'll regrow and compete with your new plants. For persistent weeds like dandelions, consider soaking the area with vinegar for 24 hours before clearing—it kills the roots without chemicals.
Soil Loosening Technique: In Step 2, focus on vertical cracks rather than turning the soil over. This preserves soil structure while improving drainage. If your soil feels like concrete when dry, try adding a little water first—it makes the hardpan easier to break up. For clay-heavy soil, work in some coarse sand during this step to prevent future compaction.
Organic Matter Strategy: When amending in Step 3, don't skimp on the 2-3 inch layer of compost. This is where the magic happens for root growth. For particularly dense soil, mix in a handful of perlite or vermiculite with your compost—it creates tiny air pockets that roots absolutely love. I've seen plants grow twice as fast in amended soil compared to unamended.
Final Watering Secret: That final watering in Step 5 is crucial for seed contact. Use a gentle mist setting on your hose to avoid disturbing the loose surface. If you're planting seeds directly, water until moisture reaches about 2 inches deep—this ensures roots have water to reach immediately after germination.
Pro Tips for Prepare Seed Bed
- Creating the ideal seed bed doesn't have to be complicated—just a few thoughtful steps make all the difference for your plants.
- Weed Prevention: I've learned the hard way that removing weeds by their roots in Step 1 is worth the extra effort.
- Soil Loosening Technique: In Step 2, focus on vertical cracks rather than turning the soil over.
Frequently asked questions
Got questions about preparing the perfect seed bed? You’re not alone!
Here are answers to the most common concerns—whether you’re a gardening newbie or a seasoned green thumb looking for a refresher.
What’s the best time of year to prepare a seed bed?
The ideal window is early spring (right after the last frost) or late summer/early fall (6–8 weeks before your first frost). This gives soil time to settle, warm up (or cool down), and avoid competing weeds. For warm-season crops like tomatoes, wait until soil temps hit 60°F+—a soil thermometer helps!
Do I need to till my soil to prepare a seed bed?
Not always! While tilling breaks up compacted soil, it can also disrupt beneficial microbes. For a no-till approach, try hand-hoeing or using a broadfork to loosen soil only 6–8 inches deep. Add compost on top and let worms do the work—nature’s free aerators!
How do I fix rocky or clay-heavy soil for seeding?
Rocky soil? Sift out large rocks (or cover them with mulch) and amend with coarse sand or perlite to improve drainage. Clay soil? Mix in 2–3 inches of compost or aged manure and till in gypsum (10 lbs per 100 sq ft) to break up particles. Re-test soil pH—aim for 6.0–7.0 for most seeds.
Why did my seeds fail even after preparing the seed bed?
Common culprits: uneven depth (bury seeds too deep = rot; too shallow = dry out), poor moisture (keep soil damp but not soggy), or compaction (press seeds gently into soil after planting). Check for pests (like birds or slugs) and ensure seeds are fresh (test germination rate if unsure).
Can I reuse last year’s seed bed soil?
Yes, but refresh it! Remove weeds, top-dress with 1–2 inches of compost, and fluff the soil. If soil looks depleted (pale or crumbly), mix in a balanced fertilizer (10-10-10) or organic matter like leaf mold. Avoid reusing soil from diseased plants—sterilize with solarization (cover with plastic for 4–6 weeks) if needed.
Wrapping up and next steps
Preparing a seed bed is your secret weapon for lush, thriving lawns and gardens—it’s all about giving your plants the perfect loose, nutrient-rich foundation to grow strong and fast! 🌱 By following the steps outlined, you’ll ensure optimal drainage, aeration, and root development, setting the stage for healthier, more resilient plants.
Whether you’re a seasoned gardener or just starting, this process is game-changing for your green space.
Now that you’re armed with the knowledge, roll up your sleeves and get ready to transform your soil! Start small—pick a section of your lawn or garden, gather your tools, and begin. Your future plants will thank you! 🌿