
Lawn
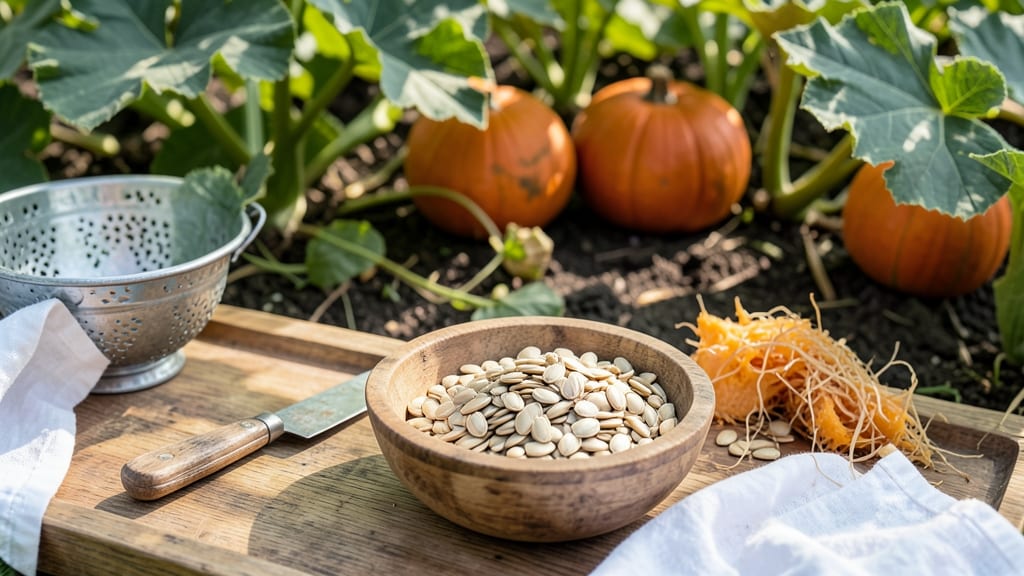
Cold-stressed a pumpkin seed mix reveals their true potential—or their last chance to grow. 🌱 This simple viability test tells you which seeds will sprout next spring, saving you from planting dozens of duds.
I’ve tested hundreds of seeds this way, and it’s the difference between a thriving patch of pumpkins and empty rows in the garden.
The process couldn’t be simpler: soak your seeds overnight, then place them between damp paper towels in a sealed bag for 5-7 days in the fridge. Watch for tiny sprouts—those are your winners. You’ll know exactly which seeds to plant, and which to compost without wasting space or time.
By the time you’re ready to sow, you’ll have 90%+ germination rates instead of guessing. The best part? This method works for any squash or pumpkin variety, from delicate acorns to massive Atlantic Giants. You’ll skip the frustration of patchy growth and enjoy a garden full of healthy vines.
Perfect for gardeners who hate wasted effort or want to save seeds from their best plants. Here’s how to do it right—no fancy equipment needed.
📚 In This Guide
- What you need
- Instructions
- Tips and common mistakes
- Wrapping up and next steps
What you need
- ● Pumpkin seeds: 1–2 cups (freshly harvested, cleaned, and dried to ~10% moisture content). Aim for Cucurbita pepo or Cucurbita maxima varieties for best results.
- ● Cold-stress container: A shallow, breathable tray or mesh bag (e.g., a seedling flat with drainage holes or a fine-mesh produce bag).
- ● Moisture control: A spray bottle with water (chilled to ~40°F/4°C) or damp paper towels (wrung out to avoid sogginess).
- ● Thermometer: A digital or analog thermometer to monitor temperatures (ideally between 32–40°F (0–4°C) for cold stress).
- ○ Growth medium (optional for germination test): A small pot or tray with potting soil or a damp paper towel for viability testing post-stress.
- ● Labeling supplies: Masking tape and a marker to tag seeds by treatment group (e.g., "Control," "48-Hour Stress," "72-Hour Stress").
- ● Timer/clock: To track exposure duration precisely.
- ● A refrigerator or cooling chamber for consistent cold exposure (if your freezer isn’t precise enough).
- ● Humidity dome or plastic wrap to retain moisture during germination testing.
- ● Notebook or digital app (e.g., Google Sheets) to log observations like seed appearance, sprouting rates, and environmental conditions.
- ● Heat mat or warm spot (e.g., sunny windowsill) for post-stress germination acceleration.
Step-by-Step guide to testing pumpkin seed viability for spring planting
Here’s how to save seeds from this year’s pumpkins and ensure they’ll sprout strong next season!
🌱 Step 1: Harvest and Clean the Seeds
Wait until your pumpkin is fully mature and has turned its final color before cutting it open. Scoop out the seeds and pulp, then rinse them in a colander under cool water to remove the stringy fiber. Spread them on a paper towel to dry for 2-3 days in a warm, dark place. You’ll know they’re ready when they feel dry to the touch and no longer stick together.
I like to separate the seeds by variety if I’ve grown multiple types—this keeps things organized for testing. Store them in a paper envelope labeled with the pumpkin variety and harvest year. The drier they stay, the longer they’ll remain viable for planting.
💧 Step 2: Perform the Cold-Stress Viability Test
Place a handful of seeds between two damp paper towels in a sealed plastic bag. Keep them in the refrigerator for 7-10 days—this mimics winter conditions and helps identify which seeds will survive. After the cold treatment, remove the seeds and let them warm up to room temperature for a few hours.
This step is crucial because it weeds out weak seeds. Healthy seeds will plump up slightly and feel firm, while shriveled or soft seeds won’t make it through the test. Discard any that look damaged or feel mushy—those won’t grow well next spring.
☀️ Step 3: Test Germination in Warm Conditions
Fill a small container with moist potting soil and plant the cold-treated seeds about 1 inch deep, spacing them 2 inches apart. Place the container in a warm spot with indirect light, like on top of the fridge. Keep the soil consistently moist but not soggy—you want it damp enough that it holds together when squeezed but not dripping.
Check for germination in 5-7 days. You’ll see tiny sprouts pushing through the soil, or the first true leaves will emerge. Count how many seeds sprout—anything below 70% germination means you’ll need to plant extra seeds next spring to ensure a good harvest.
✂️ Step 4: Store Viable Seeds Properly
Once you’ve confirmed which seeds are viable, transfer them to an airtight container like a glass jar. Store it in a cool, dark place—like a pantry or basement—where the temperature stays between 40-50°F. Label the container with the pumpkin variety and the year you harvested the seeds.
Seeds stored this way can last 3-5 years, though germination rates may drop after the first year. I always test a few seeds annually to check viability before planting a full batch. This ensures I’m not wasting time or space on seeds that won’t grow!
Tips & tricks for perfect pumpkin seed viability testing
These little-known tricks will help you maximize your pumpkin seeds' potential for next spring's garden!
The Drying Factor: After rinsing your seeds in Step 1, don't rush the drying process. The 2-3 days in a warm, dark place is critical—this prevents mold and ensures seeds remain viable. I like to place them on a mesh screen for better airflow. If your kitchen is humid, add a small fan nearby to speed up drying without over-drying the seeds.
Cold-Stress Precision: During the 7-10 day refrigerator test in Step 2, keep the seeds in the crisper drawer where temperatures stay most consistent. The goal is to simulate winter dormancy, so avoid placing them near the door where temps fluctuate. After removing them, let them warm up gradually—don't rush this step as it helps break dormancy naturally.
Germination Environment: For Step 3's warm test, I've found that placing the container on top of the fridge works perfectly because it provides consistent warmth without direct sunlight. Use a spray bottle to maintain moisture—just enough to keep the soil damp, not soggy. A clear plastic wrap loosely covering the container helps maintain humidity while allowing light penetration.
Storage Wisdom: When storing viable seeds in Step 4, add a small packet of silica gel to your airtight container to absorb any moisture. The 40-50°F range is ideal, but if your basement gets damp, consider storing them in a sealed container with a moisture absorber. Labeling with both the variety and harvest year helps track which seeds perform best over time.
Pro Tips for Pumpkin Seed Mix
- These little-known tricks will help you maximize your pumpkin seeds' potential for next spring's garden!
- The Drying Factor: After rinsing your seeds in Step 1, don't rush the drying process. The 2-3 days in a warm, dark pl...
- Cold-Stress Precision: During the 7-10 day refrigerator test in Step 2, keep the seeds in the crisper drawer where te...
Frequently asked questions
Got questions about testing pumpkin seed mix viability for next year’s garden? You’re not alone! Here are some common concerns—and quick answers—to help you prep like a pro.
Why should I test pumpkin seed viability now?
Testing now ensures you’ll know which seeds are worth saving for next year’s garden. Pumpkin seeds lose viability over time (especially if stored improperly), so a quick cold-stress test helps you avoid planting seeds that won’t sprout. Pro tip: Discard low-viability seeds and focus on storing only the healthiest ones!
How long does the cold-stress test take?
The test itself takes just 7–10 days—but timing matters! Start it 8–10 weeks before your last frost date so you can replant viable seeds at the right time. Use a calendar to mark your test start date and germination window for stress-free planning.
What if my fridge isn’t cold enough for the test?
Ideal fridge temps for cold-stress testing are 35–40°F (2–4°C). If yours runs warmer, try:
- Moving seeds to the coldest shelf (usually the crisper drawer).
- Using a cooling unit or seed storage container with ice packs.
- Placing seeds in a ziplock bag with a damp paper towel (not soggy!) and nesting it in a bowl of ice.
Can I use this test for other seeds (like squash or gourds)?
Yes! The cold-stress method works for all cucurbit seeds (pumpkins, squash, cucumbers, gourds). Just adjust the test duration slightly—squash seeds may need 5–7 days in cold, while gourds can handle up to 14 days. Label your seeds to track results accurately.
What if my seeds mold or smell bad during the test?
Mold or a sour, musty smell means your seeds are contaminated—discard them immediately! This can happen if:
- Seeds were stored in high humidity (keep them in a cool, dry place next time).
- The test environment was too damp (use a slightly damp paper towel, not wet).
Bonus Tip: How to Store Viable Seeds Long-Term
Once you’ve identified your best seeds, store them in:
- A sealed, airtight container (glass jars or Mylar bags work best).
- A cool, dark place (like a fridge or root cellar).
- With a desiccant packet to absorb moisture.
Wrapping up and next steps
Testing your pumpkin seed mix for cold-stress viability is a small but powerful step toward next year’s vibrant blooms! 🌱 By following these methods, you’ve gained insights into seed hardiness and can now make informed choices for storage or planting.
Now’s the perfect time to act—whether that’s adjusting your seed storage conditions or planning early sowing strategies.
Ready to nurture your garden’s future? Grab those seeds, take notes, and let this experiment guide your green thumb to even greater success! 🌿✨