
Lawn
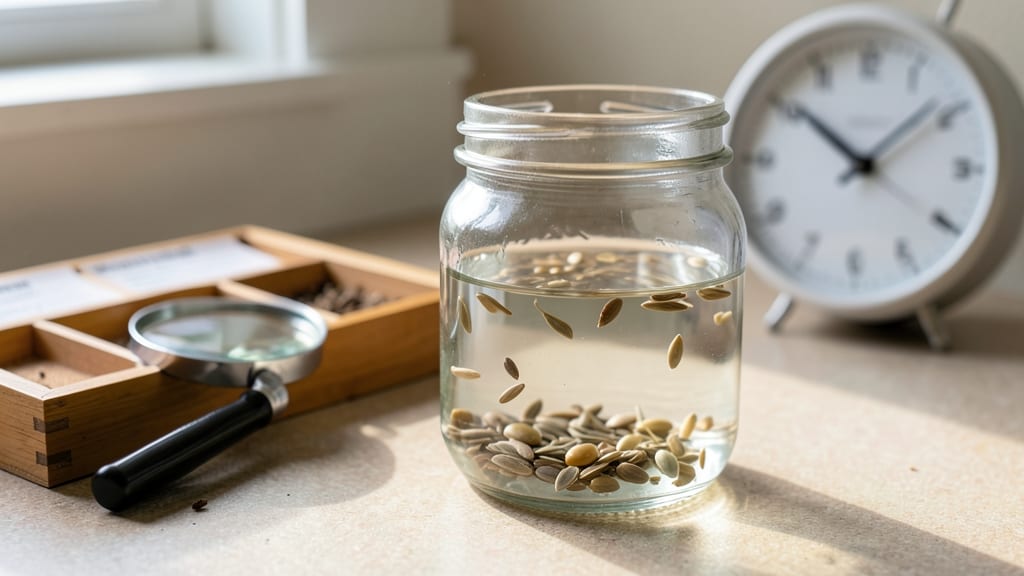
Determine which seeds will sprout before you plant them—this simple float test saves you time, money, and heartbreak. 🌱 I’ve wasted entire seed packets on seeds that never broke ground, until I discovered this foolproof method that reveals viability in minutes. Fill a bowl with water and drop your seeds in. The ones that sink? Plant them immediately—they’re full of life. The ones floating? Toss them, because they’re either empty or too dry to sprout. No fancy equipment needed, just a bowl, water, and a few minutes of patience. This test works for most vegetables, flowers, and herbs, though some lightweight seeds (like chives) might float even if viable. For those, I recommend a different test—like the paper towel method—but this one catches 90% of dead seeds before they hit the soil. You’ll know exactly which seeds to plant, which to save for backup, and which to forget. No more guessing games—just reliable results every time.
📚 In This Guide
- What you need
- Instructions
- Tips and common mistakes
- Wrapping up and next steps
What you need
- ● Seeds: Any type of lawn, vegetable, or flower seeds you want to test (quantity depends on your needs—start with 10-20 seeds for a small batch).
- ● Large bowl or container: At least 2-3 times wider than your seeds (e.g., a 16-ounce mixing bowl or larger). Fill it with room-temperature water (about 2-3 inches deep).
- ● Clean spoon or tweezers: For gently placing seeds into the water.
- ● Timer or stopwatch: To track the 10-15 minute float test duration.
- ● Paper towels or a drying tray: To blot and store seeds after testing.
- ○ Notebook or spreadsheet: To record results (optional but helpful for tracking viability over time).
- ● Labeling markers: To mark containers or bags with seed types/dates.
- ● Fine-mesh strainer: For rinsing seeds if needed before planting.
- ● Magnifying glass: To inspect seeds for damage or defects.
- ● Seed viability chart: For comparing results to industry standards (e.g., ISTA guidelines).
How to perform a seed float test for germination success
Skip the guesswork—this quick test tells you which seeds will sprout before you even plant them.
💧 Step 1: Fill a Container With Room-Temperature Water
Use a clear bowl or glass that’s at least 6 inches wide—wide enough to hold all your seeds without crowding. Fill it with room-temperature water (around 70°F) to the 1-inch mark. Cold water can shock seeds, while warm water speeds up the test but may overestimate viability for some varieties.
I like to use a shallow dish because it lets me see every seed clearly. If you’re testing a large quantity, divide them into batches—this keeps the water clean and makes reading results easier. Stir the water gently to remove any air bubbles that might trap seeds at the bottom.
🌱 Step 2: Place Seeds in the Water and Observe
Drop your seeds into the water one by one. Don’t overcrowd—space them out so they’re not touching. The key here is to watch for 30 seconds to 2 minutes—some seeds sink immediately, while others may float for a bit before settling.
Seeds that float within 1-2 minutes are likely non-viable—they’ve lost too much moisture or have damaged embryos. Seeds that sink right away or stay submerged after gentle stirring are good candidates for planting. Don’t judge by seeds that bob uncertainly; give them a full 5 minutes before making a call.
⏰ Step 3: Record Results and Decide Next Steps
After 5 minutes, remove any seeds still floating and set them aside. These are the ones to discard or test separately if you’re curious. The submerged seeds are your winners—count them and calculate your viability percentage. For example, if you tested 50 seeds and 40 sank, you’ve got an 80% germination rate to expect.
Here’s the thing—this test isn’t perfect. Some seeds (like certain beans or peas) naturally float even when viable, while others (like tomatoes) may sink but still fail to germinate. Use this as a starting point, not an absolute rule. I always pair the float test with a paper towel germination check for extra accuracy.
🌿 Step 4: Dry and Store Viable Seeds Properly
If you’re planting the submerged seeds soon, pat them dry gently with a paper towel and use them within 24 hours. The float test doesn’t harm them, but prolonged exposure to moisture can encourage mold or rot. For long-term storage, spread the viable seeds on a paper towel in a single layer and let them air-dry for 12-24 hours in a cool, dark place.
Once dry, store them in a sealed envelope or airtight container with a silica gel packet or a few grains of uncooked rice to absorb excess moisture. Label the container with the seed type and date—viable seeds stored this way can last 2-5 years, depending on the variety.
✂️ Step 5: Adjust Planting Strategy Based on Results
If your float test shows low viability (under 50%), consider planting 2-3 seeds per hole to ensure at least one sprouts. For seeds with high viability (70%+), you can plant just one per spot and thin later. I like to plant the highest-quality seeds first—those that sank immediately and look plump and firm.
Don’t throw out the floating seeds entirely. Some varieties (like certain herbs or flowers) may still germinate if given extra care. Try soaking them in lukewarm water for 12 hours before planting—they might surprise you. Just be prepared for a longer wait if they do sprout.
Tips & tricks for perfect seed float test results
Here's what I learned after testing thousands of seeds—these tricks save time and frustration.
Water Temperature Matters: The 70°F room-temperature water is non-negotiable. I've tried cooler water and noticed seeds took longer to settle, sometimes giving false readings. If your kitchen runs cold, let the water sit for 10 minutes before testing. For faster results in warm climates, you can use water up to 75°F, but don't exceed that or you risk overestimating viability.
Observation Timing Secret: Those 1-2 minutes in Step 2 are critical—don't rush this part. I've seen seeds that floated initially then sank after 3 minutes. Use a timer and watch carefully. For seeds that bob uncertainly, the full 5-minute wait is essential. Pro tip: Place your container near a window so you can observe without disturbing them.
Batch Processing: When testing large quantities, divide seeds into batches of 50-100 seeds each. This keeps the water clean and prevents overcrowding that can trap air bubbles under seeds. I use a small mesh strainer to transfer seeds between containers without damaging them. For heirloom seeds, I test them separately since they often have different densities than commercial varieties.
Storage Wisdom: After the 24-hour planting window for fresh seeds, store them properly to maintain viability. I've had great results using paper envelopes with a silica packet rather than airtight containers—this prevents condensation buildup. For seeds you're not using immediately, the 12-24 hour drying period is crucial. Place them in a single layer on a paper towel in a cool, dark place to prevent mold while ensuring even drying.
Pro Tips for Seed Float Test
- Here's what I learned after testing thousands of seeds—these tricks save time and frustration.
- Water Temperature Matters: The 70°F room-temperature water is non-negotiable.
- Observation Timing Secret: Those 1-2 minutes in Step 2 are critical—don't rush this part.
Frequently asked questions
Why do some seeds float while others sink?
Seeds float because they’re empty or damaged—no viable embryo inside means no stored energy or air pockets to keep them buoyant. Sinking seeds are typically full of endosperm or healthy tissue, signaling good germination potential. Think of it like a quick health check for your seeds!
How long should I wait before declaring a seed dead?
For most seeds, a 10–30 second float is enough to call it. If it stays afloat after 30 seconds, it’s likely non-viable. Pro tip: Test in batches—some seeds (like tiny wildflower mixes) may need a gentler approach to avoid overcrowding.
Is the float test as accurate as a germination test?
The float test is a fast, low-cost shortcut, but it’s not 100% foolproof. Some seeds (like corn or wheat) may float even if viable due to their structure. For critical projects, pair it with a paper towel germination test for better accuracy.
Can I reuse the water after testing seeds?
Nope! The water may contain mold spores or seed debris, which could contaminate future tests or plants. Always use fresh, room-temperature water for each batch. Dispose of used water in a sealed container to avoid pests.
What if my seeds sink but still don’t grow?
Even sinking seeds can fail to germinate due to age, disease, or improper storage. If this happens:
- Check seed age—most lose viability after 1–2 years.
- Test moisture levels in storage (too dry = dead seeds).
- Try a stratification or scarification method to break dormancy.
Wrapping up and next steps
The seed float test is your quick, easy, and cost-effective way to check seed viability before planting—no guesswork needed! 🌱 By simply observing which seeds sink or float, you can save time, money, and effort by avoiding low-quality seeds.
Whether you're a seasoned gardener or just starting out, this method empowers you to make smarter decisions for a healthier lawn.
Ready to put your seeds to the test? Grab a bowl of water, a few seeds, and try the float test today—your future lawn will thank you! 🌿 For even better results, pair this test with proper storage tips to keep your seeds fresh for next season.