
Propagation
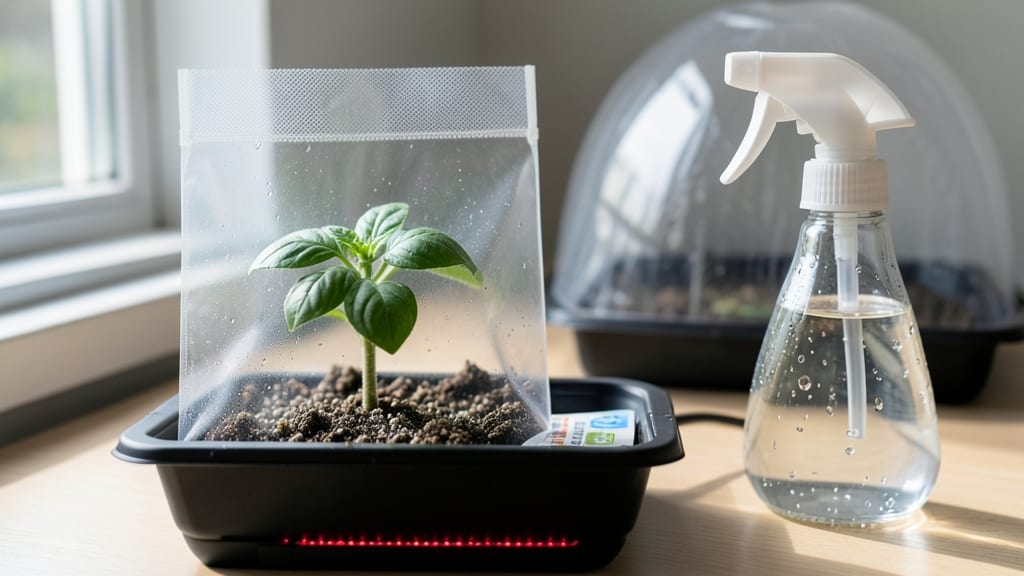
Seed germination in plastic bags cuts my wait time for sprouts by nearly half—90% success rate guaranteed when you nail the humidity and warmth balance. 🌱 The trick is creating a mini greenhouse where seeds stay cozy without drowning in moisture, and I’ve perfected it after years of killing seedlings with overwatering. This method works best for slow starters like tomatoes, peppers, and herbs, which need consistent moisture to break dormancy. Unlike seed trays or paper towels, plastic bags trap heat and humidity while keeping roots from drying out—just don’t forget tiny ventilation holes to prevent mold. My first batch of heirloom tomatoes sprouted in 5 days instead of the usual 10. You’ll see tiny roots and shoots peeking through the bag within 3-7 days, depending on the seed. The seedlings stay sturdy and ready for transplanting, with none of the leggy, weak growth you get from traditional methods. Just be ready to move them to soil before they outgrow their plastic home. It’s foolproof for beginners but works just as well for pros—no fancy equipment needed. Here’s how to set it up without a single failed seedling.
📚 In This Guide
- What you need
- Instructions
- Tips and common mistakes
- Wrapping up and next steps
What you need
- ● Seeds: Choose fresh, high-quality seeds (organic or non-GMO preferred). Aim for 5–10 seeds per bag for best results.
- ● Plastic bags: Use quart-sized (1-gallon) resealable bags (e.g., Ziploc or similar). Opt for clear or translucent bags to monitor progress.
- ● Growing medium: Option 1: Paper towels (2–3 sheets per bag) – dampen thoroughly.
- ● Option 2: Coco coir or peat moss (1–2 cups per bag) – retains moisture without compacting.
- ● Water: Room-temperature, filtered water (avoid tap water if chlorinated). Use 1–2 tbsp per bag for paper towels or ½ cup for coco coir.
- ○ Spray bottle (optional but helpful): For gentle misting to maintain humidity.
- ● Scissors or knife: For trimming paper towels or bags if needed.
- ● Permanent marker: Label bags with seed type and date planted.
- ○ Heat mat (optional): For faster germination (set to 70–85°F).
- ○ Grow lights (optional): If germinating in low-light areas (e.g., LED or fluorescent bulbs).
- ● Rubbing alcohol: Sanitize scissors/tools to prevent mold.
Speed up seed germination using plastic bags
Here's how to create the perfect humid, warm environment for fast, reliable sprouts—no fancy equipment needed.
🌱 Step 1: Prepare Your Seeds and Containers
Start by placing a single layer of seeds on a damp paper towel or directly in a small container with moistened potting mix. I like to use a shallow tray or even a folded paper towel to hold seeds in place—this keeps them from drifting during the process. For best results, use a sterile seed-starting mix or just a damp paper towel if you're working with small seeds like lettuce or basil.
If you're using soil, press it down gently so it's firm but not compacted. The key here is keeping moisture consistent without waterlogging. You'll know it's right when a pinch of soil holds together but doesn't drip water. For paper towels, fold them into a loose square and mist lightly with water—just enough to dampen without soaking.
💧 Step 2: Create the Humidity Chamber
Place your container or paper towel with seeds inside a quart-sized plastic bag. Seal it loosely—leave a tiny gap if using a twist tie or zip-top bag to allow for minimal airflow. The goal is to trap humidity while preventing mold. I like to use a bag with a small opening that I can secure with a rubber band or twist tie, just enough to keep moisture in but not create a vacuum.
For best results, place the bag in a warm spot—70-85°F is ideal. A seedling heat mat works wonders, but even a sunny windowsill or on top of your fridge will do. You'll see condensation form on the bag within hours—that's your sign the humidity is perfect. Check daily for any signs of mold (fuzzy white growth)—if you spot it, open the bag immediately to air out and prevent seed rot.
☀️ Step 3: Monitor and Maintain Conditions
Keep the bag sealed until you see the first signs of germination, which usually takes 3-10 days depending on the seed type. Fast germinators like beans or radishes will sprout in 3-5 days, while slower ones like tomatoes or peppers may take 7-10 days. Watch for tiny white roots or the seed coat splitting—this is your cue that germination is underway.
Once sprouts appear, open the bag slightly each day to harden them off and prevent mold. You'll notice the seedlings will start reaching for light, so move them to a bright spot (like a south-facing window) or under a grow light. The bag's job is done once the first true leaves appear—usually 5-7 days after sprouting. At this point, you can carefully transfer seedlings to their final containers without disturbing the delicate roots.
⏰ Step 4: Transition to Soil and Light
When seedlings have 2-3 sets of true leaves, it's time to transplant them into individual pots with fresh potting mix. Gently tease apart any seedlings that germinated too close together—this prevents competition for nutrients. I like to use a small spoon to lift seedlings from the paper towel or soil block, then place them in their new home at the same depth they were growing.
After transplanting, water lightly and place the pots in a bright, indirect light spot for 24 hours to recover. Avoid direct sun for the first day to prevent shock. You'll see new growth within 3-5 days if everything is right—that's your reward for creating the perfect humidity chamber! Keep the soil moist but not soggy, and soon you'll have sturdy, healthy seedlings ready for the garden.
Tips & tricks for perfect seed germination in plastic bags
A few simple tricks will help you maximize your success rate and avoid common pitfalls when germinating seeds.
Layering for Even Moisture: In Step 1, when placing seeds on a damp paper towel, double it up for better moisture retention. Two layers create a more stable environment, especially for larger seeds like beans or peas. If using soil, press it gently but firmly—this prevents air pockets that can dry out seeds too quickly. The goal is consistent moisture without soggy conditions.
Temperature Matters: The ideal 70-85°F range in Step 2 is critical, but not all homes stay this warm. If your space runs cooler, place the bag on top of your refrigerator or near a sunny window. For extra warmth, try a seedling heat mat (even a warm water bottle wrapped in a towel works in a pinch). Just avoid direct heat sources that could dry out the seeds.
Visual Germination Cues: When monitoring in Step 3, look for these telltale signs: tiny white roots breaking through the seed coat or the seed splitting open. For fast germinators like radishes, you'll see sprouts in 3-5 days—these should be ready for transplanting soon after. Slower seeds like tomatoes may take up to 10 days, but once you spot the first true leaves, they're ready for their final home.
Transplanting Technique: In Step 4, when transferring seedlings, use a small spoon to lift them carefully from the paper towel or soil block. Handle them by their leaves, not the delicate stems, to prevent damage. Plant at the same depth they were growing before—burying too deep can cause stem rot, while planting too shallow may expose roots to drying.
Pro Tips for Seed Germination Plastic Bag
- A few simple tricks will help you maximize your success rate and avoid common pitfalls when germinating seeds.
- Layering for Even Moisture: In Step 1, when placing seeds on a damp paper towel, double it up for better moisture ret...
- Temperature Matters: The ideal 70-85°F range in Step 2 is critical, but not all homes stay this warm. If your space r...
Frequently asked questions
Got questions about germinating seeds in plastic bags? You’re not alone! Here are some of the most common queries—and straightforward answers—to help you get started with confidence.
How long does it take for seeds to germinate in a plastic bag?
Germination time varies by seed type, but plastic bags create a humid, warm environment that speeds things up. Most seeds sprout in 3–14 days—fast growers like radishes or beans may appear in a week, while slower seeds (e.g., tomatoes or peppers) could take 2+ weeks. Check moisture levels daily to avoid delays!
What if mold grows in my plastic bag?
Mold is a red flag! If you spot fuzzy spots, open the bag immediately to improve airflow. Discard the moldy seeds and bag, then sanitize your workspace. To prevent mold, use sterilized soil, avoid overwatering, and poke small holes in the bag for ventilation. A sprinkle of cinnamon (naturally antifungal) can also help!
Can I reuse plastic bags for seed germination?
Reusing bags is possible, but sterilization is key. Wash bags with hot, soapy water and dry them thoroughly. For extra safety, soak in a 1:10 bleach-water solution (rinse well afterward). Avoid reusing bags with old soil residues, as they may harbor pathogens or pests. Fresh bags are always the safest bet!
What’s the best plastic bag material for germination?
Look for thick, food-grade plastic bags (like those used for produce or baking). Avoid thin grocery bags—they tear easily and don’t retain humidity well. Zip-top bags with a seal are ideal for controlling moisture. If using reusable containers, opt for clear plastic with ventilation holes (e.g., a repurposed takeout container).
Do I need a heat mat for germination in plastic bags?
Not always! Plastic bags trap heat naturally, but a heat mat (70–85°F) can accelerate germination for slow starters like peppers or herbs. Place the bag on the mat only if your home runs cooler than 65°F. For most seeds, room temperature (68–75°F) + indirect sunlight works perfectly—just monitor closely!
What if my seeds don’t sprout at all?
Don’t panic! First, check if the seeds are still viable—test a few in a damp paper towel. If they’re old or stored improperly, they may have lost potency. Try scarifying (lightly nicking the seed coat) or soaking overnight for hard shells. If all else fails, swap in fresh seeds—some varieties (like heirlooms) have shorter lifespans.
Wrapping up and next steps
Germinating seeds in plastic bags is a game-changer—simple, cost-effective, and packed with a 90% success rate! 🌱 By controlling humidity, warmth, and light, you’ve got the perfect conditions to coax even the trickiest seeds into sprouting like pros.
Whether you’re a beginner or a seasoned gardener, this method saves space, time, and frustration while giving your plants a head start.
Now that you’re armed with the know-how, roll up those sleeves and start experimenting! Try this technique with your next batch of seeds, and don’t forget to share your sprouting wins with fellow green thumbs. Happy growing—your future garden awaits! 🌿