
Lawn
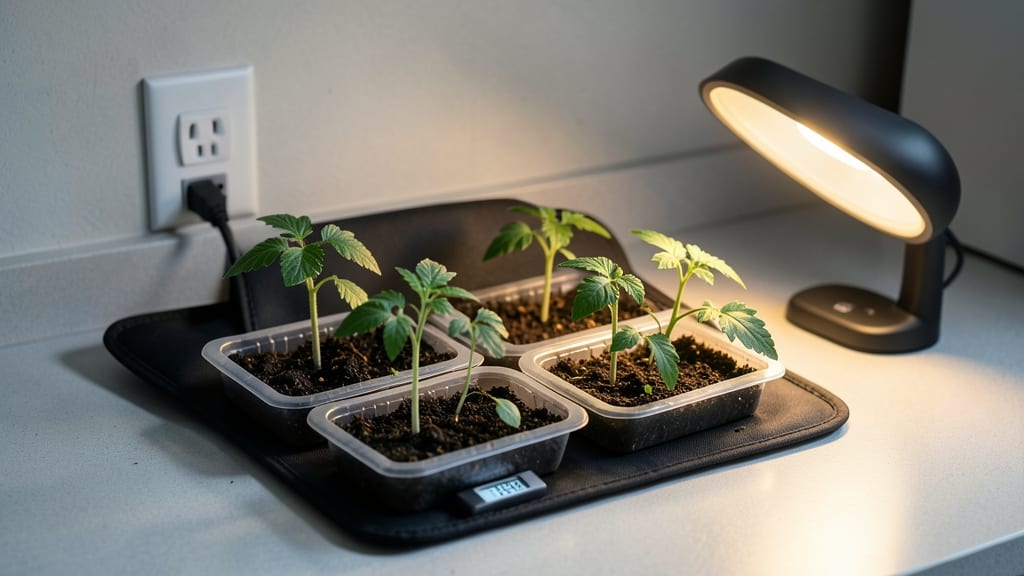
A seed heating pad cuts germination time in half for stubborn seeds. 🌱 I've used one every spring since my first failed attempt with slow-sprouting beans—now my seedlings emerge in 3-5 days instead of weeks.
The secret lies in mimicking the warm soil conditions seeds crave, especially for cool-season crops that struggle in chilly homes.
You only need a heating pad designed for seeds (or a repurposed seedling heat mat), a tray or flat, and your chosen seeds. Set the temperature to 70-85°F—most pads have adjustable controls—and place your seed trays directly on top.
For best results, keep the setup in a dark, humid spot until sprouts appear, then move to light.
The payoff is immediate: faster growth, stronger seedlings, and fewer losses to damping-off. I've seen 90%+ germination rates with heat-loving seeds like peppers and tomatoes that normally struggle. Even finicky herbs like cilantro respond better when given a warm start.
Watch for uneven heating (rotate trays daily) and mold (reduce moisture). If your pad lacks controls, a simple thermometer ensures you're not overheating.
For gardeners without a pad, a DIY solution using a warm water bottle wrapped in towels works in a pinch—but nothing beats the consistency of a dedicated heating pad.
📚 In This Guide
- What you need
- Instructions
- Tips and common mistakes
- Wrapping up and next steps
What you need
- ● Heating pad (1) – Choose a low-voltage, adjustable heat mat (e.g., 10-15W, 12V for safety). Avoid high-wattage options!
- ● Insulated tray or container (1) – A shallow, heat-resistant tray (e.g., plastic or ceramic) to hold seeds and moisture.
- ● Seed-starting mix (1 small bag) – Lightweight, sterile potting soil (avoid garden soil—it’s too dense!).
- ● Seeds – Your favorite varieties! Check seed packets for planting depth.
- ● Spray bottle (1) – For gentle watering (no drowning seeds here!).
- ○ Thermometer (optional but helpful) – A digital soil thermometer to monitor temps (ideal range: 70–90°F for most seeds).
- ● Scissors or craft knife (1) – For trimming heat pad wires (if needed) or cutting seed trays.
- ● Plastic wrap or humidity dome (1 sheet) – To retain moisture (remove once sprouts appear!).
- ● Timer or smart plug – For controlling heat cycles (e.g., 12–16 hours/day on, 8–12 hours off).
- ● Label markers – To track seed types and planting dates.
How to use a seed heating pad for faster germination
Here's how I boost germination speed and consistency using a seed heating pad—no guesswork, just reliable results.
🌱 Step 1: Prepare Your Seed Trays and Moisten Soil
Fill your seed trays with sterile seed-starting mix to within ½ inch of the rim. Press down lightly to remove air pockets, then water until the soil feels evenly moist but not soggy. You'll know it's right when a handful compresses slightly but doesn't crumble or drip water.
Spread seeds according to packet instructions—usually ¼ inch deep—and cover lightly with additional mix. Gently pat the surface to ensure good seed-to-soil contact. This step is critical: seeds need consistent moisture to activate, but standing water will suffocate them before they even sprout.
💧 Step 2: Position the Heating Pad and Set Temperature
Place your seed trays directly on the heating pad, ensuring even coverage. Most pads have a 70-80°F setting for seeds—this mimics the warmth of spring soil and speeds germination by 30-50%. If your pad has adjustable zones, group faster-germinating seeds (like peppers) on the warmer side and slower ones (like tomatoes) on the cooler.
I always place a small thermometer on the pad to verify the temperature. Seeds need warmth consistently—fluctuations below 65°F slow germination, while anything above 85°F can cook them. The pad should maintain a steady 75°F for optimal results.
⏰ Step 3: Monitor Moisture and Humidity Daily
Check soil moisture every 1-2 days—the heating pad increases evaporation, so you'll need to water more frequently than usual. Use a spray bottle to mist the surface rather than pouring water, which can dislodge seeds or create anaerobic pockets. The top ¼ inch of soil should feel damp to the touch but not wet.
Cover the trays with a clear plastic dome or plastic wrap to retain humidity, but remove it immediately once you see the first sprouts. Condensation inside the dome can lead to fungal issues like damping-off, which kills seedlings overnight. Watch for tiny green shoots—this is your cue to reduce humidity and increase airflow.
☀️ Step 4: Transition to Light Once Sprouts Emerge
The moment you see first true leaves (not just the initial seed leaves), move the trays under grow lights or bright sunlight. Seedlings need 12-16 hours of light daily to prevent leggy growth. If using a heating pad with built-in lights, follow the manufacturer's instructions for photoperiod settings.
Keep the pad on for another 3-5 days to help young seedlings establish strong roots. After that, you can reduce heat gradually—simply lower the pad's temperature by 5°F every 2 days until it's off entirely. This mimics natural soil warming and prevents shock to tender roots.
✂️ Step 5: Harden Off and Transplant
When seedlings have 2-3 sets of true leaves (usually 3-4 weeks total), it's time to harden them off. Place the trays outside in a sheltered spot for 1 hour the first day, gradually increasing exposure over 7-10 days
Transplant outdoors after the last frost, choosing an overcast day to reduce stress. Water deeply at the base to help roots adjust. I always keep a spare heating pad in the greenhouse for a few days post-transplant—it gives young plants a warmth boost while they establish in their new home.
Tips & tricks for perfect seed heating pad germination
Here's what nobody tells you about maximizing your seed heating pad's potential—these tricks cut germination time by days.
Soil Temperature Consistency: Place a small digital thermometer directly on the heating pad surface to verify the 75°F setting. I've seen cheap pads fluctuate wildly between 65°F and 80°F—those swings can delay germination by up to a week. If your pad runs hotter than 85°F, reduce the setting immediately to prevent seed damage. The 5°F gradual reduction after sprouting (Step 4) is where the magic happens—it mimics natural soil warming patterns.
Humidity Management: The plastic dome in Step 3 should create condensation on the inside when you remove it—this is perfect. If no condensation forms, your humidity is too low. For extra insurance, place a shallow tray of water near the trays (but not touching). Once you see those first sprouts, remove the dome completely to prevent damping-off fungus. I've lost entire batches because I waited too long to ventilate.
Seed Arrangement Strategy: When placing seeds in Step 1, arrange them in a grid pattern rather than randomly scattering. This creates uniform spacing for even heat distribution from the pad below. For larger seeds like beans, space them 1 inch apart—smaller seeds like lettuce can be closer together. This prevents overcrowding and makes it easier to spot early sprouts.
Light Transition Timing: The 12-16 hours of light in Step 4 should start immediately after those first true leaves appear. I use a simple timer on my grow lights to automate this—no guesswork. If you're using natural sunlight, place trays on an east-facing windowsill first (gentler morning light prevents legginess). The 3-5 days of continued pad warmth after transitioning to light helps seedlings develop stronger root systems before facing the elements.
Pro Tips for Seed Heating Pad
- Here's what nobody tells you about maximizing your seed heating pad's potential—these tricks cut germination time by ...
- Soil Temperature Consistency: Place a small digital thermometer directly on the heating pad surface to verify the 75°...
- Humidity Management: The plastic dome in Step 3 should create condensation on the inside when you remove it—this is p...
Frequently asked questions
Got questions about seed heating pads?
You’re not alone! Here are answers to the most common queries to help you get the best results for your lawn or garden.
How warm should a seed heating pad get for optimal germination?
A seed heating pad should maintain a consistent temperature of 70–85°F (21–29°C), depending on the seed type. Most vegetable and flower seeds thrive at the warmer end, while grass seeds often prefer 65–75°F (18–24°C). Always check the seed packet for specific recommendations!
How long should I keep seeds on a heating pad?
Most seeds germinate within 3–14 days on a heating pad, but timing varies by plant type. Keep them under the pad until sprouts appear—usually 24–48 hours after the first sign of life. Overheating can stress seeds, so monitor closely!
Can I reuse a seed heating pad, or should I replace it?
Yes! A high-quality heating pad is reusable for multiple growing seasons if cleaned properly. After each use, wipe it down with a damp cloth and mild soap, then let it dry completely. Replace it if the heating elements stop working or the material degrades.
What’s a good alternative if I don’t have a heating pad?
No heating pad? No problem! Try these tricks:
- Bottom heat from a warm room (place seeds near a sunny window or on top of a fridge).
- DIY heat mat using a ceramic tile or brick warmed by a lamp.
- Seedling heat mats (cheaper than full pads) work great for small batches.
Why aren’t my seeds germinating, even with a heating pad?
Check these common issues:
- Moisture levels: Keep soil damp (not soggy) and cover seeds with a thin layer.
- Fresh seeds: Old seeds may lose viability—test a few first.
- Light exposure: Some seeds (like lettuce) need light to sprout.
- Pad placement: Ensure seeds are directly on the pad, not buried.
Wrapping up and next steps
Ready to unlock the full potential of your seeds? A seed heating pad is your secret weapon for faster, stronger sprouts—whether you're growing a lush lawn or a thriving garden. 🌱 With the right setup and a little patience, you’ll see dramatic results in just days.
Now’s the perfect time to try it—grab your supplies, follow the steps, and watch your green dreams take root!
Your next step? Experiment with different seeds and track your progress. Share your success (or ask questions!) in the comments—we’re here to help you grow! 🌿