
Lawn
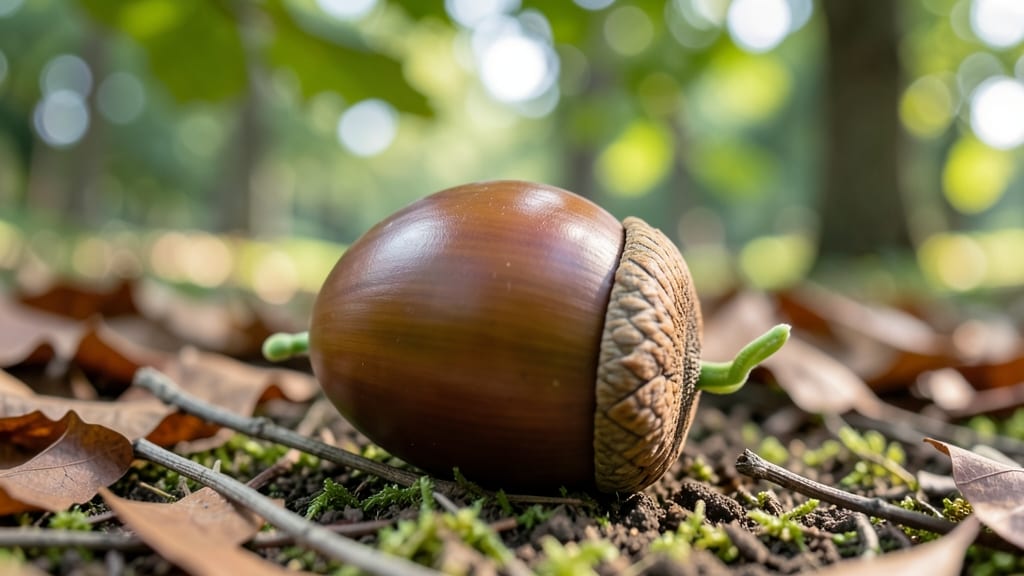
Growing the seed of an oak tree from a single acorn is one of the most rewarding challenges in gardening—if you crack the cold stratification code. 🌱 I’ve spent years watching acorns fail to sprout, until I finally understood the critical 3-month cold treatment that mimics nature’s timing.
Without it, most acorns stay dormant forever, no matter how perfect your soil or sunlight. The secret starts with fresh acorns collected in fall, stored in damp sand or peat moss for 90 days at 35–45°F. This mimics winter’s chill, tricking the seed into breaking dormancy.
Once stratified, germination happens in 2–4 weeks—patience is key, but the payoff is watching a sapling that could live for centuries. You’ll need well-draining soil, partial shade for young plants, and a 5-gallon pot for the first two years.
Oak seedlings grow slowly (just 1–2 feet per year), but with consistent care, you’ll have a sturdy 3-foot sapling ready for transplanting by year three. The biggest mistake? Rushing the process. Acorns planted straight from the tree rarely sprout—stratification is non-negotiable.
But once you nail it, you’re growing a living legacy, not just a tree.
📚 In This Guide
- What you need
- Instructions
- Tips and common mistakes
- Wrapping up and next steps
What you need
- ● Fresh acorns: Collect at least 10-15 healthy, plump acorns from mature oak trees (preferably white oak or red oak). Avoid cracked or worm-infested ones!
- ● Cold stratification medium: Option 1: Wet paper towels (2-3 towels per batch of acorns)
- ● Option 2: Moistened peat moss or coconut coir (1 small container, ~2 cups)
- ● Option 3: Vermiculite or perlite (1 cup, for drainage)
- ● Sealed plastic bag or container: A quart-sized zip-top bag or small plastic container with a lid (ensure it’s airtight but not overly tight).
- ● Refrigerator: A standard home fridge set to 34–40°F (1–4°C) for cold stratification.
- ● Small pots or seed trays: 3–4 inch diameter pots or a seed tray with drainage holes (for transplanting after stratification).
- ● Potting soil: A well-draining, sterile mix (e.g., 60% peat moss, 30% perlite, 10% compost).
- ● Misting bottle or spray nozzle: For keeping the medium moist without overwatering.
- ● Gloves: To protect your hands while handling acorns or soil.
- ● Labeling tags: To track acorn varieties and planting dates.
- ○ Grow lights or sunny windowsill: For 12–16 hours of light/day after germination (optional but helpful).
- ● Humidity dome: To create a mini greenhouse effect for seedlings.
- ○ pH test kit: To ensure your soil is slightly acidic (pH 5.0–6.5)—optional but recommended for oak seedlings.
Instructions for germinating acorns through cold stratification
Cold stratification is the secret weapon for breaking acorn dormancy—here’s how to do it right.
⏰ Step 1: Collect and Prepare Fresh Acorns
Gather acorns in late fall when they’ve fallen naturally—never use store-bought ones, as they’re often treated to prevent sprouting. Look for plump, heavy acorns with intact caps; discard any that feel hollow when tapped or show signs of insect damage. I like to soak them in lukewarm water for 24 hours first to soften the shell slightly and encourage initial hydration.
After soaking, drain and let them air-dry for 12 hours at room temperature. This mimics natural moisture fluctuations and prevents rot during stratification. Store them in a breathable container like a paper towel-lined plastic bag or a mesh sack—this allows airflow while keeping them contained.
🌱 Step 2: Stratify in a Cold, Moist Environment
Place the prepared acorns in a sealed plastic bag with a damp peat moss or vermiculite mix—about 1 part water to 2 parts medium by volume. The moisture should feel like a wrung-out sponge: damp but not dripping. Seal the bag and place it in a refrigerator set to 35-45°F for 90-120 days. This cold period mimics winter and breaks dormancy.
Check the bag monthly to ensure the medium remains moist. If it dries out, spritz lightly with water and reseal. You’ll know stratification is working when tiny white roots (¼ inch long) emerge from the acorn’s base—this usually happens after 6-8 weeks in colder temps. Don’t rush this process; patience here ensures strong, viable sprouts.
☀️ Step 3: Plant Stratified Acorns in Warmth
Once roots appear, remove the acorns from cold storage and plant them ½ inch deep in a well-draining potting mix. I use a blend of 50% peat moss, 30% perlite, and 20% sand to prevent compaction. Keep the soil consistently moist but never soggy—acorns rot faster than they sprout if overwatered.
Place the container in a warm spot with indirect light (like a south-facing window with sheer curtains) and maintain soil temps between 65-75°F. Germination can take 4-8 weeks, depending on the oak species. You’ll see the first true leaves—small, rounded cotyledons—emerge when the sprout is ready for its next growth phase.
🌿 Step 4: Transplant Seedlings to Outdoor Conditions
After the seedlings develop 3-4 sets of true leaves (about 3-6 months total), they’re ready for outdoor planting. Harden them off by placing them outside in a shaded area for 2-3 hours daily, gradually increasing exposure over 10-14 days. Choose a site with full sun to partial shade and well-draining soil—oak seedlings hate "wet feet."
Dig a hole twice as wide as the root ball but no deeper, then water deeply before transplanting. Mulch with 2-3 inches of wood chips to retain moisture and suppress weeds. The first year is critical—young oaks grow slowly, so avoid disturbing the soil around them. Watch for new growth in spring as your signal that they’ve established roots.
Tips & tricks for perfect acorn germination
Took me years of trial and error to perfect these cold stratification secrets—here's how to avoid the most common pitfalls.
Selection Tip: Focus on acorns from mature oak trees, specifically white oak (Quercus alba) or red oak (Quercus rubra), as they germinate most reliably. I learned this the hard way after struggling with acorns from younger trees—mature acorns have fully developed embryos ready for dormancy breaking. Tap each acorn firmly against your palm: a hollow sound means it's empty, while a solid thud indicates a viable seed.
Stratification Environment: The refrigerator temperature range of 35-45°F is critical—this mimics natural winter conditions that trigger germination hormones. I place my bag on the middle shelf where temps stay most consistent. If your fridge has temperature fluctuations, consider using a dedicated seed stratification fridge or even a garage refrigerator during winter months for more stable conditions. The 90-120 day window accounts for variations in oak species and individual seed maturity.
Moisture Management: The "wrung-out sponge" moisture level is non-negotiable—too dry and germination fails, too wet and you risk mold. I use a spray bottle to mist the peat moss every 2-3 weeks rather than opening the bag, which prevents moisture loss while maintaining that perfect dampness. The monthly check is essential, but don't be tempted to overwater during these checks—just a light spritz is all you need.
Transplant Timing: Waiting until you see those ¼-inch white roots before planting is the single most important timing cue. I've seen acorns planted too early wither because they weren't ready for warmth, while those planted too late miss their optimal growth window. The 3-4 sets of true leaves marker is particularly important—this indicates the seedling has developed enough energy reserves to handle outdoor conditions without shock.
Pro Tips for Seed Of An Oak
- Took me years of trial and error to perfect these cold stratification secrets—here's how to avoid the most common pit...
- Selection Tip: Focus on acorns from mature oak trees, specifically white oak (Quercus alba) or red oak (Quercus rubra...
- Stratification Environment: The refrigerator temperature range of 35-45°F is critical—this mimics natural winter cond...
Frequently asked questions
Got questions about growing an oak from an acorn? You’re not alone—this process can feel mysterious, but we’ve got answers! Here are the most common questions (and their solutions) to help you succeed.
How long does it take for an acorn to sprout?
With proper cold stratification (60–90 days in moist peat/sand), germination can start in 4–12 weeks after planting. Some acorns take longer—especially white oaks—so be patient! Keep soil moist and warm (60–70°F) to speed things up.
Can I skip cold stratification?
Technically yes, but your success rate plummets. Acorns need this natural dormancy break to mimic winter. Without it, germination drops from 80%+ to <10%. If you’re impatient, try a refrigerator trick (store in damp paper towels for 2 months).
Why did my acorn rot instead of sprouting?
Overwatering or poor drainage are the #1 culprits! Acorns need moist but not soggy soil. Use a mix of permeable potting soil + perlite, and plant in a container with drainage holes. If mold appears, repot in fresh, dry soil.
How big should my oak seedling be before transplanting?
Aim for 2–3 inches tall with 2–3 true leaves (not the first "seed leaves"). Harden off seedlings by gradually exposing them to outdoor conditions over 2 weeks before moving to the ground. Spring is the best time to transplant—avoid extreme heat or frost.
Will my oak tree grow true to the parent?
Mostly! Acorns inherit traits like species (red vs. white oak) and general growth habits, but color, size, and disease resistance can vary. For guaranteed traits, graft from a mature tree—but growing from seed is cheaper and more rewarding (plus, it’s a fun experiment!).
Pro Tip: Test your acorns first!
Not all acorns are viable. Before stratifying, float test them: Place in water—sinkers are good, floaters are empty. This saves time and effort!
Wrapping up and next steps
The seed of an oak holds incredible potential—with patience, care, and the right cold stratification techniques, you can nurture it into a mighty tree. 🌱 Whether you're a seasoned gardener or a curious beginner, every acorn you plant today could shape the future of your landscape. Now’s the time to act: gather your supplies, follow the steps, and watch nature’s magic unfold.
🌟 Next Steps:
- Start your cold stratification process this fall—your acorns will thank you!
- Mark your calendar for spring planting—consistency is key.
- Share your progress with fellow gardeners for encouragement and tips!