
Lawn
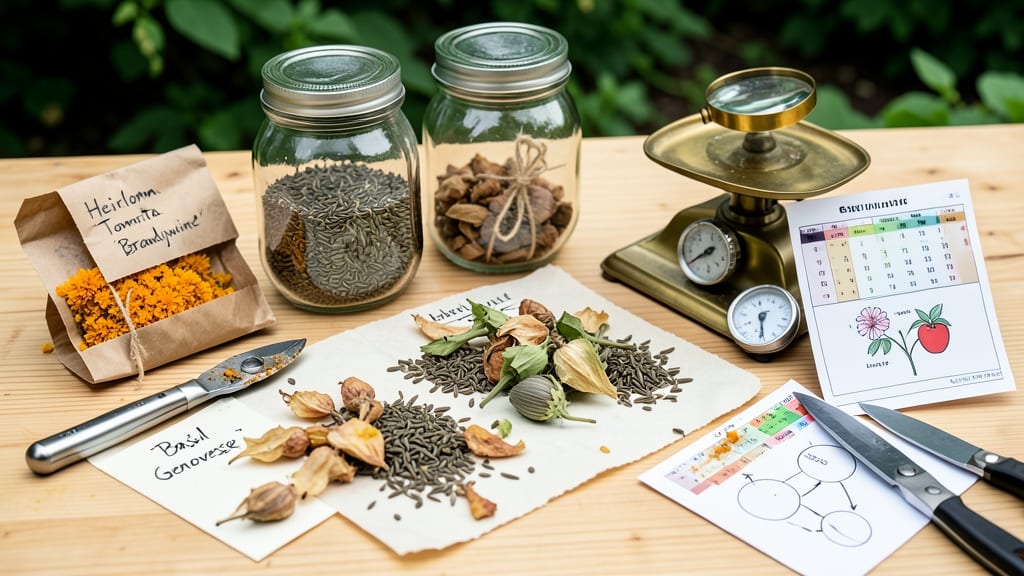
Saving seeds from your garden isn’t just about replanting—it’s about preserving the exact varieties you love year after year. 🌱 A seed-saving chart keeps you organized through each plant’s life cycle, from pollination to harvest, so you never miss the perfect moment to collect seeds.
I’ve used this system for five seasons, and it’s cut my seed costs by 80% while ensuring I always have fresh, viable seeds ready for spring.
The chart works by tracking three key stages: when flowers appear, when seeds mature, and when they’re fully dry. For tomatoes, that’s 85-90 days after pollination; for beans, just 60 days.
You’ll also note storage conditions—cool, dark, and dry keeps seeds viable for years, while humidity or heat turns them to dust. The best part? It adapts to any garden size, from a single pot to a full plot.
By the end, you’ll have a customized seed library tailored to your climate and taste. Imagine snapping peas from your own saved seeds in June, knowing every plant traces back to your garden.
The chart even includes a germination test section—just plant a few seeds and check their sprouting rate to know which ones to keep.
No more guessing when to harvest or how to store seeds. This system turns seed saving from a seasonal chore into a year-round gardening asset. Ready to start? Grab a notebook and let’s build your first chart together.
📚 In This Guide
- What you need
- Instructions
- Tips and common mistakes
- Wrapping up and next steps
What you need
- ● Seed-saving chart template – Printable or digital (e.g., graph paper, Excel, or Canva template) with labeled columns for plant name, life cycle stages, harvest time, drying methods, storage conditions, and notes.
- ● Permanent markers or fine-tip pens – For labeling stages (e.g., pollination, seed maturation, drying). Black or dark colors work best for visibility.
- ● Ruler (12-inch) – To measure and divide sections accurately on your chart.
- ● Erasable markers or colored pencils – For highlighting key stages (e.g., red for harvest-ready, green for drying).
- ● Plant identification guidebook or app – To verify life cycle stages for specific plants (e.g., Heirloom Seed Library app).
- ● Seed-saving envelopes or paper bags – 100+ count (2.5" x 3.5" kraft paper or breathable bags for long-term storage).
- ● Labeling stickers or tape – Waterproof and archival-quality for seed packets (e.g., Avery or Scotch 3M).
- ● Notebook or journal – For tracking observations (e.g., weather, pests, or unusual growth patterns).
- ○ Magnifying glass (optional but helpful) – For inspecting seed maturity up close.
- ● Digital scanner or camera – To document stages for your chart or future reference.
- ● Seed viability test kit – For checking seed freshness before storage.
- ● Humidity pack or silica gel – To control moisture in seed storage containers.
- ● Plant cloche or mesh bags – For protecting seeds during drying outdoors.
- ● Gardening gloves – To keep hands clean while handling seeds.
How to use a seed saving chart for year-round harvests
This simple system helps you track exactly when to save seeds for next season.
🌱 Step 1: Identify Your Plant's Life Cycle Stage
First, determine whether your plant is an annual, biennial, or perennial. Annuals complete their life cycle in one season—think tomatoes and basil—so you'll save seeds from their mature flowers. Biennials like carrots and onions need two years to produce seeds, so you'll let them bolt in their second year. Perennials such as asparagus and rhubarb regrow yearly, but their seed-saving process differs entirely.
Check your seed saving chart for the specific stage your plant needs to reach. For example, tomatoes must develop fully ripe fruit before you can extract seeds. You'll know it's time when the fruit softens completely and changes color—red for heirloom tomatoes, yellow for some varieties. Mark this stage on your chart to track progress.
☀️ Step 2: Track Flowering and Pollination
Most seed-saving begins when flowers appear. Use your chart to note when blooms open and when they're fully pollinated. For self-pollinating plants like peas or beans, simply observe the flowers closing after a day or two. For cross-pollinating plants like squash or corn, you'll need to isolate varieties to prevent contamination—your chart should flag this requirement.
Watch for the first signs of seed development: a swollen ovary or a hardening pod. For example, with beans, the pods will turn from green to brown and begin cracking open. On your chart, circle the date when you first notice these changes—this is your cue to start monitoring daily for readiness.
⏰ Step 3: Monitor Seed Maturity and Harvest
Your chart will guide you through the final stages: when seeds are fully mature but not yet shed. For dry seeds like those from tomatoes or beans, wait until the pods turn completely brown and begin splitting open. For fleshy fruits like peppers or eggplants, harvest when the fruit is fully colored but still firm.
Test seed readiness by gently squeezing the pod or fruit—seeds should rattle inside. For example, with tomatoes, the seeds should float in water when fully ripe. Record the harvest date on your chart to track seed viability over time. Store seeds in a cool, dry place and note the date for future reference.
🌿 Step 4: Clean, Dry, and Store Seeds Properly
After harvesting, follow your chart's instructions for cleaning seeds. Some, like beans or peas, can be dried whole, while others, like tomatoes or peppers, require fermenting the pulp to remove gel. Spread seeds on a paper towel in a single layer and let them dry in a warm, dark place for 7-10 days—stirring occasionally to prevent mold.
Once completely dry, store seeds in labeled envelopes or airtight containers. Your chart should include storage guidelines: most seeds last 3-5 years if kept cool and dry. Label each container with the plant name, variety, and harvest date—this ensures you don’t accidentally plant last year’s seeds next season.
✂️ Step 5: Review and Update Your Chart Yearly
At the end of each growing season, review your seed saving chart to note what worked and what didn’t. Did any seeds fail to germinate? Were some plants too difficult to isolate? Adjust future plans based on these observations. For example, if your chart shows that a particular variety took longer to mature, you might start saving seeds earlier next year.
Update your chart with new notes, such as ideal harvest times or storage conditions for each plant. Over time, your chart becomes a personalized gardening guide, helping you refine your seed-saving process for better results each season.
Tips & tricks for perfect seed saving chart success
These practical strategies will help you maximize your seed-saving efforts and avoid common pitfalls.
Life Cycle Clarity: I can't stress enough how important it is to double-check your plant's classification in Step 1. Annuals like tomatoes and basil need immediate attention when flowers appear, while biennials like carrots require patience—they won't produce seeds until their second year. Mark each plant type clearly on your chart to avoid confusion later. This simple step prevents wasted effort on plants that aren't ready yet.
Pollination Watch: In Step 2, pay close attention to cross-pollinating plants like squash and corn. Isolation is key—your chart should flag these varieties with bright markers or sticky notes. I've seen gardeners accidentally cross-pollinate heirloom varieties with commercial ones, ruining the genetic integrity. For extra protection, use row covers or plant them in separate areas of your garden.
Harvest Timing: Step 3's maturity test is where many gardeners go wrong. Don't harvest too early—wait until seeds rattle inside pods or fruits are fully colored. For tomatoes, the float test is foolproof: place seeds in water, and if they float, they're not ready yet. I've learned this the hard way after storing underripe seeds that failed to germinate. Record these exact dates on your chart for future reference.
Storage Wisdom: After the 7-10 day drying period in Step 4, label your containers with more than just the plant name. Include the harvest date and any special notes about storage conditions. I've found that seeds from hot summers need slightly cooler storage than those from mild seasons. This attention to detail makes next year's planting much smoother.
Pro Tips for Seed Saving Chart
- These practical strategies will help you maximize your seed-saving efforts and avoid common pitfalls.
- Life Cycle Clarity: I can't stress enough how important it is to double-check your plant's classification in Step 1. ...
- Pollination Watch: In Step 2, pay close attention to cross-pollinating plants like squash and corn. Isolation is key—...
Frequently asked questions
Got questions about saving seeds like a pro? You’re not alone—seed saving can feel tricky at first! Below, we’ve answered the most common questions to help you navigate the process with confidence. Whether you’re a beginner or just need a quick refresher, these FAQs will keep your seed-saving journey on track.
When is the best time to harvest seeds from my plants?
The ideal time depends on the plant, but most seeds are ready when the pod, fruit, or flower head is fully mature and starts to dry out. For example, tomatoes turn yellow and split open, while beans rattle inside their pods. Check your seed saving chart for plant-specific cues—harvest too early, and seeds won’t germinate; wait too long, and they may scatter or spoil.
How do I know if my saved seeds are still viable?
Test viability with the paper towel method: Moisten a paper towel, place 10 seeds in the center, fold it, and seal in a plastic bag. Store in a warm spot for 5–7 days. If 50% or more sprout, your seeds are good to go! Most seeds stay viable for 1–5 years, but some (like onions) last only a year. Store them in a cool, dry place to extend their life.
Can I save seeds from hybrid plants, or will they grow true?
Hybrid seeds (like those from F1 plants) often won’t produce offspring identical to the parent. If you want reliable, true-to-type seeds, stick to heirloom or open-pollinated varieties. Check seed packets for labels like “OP” (open-pollinated) or “heirloom.” For hybrids, focus on saving seeds from stable varieties or buy fresh seeds yearly.
What’s the easiest way to dry seeds before storage?
Spread seeds in a single layer on a paper towel or mesh screen in a warm, dry, well-ventilated spot (like a sunny windowsill or dehydrator on low heat). Avoid direct sunlight or humidity—this can cause mold. Most seeds dry in 1–3 weeks. Once brittle, store them in airtight containers with silica gel packets to absorb moisture.
My seeds sprouted in storage—what went wrong?
Sprouting in storage usually means too much moisture or warmth. Always store seeds in a cool (50–70°F), dry place, like a sealed jar in the fridge or a root cellar. Check for condensation or musty smells—these are red flags! If seeds sprout, replant them quickly (they’re still viable) or compost them. For extra protection, add a desiccant packet to your storage container.
Wrapping up and next steps
Mastering seed saving is all about understanding your plants’ rhythms—from vibrant blooms to dormant seeds—and using a seed saving chart as your trusty guide. With the right tools and knowledge, you’re not just preserving heirlooms; you’re building resilience for your garden and the planet. 🌱
Ready to take the next step? Start small: pick one easy-to-save plant (like tomatoes or beans) and track its stages using your chart. Before you know it, you’ll be a seed-saving pro, sharing your bounty with neighbors—or even selling starts! 💡