
Propagation
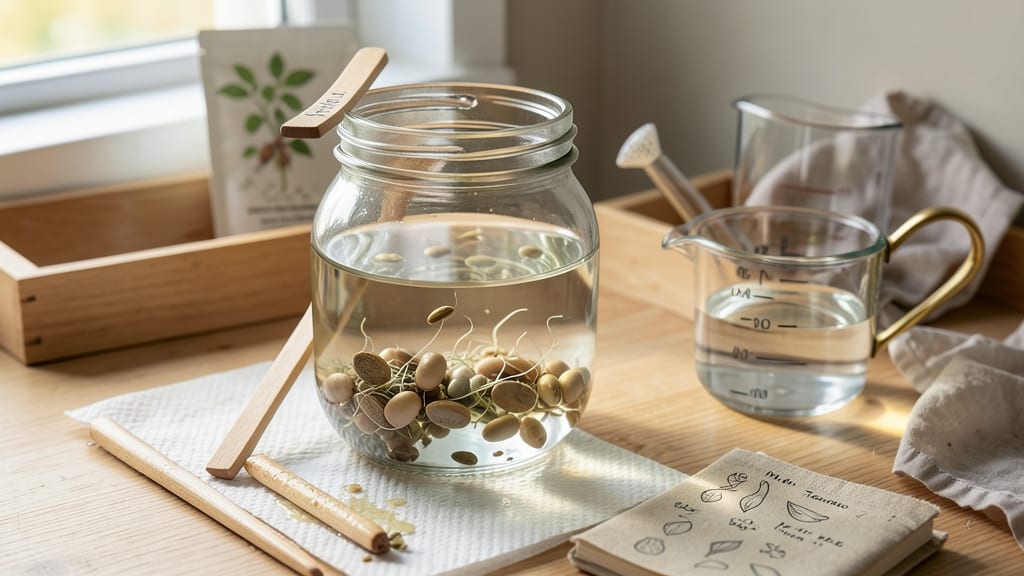
Soaking seeds for 48 hours before planting cuts germination time in half—no fancy equipment needed. 🌱 I’ve watched stubborn seeds like chard and peas pop up in days instead of weeks, all thanks to this simple pre-treatment that softens tough seed coats and kickstarts growth.
The trick works best for seeds with hard outer shells, like beans, peas, and sunflowers. Just place them in a jar of room-temperature water for 12–48 hours, then plant them shallow. Seeds that shouldn’t soak—like tomatoes, carrots, or onions—will rot if you drown them first.
You’ll notice faster sprouting, stronger seedlings, and fewer failed starts. The key is timing: too long in water and they’ll suffocate, too short and the benefits vanish. I’ve even revived seeds I thought were dead this way. Perfect for beginners or anyone tired of waiting months for germination.
Let’s get those seeds sprouting!
📚 In This Guide
- What you need
- Instructions
- Tips and common mistakes
- Wrapping up and next steps
What you need
- ● Seeds: Choose any variety (beans, lentils, sunflower, etc.). Start with 10–20 seeds for testing.
- ● Water: Use room-temperature, filtered, or distilled water (avoid tap water with chlorine if possible).
- ● Soaking Container: A glass jar (quart-sized) or bowl with a lid.
- ● Or a mesh produce bag (for easy draining).
- ● Colander or Fine Mesh Strainer: For rinsing seeds post-soak.
- ● Paper Towels or Germination Tray: 2–4 sheets of paper towels or a pre-moistened germination tray.
- ● Plastic Wrap or Lid: To retain moisture during germination.
- ● pH Strips: Test water pH (ideal range: 6.0–7.0).
- ● Hydrogen Peroxide (3%): 1 tsp per quart of water to boost oxygen and speed up soaking.
- ● Seedling Heat Mat: Keeps seeds warm (70–85°F) for faster germination.
- ● Labeling Tags: Mark seed types if testing multiple varieties.
How to soak seeds for faster germination
This simple 48-hour trick speeds up sprouting without risking rot—here's how I do it every season.
💧 Step 1: Choose the Right Seeds and Soaking Method
Not all seeds need soaking—focus on large, hard-coated varieties like beans, peas, or sunflower seeds. I skip soaking for tiny seeds (like lettuce) or those with thin shells, as they germinate quickly without it. For seeds that need soaking, fill a clean bowl with lukewarm water (about 80°F) and add 1-2 tablespoons of hydrogen peroxide (3%) per gallon to prevent mold.
The hydrogen peroxide is optional but highly recommended—it keeps water fresh and reduces the risk of fungal growth during the soaking process. If you skip it, change the water every 12 hours to prevent bacterial buildup. Place the bowl where you won’t disturb it, like on your kitchen counter near the sink.
🌱 Step 2: Soak for the Optimal Time (No Longer!)
Add your seeds to the water and let them soak for 8-12 hours maximum. Over-soaking can leach nutrients or even cause seeds to split open prematurely. I set a timer on my phone so I don’t forget—this is where most people mess up. You’ll know it’s time when the seed coats look slightly softened and swollen, not mushy.
After soaking, drain the water completely and rinse the seeds gently under cool running water. This removes any residual hydrogen peroxide and prepares them for planting. Lay them on a clean paper towel to dry for 10-15 minutes—just until the outer surface feels slightly tacky but not wet. This step is crucial for preventing mold in your planting medium.
☀️ Step 3: Plant Immediately in Moist, Warm Soil
Fill your seed-starting containers with the moistened seed-starting mix (pre-moistened to avoid displacing seeds during planting). Make small indentations with your finger—about twice the depth of the seed—and place 1-2 soaked seeds per hole. Cover lightly with additional mix, pressing down gently to ensure good seed-to-soil contact.
Water the soil again lightly with a spray bottle to settle everything in place. Place the containers in a warm spot (ideally 70-80°F) with indirect light. You’ll see the first signs of germination within 24-48 hours—tiny white roots pushing through the soil or the seed coat splitting open. This is your signal that the soaking trick worked!
⏰ Step 4: Monitor and Adjust for Speed
Keep the soil consistently moist but never soggy—water only when the top inch feels dry to the touch. If your kitchen stays cool (below 65°F), germination may take longer. In that case, move the containers to a warmer spot, like on top of the fridge or near a sunny window. You’ll notice faster sprouting once the seeds reach their ideal temperature range.
Once seedlings emerge, move them to a bright location with 12-14 hours of light daily. Avoid direct sunlight at first—it can scorch delicate new leaves. Within 7-10 days, you’ll have strong, established seedlings ready for transplanting. The key to this method is consistency: warmth, moisture, and patience.
Tips & tricks for perfect seed soaking germination
Took me a while to figure these out, so here goes—these tricks will help you avoid common pitfalls and get the best possible sprouts.
Soaking Temperature: The 80°F lukewarm water in Step 1 is key—too cold slows germination, while hot water can damage delicate seed coatings. I use a thermometer to check if I'm unsure. If your kitchen is chilly, warm the water slightly on the stove before adding seeds.
Hydrogen Peroxide Hack: That 1-2 tablespoons of 3% hydrogen peroxide per gallon isn't just optional—it's my secret weapon against mold. If you skip it, remember to change the water every 12 hours as instructed, but I've seen better results with the peroxide, especially in humid conditions. The bubbles actually help oxygenate the water too!
Visual Timing Cues: For the 8-12 hour soak in Step 2, watch for the seed coats to look "plump" rather than just wet. They should feel slightly resistant when pressed between your fingers—not mushy. This visual cue tells me exactly when to stop soaking, preventing over-soaking that can cause seeds to split.
Planting Depth Pro Tip: When making those finger indentations in Step 3, think "twice the seed size" but don't overdo it. For sunflower seeds, that's about 1 inch deep—any deeper and they'll struggle to push through the soil. I press gently around the edges to create good soil contact without compacting too much.
Pro Tips for Seed Soaking Germination
- Took me a while to figure these out, so here goes—these tricks will help you avoid common pitfalls and get the best p...
- Soaking Temperature: The 80°F lukewarm water in Step 1 is key—too cold slows germination, while hot water can damage ...
- Hydrogen Peroxide Hack: That 1-2 tablespoons of 3% hydrogen peroxide per gallon isn't just optional—it's my secret we...
Frequently asked questions
Got questions about seed soaking and germination? You’re not alone! Here are answers to the most common queries to help you sprout like a pro.
How long should I soak seeds before planting?
Most seeds benefit from a 12–48-hour soak in water (or a seed-soaking solution like apple cider vinegar). Smaller seeds (like lettuce or herbs) need just 6–12 hours, while large seeds (beans, peas) can handle the full 48 hours. Pro tip: Drain and rinse before planting to avoid rot!
Can I over-soak seeds, and what happens if I do?
Yes! Over-soaking (beyond 48 hours) can drown seeds, causing them to rot or fail to sprout. Signs of over-soaking include a foul smell, mushy texture, or mold. If this happens, pat them dry and replant—some seeds may still germinate, but success isn’t guaranteed.
Do all seeds need soaking to germinate faster?
Nope! Hard-coated seeds (like peas, beans, or sunflowers) love soaking, but soft seeds (tomatoes, cucumbers, or marigolds) can skip it—just plant them moist. Always check seed packets for tips, as some varieties (e.g., onions or garlic) hate soaking.
Why aren’t my soaked seeds sprouting after planting?
Several factors could be at play:
- Cold temps (below 60°F/15°C)? Move pots to a warmer spot or use a heat mat.
- Poor drainage? Ensure pots have holes and use well-draining soil.
- Old seeds? Test viability by crushing a seed—if it’s hard, it’s likely dead.
- Lack of moisture? Keep soil damp (not soggy) and cover with plastic wrap until sprouts appear.
What’s the best water for soaking seeds?
Use room-temperature, filtered, or rainwater to avoid chlorine (which can inhibit germination). For a boost, add 1 tsp apple cider vinegar or hydrogen peroxide (3%) per cup of water to kill bacteria. Never use tap water if it’s heavily chlorinated—let it sit out for 24 hours first!
Wrapping up and next steps
Mastering the seed soaking germination trick can transform your gardening game—saving time, boosting yields, and unlocking healthier plants! 🌱 Whether you're a seasoned gardener or just starting, these simple steps make sprouting easier and more reliable.
Now that you’re equipped with the 48-hour secret, it’s time to put it into action.
Ready to grow? Start with one batch of seeds—track your progress, adjust as needed, and watch your plants thrive. Happy sprouting!