
Propagation
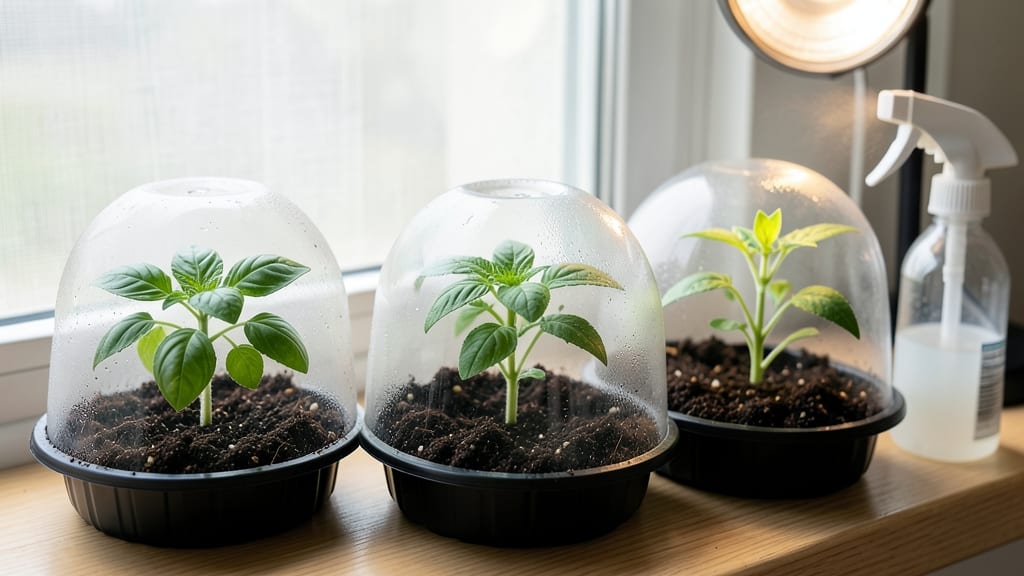
A seed starting humidity dome turns your windowsill into a tropical greenhouse for seeds. 🌱 I’ve used these clear plastic covers to cut germination time in half—from weeks to days—while keeping my seedlings from drying out or developing that dreaded "leggy" look.
The secret is simple: a sealed environment keeps moisture and warmth right where the seeds need it. You’ll need a clear plastic dome (or even a plastic bag), a seed tray, and a heat mat if your space runs cool.
Most seeds—especially finicky ones like tomatoes or peppers—sprout faster and stronger with this setup. Once you see those first green hooks breaking through the soil, you’ll know it’s working.
The dome creates a microclimate that mimics the moist, warm conditions seeds crave in the wild, leading to thicker, stockier seedlings ready for transplanting in weeks. Remove the dome when seedlings have their first true leaves and look sturdy—usually 7-14 days after germination.
Just lift it gradually to avoid shocking them. Here’s how to avoid the most common pitfalls.
📚 In This Guide
- What you need
- Instructions
- Tips and common mistakes
- Wrapping up and next steps
What you need
- ● Clear plastic dome or lid: A shallow container (e.g., seedling tray, plastic clamshell, or repurposed takeout container) with a clear, airtight lid (8"–12" diameter works well for most setups).
- ● Seed-starting mix: Lightweight, sterile potting mix (1–2 gallons, depending on container size). Avoid garden soil—it’s too dense!
- ● Seeds: Your chosen variety (check seed packets for depth/spacing guidelines).
- ● Spray bottle: For gentle watering (avoid over-saturating the mix).
- ● Tweezers or small spoon: For precise seed placement.
- ○ Small fan (optional but helpful): A battery-operated fan on low speed to prevent mold (place outside the dome).
- ● Grow lights: LED or fluorescent lights (12–16 hours/day) for consistent warmth.
- ● Thermometer/hygrometer: To monitor humidity (ideal: 70–90% RH) and temperature (70–85°F).
- ● Ventilation holes: Poke tiny holes in the dome lid with a hot nail if condensation builds up.
- ● Rocks or paper towels: Place a layer at the bottom to improve drainage.
- ● Labeling tags: To track seed varieties (trust us, it’s easy to forget!).
Step-by-step guide to using a humidity dome for faster germination
Here's how I get seeds sprouting in half the time—no fancy equipment, just science-backed moisture control.
🌱 Step 1: Prepare Your Seed Trays and Soil
Start with clean seed trays or pots filled with moistened seed-starting mix. Press the soil down lightly so it's firm but not compacted—you want roots to push through easily. I like to tap the tray gently on the table to settle everything evenly. The soil should hold together when squeezed but not drip water.
Plant your seeds at the correct depth (usually twice the seed diameter) and cover lightly with additional mix. Mist the surface with water until it's evenly damp, but not soggy. This initial moisture creates the perfect foundation for your humidity dome to work its magic.
💧 Step 2: Cover and Create the Humidity Cocoon
Place your clear humidity dome over the seed trays, pressing the edges gently to create a seal. The dome traps moisture and warmth, which is exactly what seeds need to germinate quickly. I use a plastic lid or a store-bought dome—just make sure it's clear so you can monitor progress without removing it.
Set the covered trays in a warm location, ideally between 70-80°F. A seedling heat mat keeps things even warmer and speeds up germination. Watch for condensation on the inside of the dome—that's your signal the humidity is perfect. If you see mold or fuzzy growth, that's a sign the dome is too humid and needs better airflow.
⏰ Step 3: Monitor and Adjust for Optimal Conditions
Check your seeds daily but avoid lifting the dome unless absolutely necessary. You'll see condensation on the inside—this is normal and indicates high humidity. If the soil looks dry when you peek, mist the inside of the dome lightly with water to restore moisture without disturbing the seeds.
Germination times vary by plant, but you'll typically see sprouts in 5-14 days. As soon as 50% of seeds have sprouted, remove the dome immediately. Leaving it on too long creates conditions for damping-off, a fungal disease that collapses seedlings overnight. Strong seedlings will have thick stems and vibrant green leaves.
☀️ Step 4: Transition to Normal Growing Conditions
Once the dome comes off, move your seedlings to bright light immediately. Without the humidity cocoon, they'll need 14-16 hours of light daily to prevent leggy growth. I use a grow light positioned 2-4 inches above the plants and raise it as they grow. You'll notice stronger stems and darker green leaves within days.
Water from below now—place trays in an inch of water for 10-15 minutes to encourage deep root growth. Avoid wetting the leaves to prevent disease. The transition from dome to open air is critical—if you rush it, seedlings may struggle to adapt to drier conditions.
Tips & tricks for perfect seed starting with a humidity dome
Here's what nobody tells you about making this method work flawlessly—these are the details that separate good sprouts from great ones.
Soil Preparation Secret: After filling your trays with moistened seed-starting mix, press it down firmly but don't compact it like you would for mature plants. The goal is to create a texture that holds moisture while still allowing roots to push through easily. I find that tapping the tray gently on the table 3-4 times helps settle the soil evenly without over-compacting it. The soil should crumble when you squeeze it gently—if it sticks together like wet sand, it's too moist.
Dome Placement Matters: When placing your clear humidity dome, press the edges firmly to create a complete seal. I've found that using a small amount of water around the dome's base creates a temporary seal if it's not perfectly fitting—just wipe it up after placement. The goal is to trap that warm, humid air right above the soil. If you see gaps, condensation won't form properly, and your germination rate will suffer.
Temperature Troubleshooting: The ideal 70-80°F range is crucial, but every home has hot and cold spots. If you're not seeing condensation after 24 hours, your location might be too cool. Try moving your setup to a warmer spot like near a sunny window (but not in direct sunlight) or on top of your refrigerator. A seedling heat mat placed underneath can add 5-10°F of warmth without needing to adjust your thermostat. If you see mold instead of condensation, that's your sign the dome is too humid—lift it briefly to air out for 10-15 minutes.
Transition Timeline: The moment 50% of your seeds sprout is the absolute cutoff for dome removal. I've seen beginners keep domes on too long, thinking "a few more days won't hurt," but that's when damping-off fungus strikes. Watch for the first true leaves to appear—those are your signal. After removing the dome, give your seedlings 24 hours to acclimate before moving them under grow lights. This gradual transition prevents shock and helps them develop stronger stems.
Pro Tips for Seed Starting Humidity Dome
- Here's what nobody tells you about making this method work flawlessly—these are the details that separate good sprouts from great ones.
- Soil Preparation Secret: After filling your trays with moistened seed-starting mix, press it down firmly but don't compact it like you would for mature plants.
- Dome Placement Matters: When placing your clear humidity dome, press the edges firmly to create a complete seal.
Frequently asked questions
Got questions about seed-starting humidity domes?
You’re not alone! Here are answers to the most common concerns—so you can create the perfect germinating environment with confidence.
How often do I need to open the humidity dome?
Open the dome once daily for 5–10 minutes to prevent mold and allow airflow. After seeds sprout, gradually increase ventilation by propping the dome open or removing it entirely. Pro tip: Use a fan on low to mimic natural airflow without shocking seedlings!
When should I remove the humidity dome?
Remove the dome 7–14 days after germination (or when seedlings touch the cover). True leaves (not just the first seed leaves) signal readiness. Warning: Sudden removal can stress seedlings—acclimate them by lifting the dome daily for 30+ minutes first.
Can I reuse a humidity dome for multiple seed batches?
Yes! Clean the dome with soapy water and a 1:10 bleach solution (rinse well) between uses. Avoid plastic domes that trap bacteria—glass or clear plastic with UV resistance lasts longer. Hot tip: Label domes by seed type to track care needs!
What if condensation forms inside the dome?
Condensation is normal, but excess moisture risks mold. If droplets persist, increase airflow or reduce watering. Wipe the dome’s underside with a dry cloth to prevent algae growth. Quick fix: Place a small fan nearby to dry the air gently.
What’s a good alternative if I don’t have a humidity dome?
DIY options work great! Try:
- Plastic wrap (secure with rubber bands, poke holes for airflow).
- Clear plastic bottle (cut in half, invert as a mini dome).
- Glass jar (cover trays loosely).
Wrapping up and next steps
Mastering the art of seed starting with a humidity dome can transform your gardening journey—faster germination, healthier seedlings, and a head start on the growing season! 🌱 Whether you’re a novice or a seasoned green thumb, this simple tool gives your seeds the perfect environment to thrive.
Now that you’re equipped with the how-tos and pro tips, it’s time to put your knowledge into action.
Ready to dive in? Start with a small batch of seeds—like herbs or flowers—and experiment with different humidity levels. Track your progress, adjust as needed, and soon, you’ll be harvesting confidence (and seedlings!) like a pro. Happy growing! 🌿