
Propagation
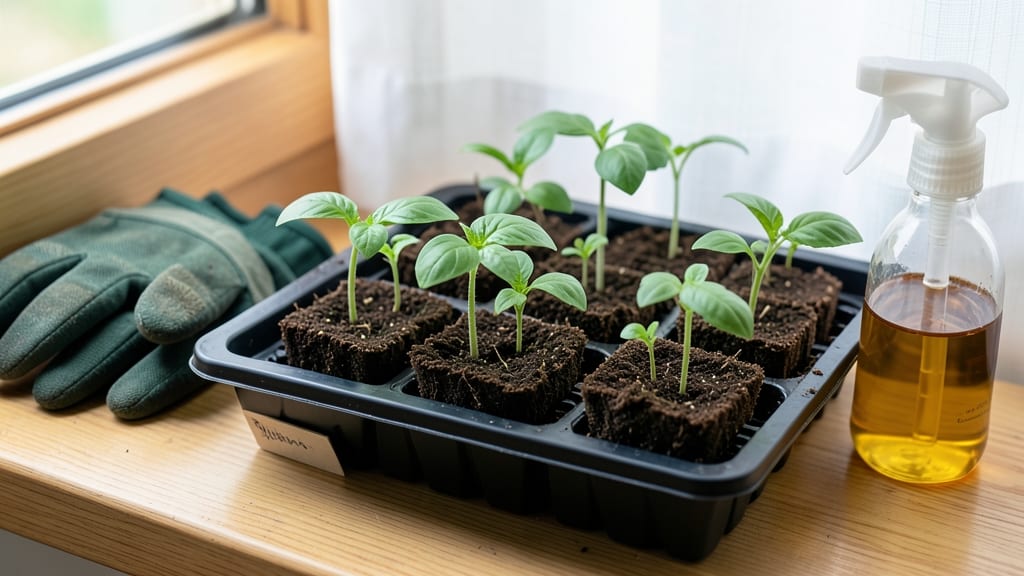
Soil blocks for seed starting cut out the mess of tangled roots and broken peat pots. 🌱 I switched to them after struggling with transplant shock—now my seedlings transfer like pros, with no root circling or damage.
The blocks are just compressed soil cubes that hold moisture perfectly while giving roots room to grow naturally. You'll need a soil block maker (or DIY molds), a mix of compost and coco coir, and a shallow tray.
The blocks take 24 hours to set up, and you can start seeds directly in them—no potting later. They're reusable too, which saves money and reduces waste over time. What you end up with is sturdy, root-dense seedlings ready for the garden.
No more delicate handling, no more lost plants—just strong starts that thrive from day one. The blocks even wick moisture evenly, so you won't overwater like I did my first year. Works for tomatoes, peppers, herbs, and more. Here's how to master them!"
📚 In This Guide
- What you need
- Instructions
- Tips and common mistakes
- Wrapping up and next steps
What you need
- ● Soil blocks: 1-2 inch (2.5-5 cm) diameter blocks (quantity depends on seeds—aim for 1 block per seedling). Opt for compost-based blocks for best results.
- ● Seed-starting mix: 1 bag (1-2 cubic feet) of lightweight, sterile potting mix (avoid garden soil—it’s too dense!).
- ● Water: Room-temperature, chlorine-free water (rainwater or filtered works best).
- ● Seeds: Your chosen varieties (check seed packets for spacing/depth needs).
- ● Block maker: A manual or electric soil block press (e.g., EZ Block Maker or DIY cardboard forms).
- ● Flat tray or seedling mat: A shallow container (e.g., 10x20 inch tray) with drainage holes to hold blocks during germination.
- ● Spray bottle: For gentle watering (avoid over-saturating blocks).
- ○ Labels & marker: To track seed varieties (optional but highly recommended!).
- ● A well-ventilated space (e.g., greenhouse, sunny windowsill, or grow tent).
- ● Consistent warmth: Aim for 65–75°F (18–24°C) for most seeds (use a heat mat if needed).
- ● Patience: Soil blocks take 24–48 hours to dry and harden—don’t rush the process!
- ● Humidity dome or plastic wrap to retain moisture during germination.
- ● Grow lights for seedlings if natural light is insufficient.
- ● Compost tea or mild fertilizer (once seedlings sprout, not before!).
- ● Tweezers for delicate seed placement (great for tiny seeds like lettuce).
Step-by-Step instructions for starting seeds in soil blocks
Here’s how to bypass the transplant shock and get seedlings off to a flying start.
🌱 Step 1: Soak and Prepare Your Soil Blocks
Fill a shallow tray with 1 inch of water and place your soil blocks inside. They’ll soak up moisture like sponges—wait until they’re fully saturated and about 1.5 times their original size. This ensures they hold water for germination without becoming soggy. I tap the tray gently to help them absorb evenly, especially if they’re on the dry side.
Once soaked, let them drain for 5-10 minutes on a wire rack or paper towels. You’ll know they’re ready when water stops dripping from the bottom, but they still feel damp to the touch. This step prevents waterlogged blocks, which can suffocate seeds before they even sprout.
💧 Step 2: Plant Seeds Directly Into Blocks
Use your finger or a toothpick to make a tiny hole in the center of each block—just deep enough to hold your seed. I like to press the seed in gently but firmly, so it stays put. Cover it with a pinch of the soil block material, then mist the surface lightly with water. Don’t overdo it; you just want the top damp, not soaked.
Place the tray in a warm spot—70-75°F is ideal for most seeds. A seedling heat mat speeds things up, but even a sunny windowsill works. You’ll see the first sprouts in 5-14 days, depending on the plant. Watch for the seedling’s first true leaves (not the initial cotyledons) to confirm germination.
☀️ Step 3: Provide Light and Airflow for Strong Growth
Once sprouts appear, move the tray to a bright spot with 12-16 hours of light daily. A grow light works best if natural light is weak. Keep the blocks moist but not wet—water from the bottom by placing the tray in ½ inch of water for 10-15 minutes, then drain. This prevents fungal issues while keeping roots hydrated.
Space blocks slightly apart to improve airflow, which reduces damping-off disease. You’ll know your seedlings are thriving when they stand upright with dark green leaves. If they lean toward the light, rotate the tray daily so they grow straight and sturdy.
⏰ Step 4: Harden Off Before Transplanting
Two weeks before your last frost date, start hardening off your seedlings. Place them outside in a sheltered spot for 1-2 hours the first day, gradually increasing time over 7-10 days. This toughens them up so they handle outdoor conditions. On the final day, leave them out all day if temperatures stay above 50°F.
Transplant soil blocks directly into the garden—no need to remove them from their blocks. The blocks break down naturally, adding organic matter to the soil. Water deeply after planting to help roots establish. You’ll see faster growth and fewer setbacks compared to traditional seedling transplants.
Tips & tricks for perfect soil block seed starting
These simple tricks will help you avoid the most common pitfalls and get your seedlings thriving from day one.
Soaking Precision: In Step 1, don't rush the 5-10 minute draining time—this is where most people go wrong. If you skip this, your blocks will stay too wet and suffocate the seeds. I like to test by lifting a block: it should feel damp but not dripping. This balance is key for root development without waterlogging.
Seed Placement Technique: When making that tiny hole in Step 2, aim for depth equal to twice the seed's width. For tiny seeds like lettuce, just press them gently into the surface—they don't need deep planting. Larger seeds like beans need that extra depth. This ensures proper root establishment without burying too deep.
Light Management: The 12-16 hours of light in Step 3 is non-negotiable for strong seedlings. If natural light is weak, supplement with a grow light just 6 inches above the tray. I've seen seedlings stretch toward weak light and become leggy—this is your warning sign to add more illumination immediately.
Harden Off Gradually: The 1-2 hour start in Step 4 might seem short, but this gradual approach prevents transplant shock. I've seen seedlings wilt dramatically when moved too quickly—start with just a few hours in partial shade, then slowly increase exposure. This mimics natural conditions and builds resilience.
Pro Tips for Soil Blocks Seed Starting
- These simple tricks will help you avoid the most common pitfalls and get your seedlings thriving from day one.
- Soaking Precision: In Step 1, don't rush the 5-10 minute draining time—this is where most people go wrong.
- Seed Placement Technique: When making that tiny hole in Step 2, aim for depth equal to twice the seed's width.
Frequently asked questions
Got questions about soil blocks for seed starting? You’re not alone! Here are answers to the most common queries to help you get started with confidence.
What are soil blocks, and how are they different from seedling pots?
Soil blocks are compressed, peat-based (or coco coir) cubes that mimic natural soil conditions. Unlike plastic pots, they don’t require transplanting—just pop them into the ground! This reduces root disturbance, speeds up growth, and eliminates waste. Think of them as a zero-waste alternative to traditional seedling containers.
When is the best time to start seeds in soil blocks?
Timing depends on your plants and climate. For most veggies (like tomatoes or peppers), start 6–8 weeks before the last frost. Leafy greens or herbs can go in 3–4 weeks earlier. Check seed packets for specifics! Pro tip: Use a heat mat if your space is chilly to speed up germination.
Are soil blocks more expensive than regular seedling pots?
Upfront, yes—soil blocks cost more per unit than plastic pots. But they’re reusable (just compost them after use) and reduce transplant shock, saving time and money long-term. For budget-friendly options, try DIY blocks with coconut coir or peat moss. A one-time investment in a soil block maker pays off fast!
What do I do if my soil blocks dry out or crack?
Cracking is normal as they dry, but consistent moisture is key. Mist blocks lightly daily and store them in a humidity dome or sealed container until sprouts appear. Overwatering? Drain excess—soggy blocks suffocate roots. If cracks form, press them gently back together or re-moisten before planting.
Can I use soil blocks for all types of plants, or are some better suited?
Soil blocks work for most seeds, including flowers, herbs, and veggies, but delicate seedlings (like orchids) may need extra support. Avoid tiny seeds (e.g., carrots) unless you’re experienced—they’re better in trays. For fast growers (e.g., radishes), use smaller blocks (1"–2") to prevent overcrowding.
Still stumped? Drop your question in the comments—we’re happy to help!
Wrapping up and next steps
Starting seeds with soil blocks is a game-changer for gardeners—it’s simple, eco-friendly, and packed with benefits like better root growth and less transplant shock. Whether you're a beginner or a seasoned pro, these blocks make seed starting foolproof and stress-free. 🌱
Ready to give it a try? Grab your materials, follow the steps, and watch your seedlings thrive! Once you master soil blocks, you’ll wonder why you ever struggled with traditional seed-starting methods. Happy planting! 🌿