
Propagation
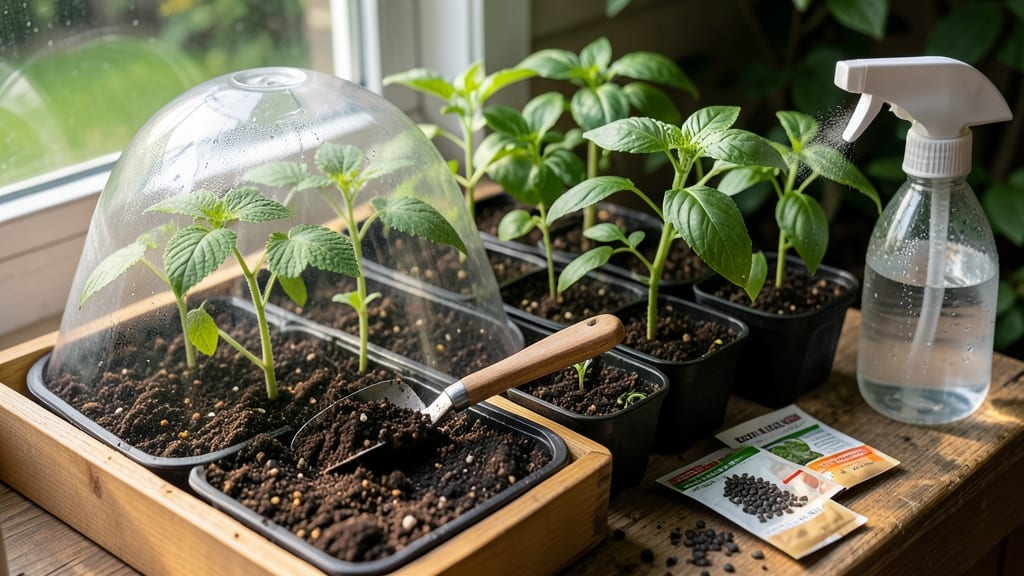
The best soil mix for seed starting is all about that perfect balance of lightness and drainage. ✨ My first batch of seedlings drowned in a heavy mix that compacted like wet cement—until I learned the magic ratio of peat moss, perlite, and compost that keeps roots happy and air flowing.
You’ll need 2 parts peat moss (or coconut coir for a sustainable swap), 1 part perlite or vermiculite (for that critical airflow), and 1 part compost (just enough nutrients to kickstart growth).
Sterilizing the mix with a 20-minute bake at 200°F kills pathogens that could rot your seeds before they even sprout. What you’ll end up with is a fluffy, crumbly medium where seeds germinate twice as fast and seedlings grow strong instead of leggy.
The texture stays loose enough to avoid damping-off disease while holding just enough moisture to keep roots fed—not drowned.
For delicate seeds like herbs or flowers, add 10% extra perlite to prevent rot; for tougher plants like tomatoes, a slightly higher compost ratio gives them the boost they need to thrive.
📚 In This Guide
- What you need
- Instructions
- Tips and common mistakes
- Wrapping up and next steps
What you need
- ● 50% peat moss or coconut coir – 1 part (holds moisture while staying light).
- ● 30% perlite or vermiculite – 1.5 parts (boosts drainage and aeration).
- ● 20% compost or worm castings – 1 part (adds nutrients for young seedlings).
- ○ Optional: 5% sand (coarse horticultural grade) – ¼ part (improves texture if soil feels too dense).
- ● A sterilized container (seed trays, pots, or a clean bucket).
- ● A large mixing bowl or wheelbarrow (for blending ingredients).
- ● Gloves and a mask (to avoid dust from perlite/peat).
- ● Spray bottle with water (for moistening the mix).
- ○ pH testing kit (optional) – Aim for 5.8–6.5 (ideal for most seeds).
Step-by-Step guide to crafting the perfect seed-starting soil mix
Here’s how I create a lightweight, airy loam that gives seedlings the ideal foundation—no compacting, no waterlogging, just pure growth potential.
🌱 Step 1: Combine Base Materials for Loose Structure
Start with 50% peat moss or coconut coir—this is your moisture-retaining backbone. I sift it first to break up any clumps, because fine particles create better airflow around delicate roots. Next, add 30% perlite or vermiculite (I prefer perlite for its extra grit). This prevents compaction and lets water drain freely while keeping roots oxygenated.
Mix these two dry first, then add 20% compost or worm castings for gentle nutrition. I use my hands to blend until the texture feels like crushed velvet—light enough to crumble between fingers, but cohesive enough to hold shape when squeezed. This balance is critical: too much compost can smother seeds, while too little perlite risks water pooling.
💧 Step 2: Hydrate Without Drowning the Mix
Gradually add warm water while mixing—just enough to reach moist but not soggy. I test by squeezing a handful: one drop should form, but the mix shouldn’t drip. Overwatering now creates anaerobic pockets that suffocate seeds before they even sprout. If the blend feels dry, add water spoonful by spoonful until it’s uniformly damp.
Let the mix sit for 10 minutes to settle. This lets excess moisture redistribute evenly. I tap the container gently on the counter to eliminate air pockets—seedlings hate fighting for space in dense soil. The goal is a fluffy, aerated medium that crumbles easily when pressed.
☀️ Step 3: Test and Adjust for Ideal Seedling Conditions
Fill a small container with your mix and press it lightly—it should hold its shape but still allow a seedling’s roots to push through without resistance. If it feels too dense, add 5-10% more perlite. If it collapses when handled, mix in 5% extra peat moss. I run a finger through it: the texture should feel slightly gritty with a soft, spongy core.
This is the moment that matters: sterility and structure. To ensure no pathogens lurk, I microwave the mix in 30-second bursts (stirring between each) until it’s steaming. Let it cool completely before use—warm soil speeds germination, but scalding seeds is a rookie mistake.
✂️ Step 4: Layer and Store for Freshness
Divide the mix into 4 equal portions (one for each of your seed-starting trays). Store any extras in a sealed container with a damp paper towel to retain moisture without mold. I label each batch with the date—fresh mix stays potent for 4-6 weeks before nutrients degrade.
When ready to use, fluff the mix one last time with a fork. The perfect seed-starting soil should look lighter than garden loam and smell earthy, not musty. If it passes these checks, your seedlings will thrive from day one—no leggy stems or fungal issues in sight.
Tips & tricks for perfect seed-starting soil mix
Here’s the secret to foolproof seed-starting soil—these tricks ensure your mix stays light, sterile, and just right for every seed type.
Texture is Everything: In Step 1, when blending the 50% peat moss or coconut coir with 30% perlite, aim for a consistency that feels like "crushed velvet" when squeezed. This isn’t just about looks—it’s about creating tiny air pockets that mimic a seedling’s natural environment. Too much pressure during mixing? You’ll compact those vital air channels, and roots will struggle to establish. Think of it like fluffing a pillow: just enough firmness to hold shape, but still soft enough to breathe.
Sterility Check: The 30-second microwave bursts in Step 3 aren’t just about killing pathogens—they’re also a great way to test your mix’s moisture balance. If it’s too wet, the steam will rise unevenly; if too dry, it’ll barely heat at all. This is your final quality control before planting. I’ve ruined batches by skipping this step, only to watch seedlings rot from hidden mold. Trust me, that 2-minute microwave session saves weeks of heartache.
Moisture Mastery: During the 10-minute settling period in Step 2, resist the urge to rush. This isn’t just about redistribution—it’s about letting the mix "find its level." Tap the container gently on the counter to eliminate air pockets, but don’t vibrate it like a blender. You’re not making a smoothie; you’re creating a delicate ecosystem where seeds can germinate without competition. Pro tip: Use a spray bottle for final adjustments instead of pouring water directly onto the mix—this prevents clumping and keeps moisture even.
Storage Wisdom: That damp paper towel in Step 4 isn’t just for moisture—it’s a humidity buffer. The paper towel should feel damp to the touch but not dripping. If you’re storing for the full 4-6 weeks, check it monthly and refresh if it dries out. I’ve had batches go moldy because I forgot this step, so set a reminder in your phone if needed. The key is maintaining that "earthy, not musty" smell—if it starts developing any funk, toss the mix and start fresh.
Pro Tips for Soil Mix For Seed Starting
- Here’s the secret to foolproof seed-starting soil—these tricks ensure your mix stays light, sterile, and just right for every seed type.
- Texture is Everything: In Step 1, when blending the 50% peat moss or coconut coir with 30% perlite, aim for a consistency that feels like "crushed velvet" when squeezed.
- Sterility Check: The 30-second microwave bursts in Step 3 aren’t just about killing pathogens—they’re also a great way to test your mix’s moisture balance.
Frequently asked questions
Got questions about the perfect soil mix for seed starting? Here are some common concerns—and their answers—to help you grow with confidence!
What’s the best ratio of peat moss to perlite for seed starting?
A classic mix is 50% peat moss or coco coir (for moisture retention) and 50% perlite or vermiculite (for drainage). Adjust slightly—add 10% more perlite if your seeds need extra airflow (like succulents) or 10% more peat for moisture-loving plants (e.g., lettuce). Always sterilize your mix first!
How long does homemade seed-starting mix last?
Homemade mixes stay fresh for 6–12 months if stored in a dry, cool place (like a sealed bucket). Over time, organic matter breaks down, so test drainage before reuse. If it clumps or smells sour, compost it and make a fresh batch. Pro tip: Label your mix with the date!
Can I use garden soil for seed starting?
No—garden soil is too dense and may contain disease, weeds, or pests. Instead, use a sterile seed-starting mix (store-bought or homemade). If you’re desperate, pasteurize garden soil by baking it at 180°F (82°C) for 30 minutes to kill pathogens. But why risk it? Lightweight mixes work better!
Why are my seeds rotting in the soil mix?
Overwatering or poor drainage are the usual culprits. Check your mix: it should feel damp like a wrung-out sponge, not soggy. Add more perlite or sand to improve airflow, and water only when the top inch feels dry. Pro tip: Use trays with drainage holes and bottom watering to avoid drowning seeds!
Are there eco-friendly alternatives to peat moss?
Swap peat moss for coco coir (sustainable coconut husk fiber), compost, or leaf mold. For drainage, use rice hulls, orchid bark, or worm castings. Just ensure your mix stays lightweight and sterile. Bonus: Compost spent mixes later for your garden!
Wrapping up and next steps
Creating the perfect soil mix for seed starting is all about balance—lightweight loam with just the right blend of drainage, aeration, and moisture retention.
Whether you’re mixing your own or choosing a pre-made option, the key is giving those tiny seeds the cozy, nutrient-rich environment they need to sprout strong and healthy. 🌱
Now that you’re armed with the knowledge, it’s time to roll up your sleeves and get growing! Start small with a few trays, experiment with your mix, and watch your seeds transform into thriving seedlings. Happy planting—your green thumb is about to get even greener! 🌿