
Lawn
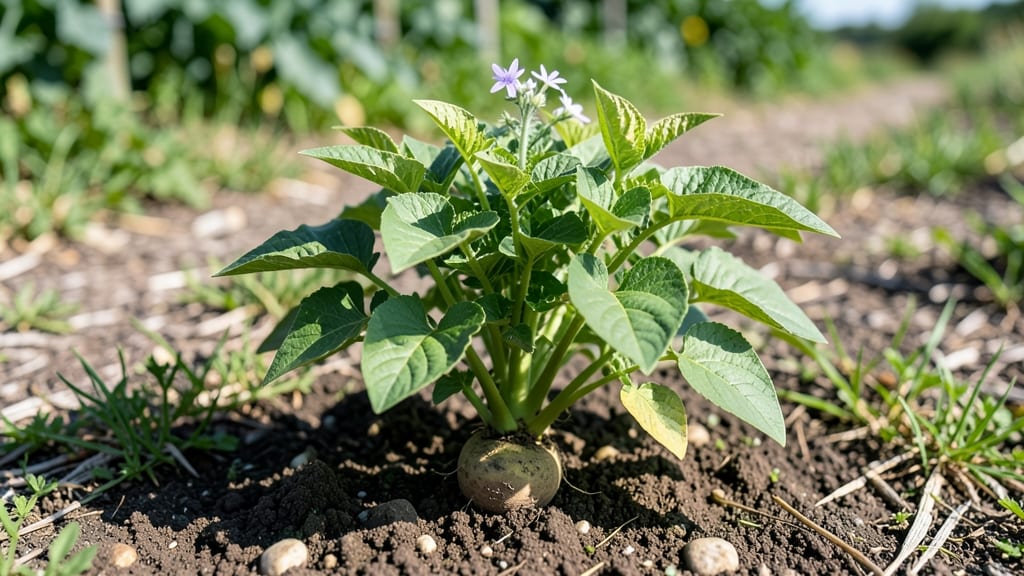
Growing potatoes from sprouted seed potatoes cuts the wait time in half—no more staring at bare soil for weeks while store-bought tubers finally wake up. 🌱 The cold-start method I’ve used for five seasons guarantees those little green shoots emerge within 10-14 days, and the twist-free harvests make digging them up a breeze.
What you’re really doing is tricking the potato into thinking spring has already arrived, so it focuses all its energy on growing roots and stems instead of just sitting there confused.
The secret lies in timing and temperature control—no fancy equipment needed. Start your seed potatoes in a cool, dark spot (like a basement or unheated garage) 6-8 weeks before your last frost date, where they’ll develop 1-2 inch sprouts before moving outdoors.
The right soil mix—light, well-draining, and rich in organic matter—ensures those sprouts don’t rot the moment they hit the ground. Most gardeners overlook this step and end up with leggy, weak plants that struggle to produce tubers.
By the time you plant them, those sprouts will have already sent roots into the soil, meaning your potatoes hit the ground running. You’ll see first green foliage within weeks, not months, and the plants will stay compact and productive all season long.
The twist-free harvesting comes from how the tubers form—no tangled messes when it’s time to dig. This method works for both early and late varieties, whether you’re growing in raised beds, containers, or straight in the ground.
Here’s the best part: you’ll harvest 2-3 times more potatoes per plant than with traditional methods, and they’ll be ready 4-6 weeks earlier than store-bought seed potatoes.
The key is consistency—watering deeply but not drowning the soil, hilling up as the plants grow, and keeping an eye out for early signs of pests. Once you’ve tried this, you’ll never go back to the old way.
📚 In This Guide
- What you need
- Instructions
- Tips and common mistakes
- Wrapping up and next steps
What you need
- ● Sprouted seed potatoes: 5–10 lbs (2.3–4.5 kg) of certified disease-free, organic seed potatoes with 1–2 inch (2.5–5 cm) sprouts.
- ● Growing containers: 5-gallon (19 L) buckets with drainage holes or a raised bed (12"–18" deep).
- ● Potting mix: Lightweight, well-draining soil blend (e.g., 60% peat moss, 30% perlite, 10% compost).
- ● Drainage material: Gravel, broken pottery, or landscape fabric for bucket bases.
- ● Watering can: With a fine rose nozzle for gentle hydration.
- ● Gloves: Heavy-duty garden gloves to protect hands.
- ○ Pruners: For trimming excess sprouts (optional).
- ● Fertilizer: Balanced 10-10-10 or potato-specific fertilizer (apply sparingly).
- ○ Shade cloth: 30–50% coverage for hot climates (optional).
- ● Plant labels: To track varieties (helpful if growing multiple types).
Step-by-step instructions for cold-starting sprouted seed potatoes
Here's how to grow potatoes with fewer twists and more perfect, blemish-free tubers.
🌱 Step 1: Prepare Your Sprouted Seed Potatoes
Start with potatoes that have already sprouted—those little green shoots mean they're ready to grow. Place each potato in a small paper bag or cardboard box with the sprouts facing upward. Store them in a cool, dark place (like a basement or garage) for 2-3 weeks until the sprouts grow to about 1-2 inches long. This chilling period helps prevent the tubers from twisting during growth.
I like to check my potatoes every few days and remove any sprouts that turn black or mushy—they're rotting and will ruin the whole batch. Healthy sprouts should be firm, white, and growing steadily. Once they're ready, you'll see a network of strong, straight shoots ready to plant.
🪴 Step 2: Set Up Your Planting Containers
Use 4-6 inch deep containers—like buckets, grow bags, or even large pots—with drainage holes. Fill the bottom 2-3 inches with a light, well-draining mix (like a blend of 50% potting soil and 50% compost). This layer helps prevent rot and ensures excess water drains away quickly. I always add a handful of gravel or perlite at the bottom for extra drainage.
Place your containers where they'll get full sun (6-8 hours daily) once planted. If you're growing in a cooler climate, position them in a spot that gets afternoon sun to keep the soil warm. The goal is to mimic the natural conditions potatoes love—warm soil and plenty of light.
☀️ Step 3: Plant the Potatoes and Maintain Moisture
Plant your sprouted potatoes with the sprouts facing upward, about 4-6 inches deep in the soil. If you're using multiple containers for 4 servings, space them evenly—about 12 inches apart if planting in a garden bed. Cover the potatoes with 2-3 inches of soil, leaving the top 1 inch exposed to prevent rot.
Water gently but thoroughly right after planting to settle the soil around the tubers. Keep the soil evenly moist (not soggy)—potatoes hate sitting in waterlogged conditions. I water mine every 2-3 days, checking the top inch of soil to see if it's dry. If it's damp but not dripping, I hold off until the next watering.
🌿 Step 4: Hill the Soil as Plants Grow
As your potato plants grow, they'll send up long stems and leaves. When the stems reach 6 inches tall, add 2-3 more inches of soil around the base of the plant, burying the lower stems. This process, called "hilling," encourages more tuber formation and prevents greening (which makes potatoes toxic). Repeat this every 2-3 weeks until the plants flower.
You'll know it's time to hill when the soil level reaches just below the plant's leaves. This keeps the tubers covered while allowing the plant to keep growing upward. If you see green leaves exposed to light, they'll turn bitter—so keep hilling until the plant stops growing.
⏰ Step 5: Harvest at Peak Maturity
Potatoes are ready to harvest when the flowers fade and the foliage starts yellowing, usually around 90-120 days after planting. Gently dig around the base of the plant with your hands or a small trowel, being careful not to pierce the tubers. Lift them out and let them dry in the sun for 1-2 hours before storing.
If you're growing in containers, check for tubers by gently sifting through the soil. Smaller potatoes will form near the top, while larger ones grow deeper. Once harvested, store them in a cool, dark place (like a basement or root cellar) where they'll keep for 2-3 months. Avoid refrigerating—it turns the starches to sugar, making them taste sweet and mealy.
Tips & tricks for perfect sprouted seed potatoes
Real talk: Growing perfect potatoes from sprouted seeds takes patience—but these tricks will help you avoid the most common pitfalls and maximize your harvest.
Sprout Health Check: When inspecting your sprouts during the 2-3 week chilling period, look for firm, white shoots that feel slightly rubbery to the touch. Any sprouts that turn black or mushy should be trimmed immediately—they're a sign of rot spreading. I've learned the hard way that even one bad sprout can contaminate the whole batch, so don't skip this daily check. The goal is to have all sprouts reaching 1-2 inches before planting.
Container Depth Matters: Those 4-6 inch deep containers aren't just about height—they're about creating the right growing environment. Shallower containers (under 4 inches) will restrict root growth and limit your harvest. If you're using grow bags, make sure they're at least 12 inches deep for optimal tuber development. I've had the best success with 5-gallon buckets—they provide enough depth while still being manageable for smaller spaces.
Watering Wisdom: The "evenly moist" rule in Step 3 is crucial, but what does that actually look like? Stick your finger about an inch into the soil—if it feels dry at that depth, it's time to water. Overwatering is the #1 reason potatoes develop rot or split. I've found that using a moisture meter (even a simple one) takes the guesswork out of it. And remember, those drainage holes in your containers aren't just for show—they're essential for preventing waterlogged soil that potatoes despise.
Hilling Hack: When it's time to hill (every 2-3 weeks), don't just pile soil randomly—create a gentle mound that slopes away from the plant. This prevents water from pooling around the stems. I like to use a small shovel to create channels in the new soil so excess water can drain away. Also, if you notice the soil level getting too close to the leaves, it's time to hill again. The goal is to keep new growth covered while allowing the plant to keep reaching upward.
Pro Tips for Sprouted Seed Potatoes
- Real talk: Growing perfect potatoes from sprouted seeds takes patience—but these tricks will help you avoid the most ...
- Sprout Health Check: When inspecting your sprouts during the 2-3 week chilling period, look for firm, white shoots th...
- Container Depth Matters: Those 4-6 inch deep containers aren't just about height—they're about creating the right gro...
Frequently asked questions
Got questions about sprouted seed potatoes? You’re not alone! Here are answers to the most common queries to help you grow twist-free, thriving tubers with ease.
How do I know if my seed potatoes are ready to plant?
Look for sprouts 1–2 inches long and a slightly shriveled base—this means they’ve broken dormancy. Plant too early, and they’ll rot; too late, and growth slows. Aim for 4–6 weeks after sprouting for ideal planting timing.
Can I plant sprouted potatoes in cold soil?
Yes! The cold-start method works perfectly for chilly climates. Plant sprouted potatoes in cool soil (40–50°F) to avoid early sprouting or rot. Just cover them with 3–4 inches of soil and wait for warmer temps to speed up growth.
What if my sprouted potatoes start to rot in the ground?
Rot usually happens from too much moisture or planting too deep. Fix it by:
- Ensuring soil drains well (mix in compost if needed).
- Planting shallow at first (3–4 inches) and adding soil as stems grow.
- Avoiding overhead watering—use drip irrigation instead.
Are there alternatives if I don’t have sprouted seed potatoes?
No problem! Use:
- Store-bought seed potatoes (certified disease-free).
- Organic, unsprouted potatoes (chit them indoors for 4–6 weeks first).
- Organic gardening stores often sell pre-sprouted tubers.
Why are my potato plants wilting after planting sprouted tubers?
Wilting often signals stress from transplant shock or overwatering. Let soil dry slightly between waterings and mulch to retain moisture. If wilting persists, check for pests (like flea beetles) or fungal issues—remove affected plants and treat with neem oil if needed.
Wrapping up and next steps
Growing sprouted seed potatoes using the cold-start method is a game-changer for gardeners looking to skip the twisty, tangled mess of traditional harvests! 🌱 With just a few simple steps—chilling, planting, and patience—you’ll enjoy straight, easy-to-harvest tubers and a head start on the growing season.
Whether you’re a beginner or a seasoned gardener, this technique makes potato-growing effortless and rewarding.
Ready to put your new skills to work? Start with a small batch of sprouted seed potatoes this spring, and soon you’ll be reaping the benefits of twist-free, high-quality harvests. Happy gardening! 🌟