
Lawn
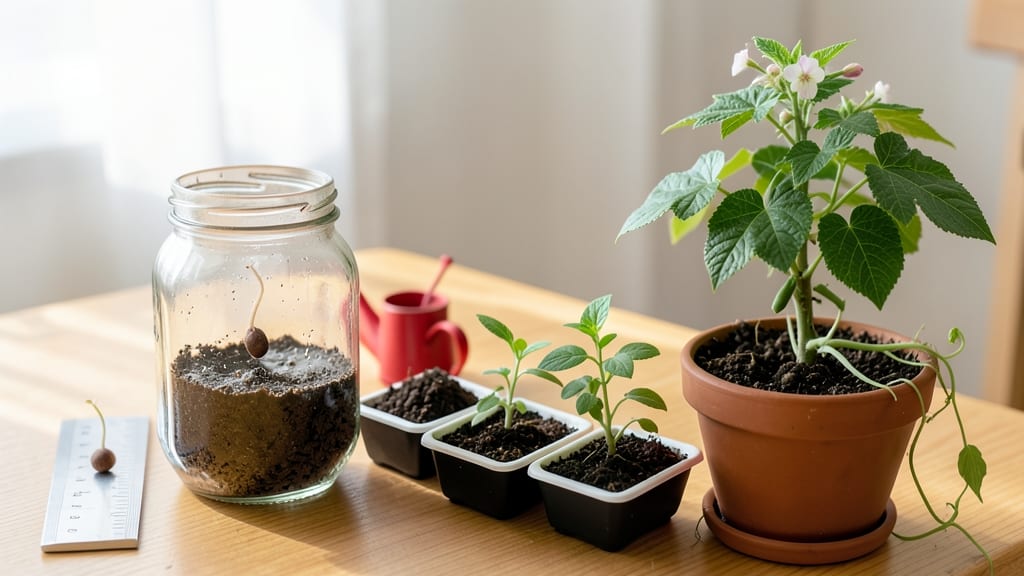
The magic of seed growth starts long before you see a sprout—right when the seed meets moisture. 🌱 Understanding these stages turns guesswork into confidence, whether you're growing fast radishes or patiently nurturing a future oak tree.
Each phase has its own needs, and knowing them means you'll catch problems early or celebrate tiny victories you might otherwise miss.
First comes imbibition, where the seed drinks up water and swells—this kickstarts the whole process. Then germination happens, with the root breaking through the seed coat, followed by the shoot pushing upward.
Fast growers like beans pop up in days, while perennials might take weeks to show their first green. The key? Consistent moisture, warmth, and patience—no peeking at those seeds!
Once the seedling emerges, it enters vegetative growth, building leaves and roots before flowering. This is where light becomes critical—too little and you get leggy, weak plants. For slow growers like fruit trees, this stage can stretch for months, but proper care now means stronger plants later.
The payoff? A garden that thrives instead of struggles.
Advanced gardeners can fine-tune conditions at each stage—adjusting temperature for faster germination or providing support for heavy blooms. But even beginners will see better results by simply knowing what to expect. Ready to transform seeds into plants with purpose?
📚 In This Guide
- What you need
- Instructions
- Tips and common mistakes
- Wrapping up and next steps
What you need
- ● Seeds: Choose high-quality seeds suited to your climate (e.g., grass seeds for lawns, flower seeds for gardens). Quantity: Adjust based on your project (e.g., 1 lb for a small lawn patch, 5–10 seeds per pot for indoor plants).
- ● Growing Medium: Potting soil (sterile, well-draining; 2–3 gallons for small projects, 50+ lbs for lawns).
- ● Seed-starting mix (lighter, moisture-retentive; 1–2 quarts for sprouting).
- ○ Vermiculite or perlite (optional but helpful for aeration; 1 cup).
- ● Containers: Seed trays (with drainage holes; 5–10 cavities for small seeds).
- ● Plastic pots (4–6 inches deep; 1–2 per seed type).
- ● Lawn seed starter tray (for direct sowing; 1–2 per 100 sq ft).
- ● Watering Tools: Spray bottle (for gentle watering; 1).
- ● Watering can (with a fine rose nozzle; 1).
- ● Light Source: Grow lights (LED or fluorescent; 1–2 bulbs for indoor setups).
- ● Sunny windowsill (south-facing; 1 spot).
- ● Miscellaneous: Plastic wrap or humidity dome (to retain moisture; 1 sheet).
- ● Labels & markers (to track seed types; 5–10 labels).
- ● Seedling heat mat (to speed up germination; 1).
- ● Fertilizer (balanced 10-10-10 or organic compost; 1 small bag).
- ● pH testing kit (to check soil acidity; 1).
- ● Tweezers (for delicate seed placement; 1 pair).
- ● Timer (for consistent light cycles; 1).
Understanding the stages of a seed growing: a visual journey
Here's how to recognize each phase—from the first crack to a thriving plant.
🌱 Step 1: Imbibition – The Seed Wakes Up
The moment you water your seed packet, the real magic begins. Imbibition is when the seed absorbs moisture through its outer coat, swelling as it activates enzymes to break down stored nutrients. You won’t see anything yet, but inside, the seed’s metabolism shifts from dormancy to growth mode. This stage takes anywhere from 4 hours to 48 hours, depending on the seed type and temperature. For fast germinators like beans, you might notice the seed coat soften within hours, while slower seeds like tomatoes may take a full day.
Here's the thing—this is why I always pre-soak seeds in lukewarm water for 12 hours before planting. It jumpstarts the process, especially for seeds with hard outer shells like peas or beans. Just don’t let them dry out during this phase, or you’ll have to start over. The seed’s weight will double as it absorbs water, preparing for the next stage.
🌱 Step 2: Germination – The First Crack
This is the moment that matters: the radicle, or embryonic root, emerges first, pushing through the seed coat toward moisture. Within 24-72 hours (sometimes faster in warm conditions), you’ll see a tiny white tip breaking through. Don’t panic if it looks fragile—this root is the plant’s lifeline, anchoring it and starting nutrient uptake. The shoot (plumule) follows, but it’s always the root that comes first. You’ll know germination is underway when the seed coat splits open, revealing the first signs of life.
I keep my seed trays in a warm, dark place (around 70-75°F) during this stage to encourage speedy germination. Too much light now can inhibit root growth, so wait until you see that first white root before moving seedlings to brighter conditions. If your seeds aren’t sprouting within 7-10 days, they may need a little more warmth or moisture—check that soil isn’t drying out.
🌱 Step 3: Emergence – The Shoot Breaks Through
Once the radicle has established itself, the shoot emerges next, pushing upward through the soil. This is when you’ll see the first signs of green: the cotyledons, or seed leaves, unfurl to begin photosynthesis. These aren’t true leaves—they’re the plant’s first food source, packed with nutrients from the seed. You’ll notice the shoot growing faster now, reaching for light as it stretches toward the surface. Within 3-7 days of germination, the cotyledons will fully open, and the plant will start looking like a tiny version of its mature self.
This is where I make my first big adjustment: moving seedlings to bright, indirect light. Too much direct sun now can scorch delicate cotyledons, while too little light leads to leggy, weak growth. You’ll see strong seedlings have sturdy stems and dark green cotyledons, while weak ones look pale and stretched. If your seedlings are leaning toward the light, it’s time to rotate the tray or adjust their position.
🌿 Step 4: Seedling Growth – True Leaves Appear
The real transformation happens here. After the cotyledons have done their job, the plant produces its first true leaves—these are the ones that look like the mature plant’s foliage. This stage typically begins 7-14 days after germination, depending on the species. True leaves are smaller at first but develop veins and a shape distinct from the cotyledons. You’ll see the seedling’s growth speed up as it focuses on building its root system and foliage. This is when the plant starts looking like what you eventually want to harvest or enjoy.
Real talk: This is the moment to thin seedlings if you planted more than one per cell. Overcrowding now leads to weak, competitive plants. Use small scissors to snip unwanted seedlings at soil level—don’t pull them, or you’ll disturb the roots of the ones you’re keeping. Strong seedlings at this stage have compact growth, bright green leaves, and no yellowing. If you notice yellowing, it’s often a sign of overwatering or poor drainage.
☀️ Step 5: Vegetative Growth – Roots and Foliage Expand
Now the real work begins. The plant shifts focus to vegetative growth, producing more leaves, stems, and roots at a rapid pace. You’ll see leaves grow larger and more complex, with additional veins forming. The root system expands downward and outward, searching for water and nutrients. This stage lasts until the plant reaches maturity, which varies by species—some herbs like basil mature in 4-6 weeks, while vegetables like tomatoes take 8-12 weeks. You’ll know the plant is thriving when it develops a full canopy of leaves and a strong, woody stem (for plants like tomatoes or peppers).
Here’s where I adjust care based on the plant’s needs. Leafy greens like lettuce or spinach benefit from regular harvesting to encourage bushier growth, while fruiting plants (like tomatoes) need balanced fertilization to support both foliage and flower production. Watch for signs of stress: yellowing leaves (often nitrogen deficiency), wilting (underwatering or root issues), or stunted growth (too much shade or cold). Most problems at this stage are fixable with light adjustments or a nutrient boost.
⏰ Step 6: Maturity – Ready for Harvest or Flowering
The final stage is when the plant reaches its full potential. For vegetables, this means producing flowers, fruits, or edible leaves. For herbs, it’s when they develop their signature flavors and aromas. You’ll see flowers (for fruiting plants) or fully formed leaves (for greens) that are ready for harvest. Tomatoes develop fruit, basil emits its aromatic scent, and carrots grow to their full size. This stage can take anywhere from 6-12 weeks, depending on the plant. You’ll know it’s time to harvest when the plant looks vigorous, with no signs of stress and abundant production.
Don’t rush this stage—patience pays off. For example, basil leaves harvested too early lack flavor, while tomatoes picked too soon won’t ripen properly. I always check the plant’s growth habit: if it’s producing flowers but no fruit, it might need more phosphorus (try a bloom booster fertilizer). And if leaves start to yellow or drop, it could be a sign of over-maturity or disease, so act quickly to salvage what you can.
Tips & tricks for perfect seed sprouting success
Common pitfalls—and how to sidestep every one when nurturing seeds from dormancy to maturity.
Environmental Control: The 70-75°F temperature range during germination isn't just a suggestion—it's the sweet spot for metabolic activation. I use a simple seedling heat mat ($15) under my trays to maintain consistent warmth, especially in cooler climates. For seeds that take longer to germinate (like tomatoes), I cover them with a clear plastic dome to trap humidity and create a mini greenhouse effect. This cuts the 24-72 hour window by nearly half when conditions are ideal.
Seed Selection Strategy: Not all seeds are created equal when it comes to germination speed. I categorize seeds into three groups: fast (beans, peas - 4-24 hours), medium (lettuce, herbs - 24-48 hours), and slow (tomatoes, peppers - 48-72 hours). This helps me set realistic expectations and adjust my pre-soaking strategy accordingly. For the slowest germinators, I pre-soak for the full 12 hours and plant immediately, which gives them a head start on moisture absorption.
Light Transition Technique: The shift from darkness to light in Step 3 is where most beginners go wrong. I recommend using a grow light on a timer for 12 hours of light/day during the emergence stage. This mimics natural daylight cycles and prevents the leggy growth that occurs when seedlings stretch desperately toward any available light source. Position the light just 2-3 inches above the seedlings—closer than you think! The goal is to encourage compact, sturdy growth that can support itself.
Troubleshooting Common Issues: If your seeds aren't sprouting within the expected 7-10 day window, don't assume they're dead. First, check moisture levels—damp (not soggy) is ideal. Second, verify temperature consistency. I've found that placing a small thermometer in the soil gives more accurate readings than air temperature alone. For stubborn seeds, try scarification (lightly sanding the seed coat) or a warm water soak to break dormancy. Remember, some seeds need both warmth and darkness to germinate successfully.
Pro Tips for Stages Of A Seed Growing
- Common pitfalls—and how to sidestep every one when nurturing seeds from dormancy to maturity.
- Environmental Control: The 70-75°F temperature range during germination isn't just a suggestion—it's the sweet spot f...
- Seed Selection Strategy: Not all seeds are created equal when it comes to germination speed. I categorize seeds into ...
Frequently asked questions
Got questions about seed growth?
Here are some of the most common ones—plus quick, actionable answers to help you troubleshoot and succeed!
How long does it take for a seed to sprout?
The sprouting time varies by seed type: fast growers like radishes or lettuce sprout in 3–7 days, while slower ones (e.g., beans, tomatoes) may take 7–21 days. Check the seed packet for exact timelines—patience is key! Overwatering or inconsistent moisture can delay sprouting.
What if my seeds aren’t sprouting after 2 weeks?
Don’t panic! First, check if the seeds are viable (test with a damp paper towel—if they don’t swell, they may be old). Ensure proper conditions: warmth (65–75°F), moisture (keep soil damp, not soggy), and light (or darkness for some seeds like beans). If all else fails, try fresh seeds or a different variety.
How often should I water seeds?
Keep the soil consistently moist but never waterlogged—overwatering drowns seeds, while underwatering halts growth. Mist lightly 1–2 times daily or use a spray bottle. Once sprouts appear, reduce to 1–2 times weekly, letting the top inch of soil dry slightly between waterings.
Can I use regular soil for sprouting seeds?
Not ideal! Use a lightweight, sterile seed-starting mix (like coco coir or peat-based blends) to avoid compaction and disease. Regular garden soil can harbor pathogens or be too dense. For indoor sprouting, a damp paper towel or hydroponic setup works too—just rinse sprouts daily for freshness.
What’s the best temperature for seed germination?
Most seeds thrive between 65–75°F (18–24°C), but some (like peas or spinach) prefer cooler temps (50–60°F/10–15°C). Use a seedling heat mat (70–80°F) for slow starters or place pots in a sunny windowsill. Avoid extremes—cold slows growth, while heat above 85°F can kill delicate sprouts.
What if my seedlings look leggy or weak?
Leggy seedlings stretch toward light due to insufficient sunlight. Move them closer to a south-facing window or use a grow light 12–16 inches away for 12–14 hours daily. Thin crowded seedlings to avoid competition, and ensure pots have good drainage to prevent root rot.
Wrapping up and next steps
Watching a seed transform into a thriving plant is nothing short of magical! 🌱 From the first signs of germination to the robust growth of a seedling, each stage is a testament to nature’s resilience—and yours, too, if you’re nurturing these tiny wonders.
Whether you’re a gardening novice or a seasoned green thumb, understanding these stages empowers you to create the perfect conditions for success.
Ready to take the next step? Start small—plant a few seeds in a pot or garden bed and observe their journey firsthand. You’ll not only grow plants but also grow your confidence in the art of gardening. Happy planting! 🌿