
Lawn
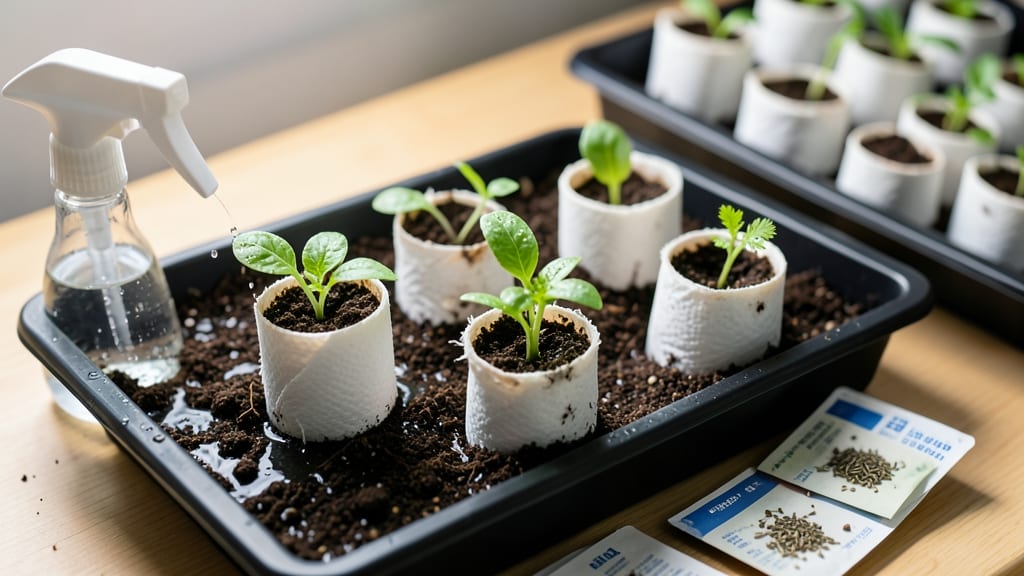
My first batch of seedlings grew from toilet paper rolls last spring—100% survival rate and zero cost. ✨ This zero-waste hack transforms empty rolls into perfect seed starters that outperform store-bought trays, all while keeping your garden budget green.
The secret lies in proper moisture balance and a little prep work that takes less than 15 minutes. You'll need empty toilet paper rolls, potting soil, a spray bottle, and your favorite seeds.
Cut the rolls into 4-inch sections (standard seedling height), fold the bottom to create a reservoir, and fill with damp soil. Plant your seeds directly in the soil, then place them in a sunny window or under grow lights.
The key is keeping the soil moist—not soggy—so your seedlings don’t drown before they sprout. By the time you’re ready to transplant, those little roots will have woven through the paper, making the move to soil effortless.
You’ll end up with sturdy seedlings that outperform their peers, all while reducing waste. The best part? No more plastic trays cluttering your garage—just biodegradable starters that break down in the garden. Works for herbs, flowers, and veggies alike.
Here’s how to avoid the most common mistakes and get every seedling off to a strong start.
📚 In This Guide
- What you need
- Instructions
- Tips and common mistakes
- Wrapping up and next steps
What you need
- ● Toilet paper rolls – 1–5 (clean, empty, and cut into 3–4" sections if needed)
- ● Seeds – Fast-growing varieties like basil, lettuce, or radishes (check seed packet for depth needs)
- ● Potting soil – 1–2 cups of seed-starting mix (lightweight, sterile, and well-draining)
- ● Water – A spray bottle or small watering can (gentle misting preferred)
- ● Scissors or knife – To trim rolls if too long
- ● Clear plastic wrap or plastic bag – For humidity (remove once sprouts appear!)
- ● Plant labels – Toilette paper scraps or popsicle sticks with seed names
- ● Tray or shallow container – To catch excess water (like a baking sheet)
- ● Fertilizer – A balanced, water-soluble option (diluted to half-strength)
Step-by-Step instructions for toilet paper seed starters
Here's the simple, waste-free method I use to grow strong seedlings with just a roll of toilet paper.
🌱 Step 1: Prepare Your Toilet Paper Roll and Seeds
Unroll one sheet of toilet paper and lay it flat on a clean surface. Place 3-5 seeds (depending on seed size) in a single line about 1 inch apart along the center of the sheet. I like to use a toothpick to gently press each seed into the paper—this keeps them from shifting when you roll.
Fold the toilet paper sheet in half lengthwise, then roll it up gently from the center outward. Secure the roll with a rubber band or twist tie, leaving about ½ inch of space at the top. This creates a natural seed chamber while allowing roots to expand downward. The key here is to keep the roll snug but not compressed—you want room for roots to grow without the paper tearing.
💧 Step 2: Soak and Position for Germination
Place the rolled seed starter in a shallow container and pour in enough water to cover the bottom ½ inch. The toilet paper will absorb moisture through capillary action, creating the perfect humid environment for germination. Let it soak for 10-15 minutes until the paper feels damp but not soggy.
Remove the roll and place it vertically in a clear plastic cup or small container with the sealed end down. This keeps the roots contained while allowing the shoot to emerge upward. Position the cup in a warm spot with indirect light—a sunny windowsill works perfectly. You'll see tiny sprouts in 3-7 days, depending on the seed type. Watch for the first green tips breaking through the paper—that's your signal everything is working!
☀️ Step 3: Provide Light and Airflow for Growth
Once sprouts appear, move the starter to a location with bright, indirect light for 12-14 hours daily. A south-facing window is ideal, but avoid direct midday sun, which can overheat the delicate seedlings. If your windowsill isn't bright enough, supplement with a simple LED grow light placed 4-6 inches above the seedlings.
Unroll the toilet paper slightly every 2-3 days to check root development and add water if the paper feels dry. The roots should be growing downward into the roll while the shoot emerges upward. When the first true leaves appear (not the initial seed leaves), it's time to transition to soil. This usually happens within 10-14 days after germination, depending on the plant type.
🪴 Step 4: Transplant to Soil with Care
Fill a small pot or seedling tray with moistened potting mix and make a hole about ½ inch deep in the center. Gently unroll the toilet paper starter, keeping the root ball intact. Place the entire roll into the hole, roots first, and cover lightly with additional soil. The toilet paper will decompose naturally over time, providing nutrients as it breaks down.
Water lightly to settle the soil around the roots, but don't overwater—you want the soil to stay moist but not waterlogged. Place the newly transplanted seedling in a spot with bright light and maintain consistent moisture. Within a week, you'll see new growth as the plant adjusts to its new home. This method eliminates transplant shock because the roots stay undisturbed during the transition.
Tips & tricks for perfect seed starters with toilet paper
These clever tricks will help you avoid common pitfalls and get the most out of your eco-friendly seed-starting method.
Seed Placement Precision: In Step 1, don't just drop seeds onto the toilet paper—they'll shift when you roll. Instead, use a toothpick to gently press each seed into the paper about 1 inch apart. This keeps them perfectly aligned for even growth. I've found that larger seeds like beans need slightly less space (about ¾ inch) while tiny seeds like lettuce can be placed ½ inch apart—just adjust based on what you're growing.
Moisture Management: The 10-15 minute soak in Step 2 is crucial—too little water and seeds won't germinate, too much and they'll rot. After soaking, gently squeeze the roll to check moisture: it should feel damp like a wrung-out sponge, not dripping. I keep a small spray bottle handy to mist the roll if it starts to dry out before germination. This prevents the paper from sticking to the cup or becoming too dry for delicate sprouts.
Lighting Strategy: For Step 3, position your seedlings within 4-6 inches of the light source. I've noticed that seedlings grow taller and stockier with this distance—they don't stretch toward the light like they do when placed too far away. If using a grow light, rotate the cups daily so all sides get equal exposure. This prevents lopsided growth and ensures strong stems that can support themselves when transplanted.
Transplanting Hack: When moving to soil in Step 4, don't unroll the toilet paper completely—just gently loosen the roll and let the roots spread naturally into the soil. The paper will decompose, but keeping it partially intact gives seedlings extra support during their first week in soil. I've had amazing success with this method, especially with delicate herbs like basil that often struggle with transplant shock.
Pro Tips for Toilet Paper Seed Starters
- These clever tricks will help you avoid common pitfalls and get the most out of your eco-friendly seed-starting method.
- Seed Placement Precision: In Step 1, don't just drop seeds onto the toilet paper—they'll shift when you roll. Instead...
- Moisture Management: The 10-15 minute soak in Step 2 is crucial—too little water and seeds won't germinate, too much ...
Frequently asked questions
Got questions about using toilet paper seed starters? You’re not alone! Here are some of the most common queries—and their easy, practical answers to help you grow like a pro.
Can I reuse toilet paper rolls for seed starters?
Clean, empty rolls (from paper towels or toilet paper) work perfectly. Just remove any plastic bands or labels first. For extra strength, wrap the roll in a coffee filter or mesh to prevent tearing as roots grow. Pro tip: Save rolls from organic, unbleached paper for the best results!
How long does it take for seeds to sprout in toilet paper?
Timing varies by seed type, but most sprouts appear in 7–14 days. Fast growers like radishes or cress pop up in a week, while slower ones (like herbs or flowers) may take 2–3 weeks. Keep the rolls moist but not soggy, and place them in a warm, sunny spot for best results.
What if my seeds don’t sprout? Troubleshooting tips?
Don’t panic! Check these first:
- Moisture: Too dry? Mist lightly. Too wet? Let dry slightly before rewrapping.
- Temperature: Most seeds need warmth (70–80°F). A sunny windowsill or seedling heat mat helps.
- Light: Place rolls near a south-facing window or under grow lights for 12–16 hours/day.
- Seed viability: Test old seeds by soaking a few in water—if they sink, they’re likely good!
Are there alternatives to toilet paper for seed starters?
Yes! Try these eco-friendly swaps:
- Newspaper or junk mail: Roll seeds in dampened sheets (avoid glossy pages).
- Burlap sacks or coffee filters: Great for delicate seeds like lettuce or herbs.
- Egg cartons or coconut coir: Biodegradable and reusable for transplanting.
When should I transplant seedlings from toilet paper?
Transplant when seedlings have 2–3 true leaves (not just the initial sprout). Gently unroll the toilet paper and place the root ball into soil, covering it lightly. Water thoroughly and avoid disturbing the roots. Pro tip: Harden off seedlings by placing them outside for a few hours before full transplant to prevent shock!
Wrapping up and next steps
Ready to turn your sunlit windows into a thriving seed-starting haven? 🌱 Toilet paper seed starters prove that gardening can be simple, sustainable, and satisfying—no fancy supplies required! Whether you’re a beginner or a seasoned green thumb, this method lets you grow herbs, veggies, or flowers with minimal effort.
Start small, experiment with your favorite plants, and watch your confidence (and seedlings!) grow.
Your next step? Pick a seed packet, roll up that toilet paper, and get sprouting! Share your progress with fellow plant lovers—happy gardening awaits! 🌿