
Trees
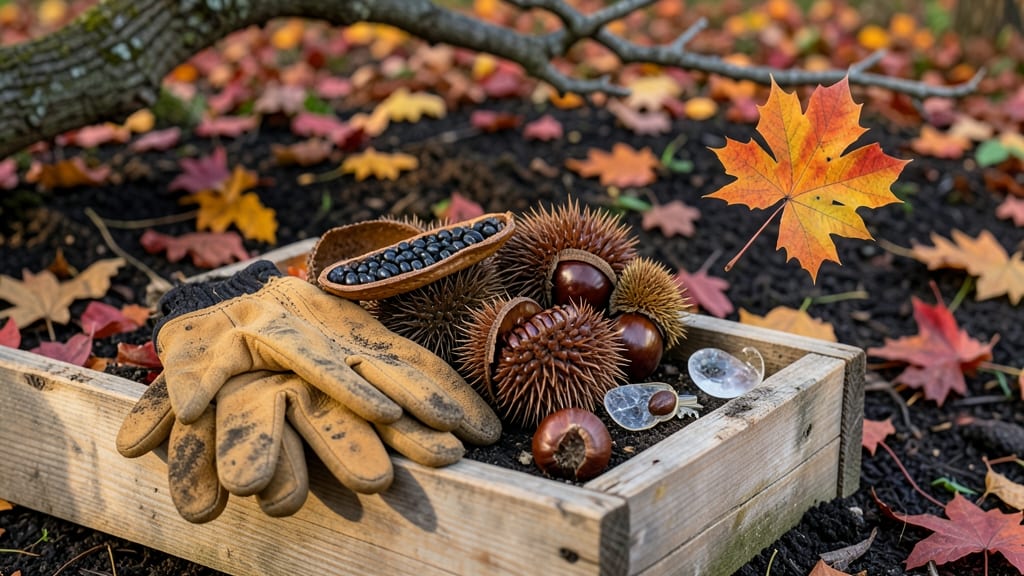
Collecting tree seed pods in fall means next year’s backyard forest starts now. 🌱 The secret to breaking seed dormancy isn’t just planting—it’s mimicking winter’s cold snap through cold stratification, a process that tricks seeds into thinking they’ve survived a natural season.
I’ve turned hundreds of collected pods into thriving saplings by mastering this simple technique, and you can too.
Most seeds need 60-90 days in moist, chilled conditions to germinate reliably. Maple, birch, and fruit tree seeds respond best to this method, while oaks and hickories demand extra patience (up to 120 days).
All you need is a plastic bag, some damp peat moss, and your freezer—or a shady spot outdoors if winters stay cold. The key is consistency: check moisture weekly and avoid letting seeds dry out.
By spring, you’ll see tiny roots pushing through the soil, ready to transplant. These seedlings grow stronger than nursery-bought trees because they’ve adapted to your local climate from day one. Imagine watching an oak sprout from a pod you collected last autumn—that’s the magic of cold stratification done right.
Works for shade trees, fruit varieties, and even ornamental species. The only rule? Start collecting pods when they’re fully ripe but before they split open—then let nature do the rest of the work. Let’s get those seeds growing!
📚 In This Guide
- What you need
- Instructions
- Tips and common mistakes
- Wrapping up and next steps
What you need
- ● Fresh tree seed pods: Collect from mature, healthy trees (e.g., maple, oak, or hickory). Aim for at least 50 pods for reliable results.
- ● Potting mix: Use a well-draining, sterile blend (e.g., 50% peat moss + 50% perlite or vermiculite). You’ll need about 2–3 gallons depending on container size.
- ● Containers: Opt for: Plastic storage bins with lids (10–12 inches deep, 2–3 bins for batch processing).
- ● OR Seedling trays with drainage holes (100+ cells for individual pods).
- ● Moisture control tools: Spray bottle (for gentle hydration).
- ○ Fine-mist hose attachment (optional for larger batches).
- ● Refrigerator or cold frame: A standard fridge (34–40°F) or outdoor cold frame (if temps stay 35–50°F).
- ● Labeling supplies: Waterproof markers + masking tape (to track pod types/dates).
- ● Gloves: Heavy-duty gardening gloves (some pods have sharp edges!).
- ● Timer/alarm: To monitor stratification duration (most pods need 60–90 days).
- ● Humidity dome or plastic wrap (to retain moisture in trays).
- ● Grow lights (if extending stratification indoors post-cold treatment).
- ● pH test kit (to check soil pH, ideal range: 5.5–7.0).
- ● Journal/notebook (to log pod sources, stratification dates, and germination progress).
Instructions: how to cold stratify tree seed pods for success
This method mimics nature’s winter process—just add patience and you’ll have strong seedlings ready to plant.
🌱 Step 1: Collect and Clean the Seed Pods
Harvest pods when they’re fully mature but still dry to the touch—usually late fall or early winter. I like to gather them after the first frost when they’ve naturally released from the tree. Rinse off any dirt or debris with a damp cloth, but avoid soaking them. Let them air-dry completely for 24 hours in a warm, shaded spot.
Open the pods carefully with a small knife or your fingers, removing any remaining pulp or fibrous material. This step is critical—leftover pulp can rot the seeds during stratification. Spread the cleaned seeds on a paper towel to dry for another 12 hours. You’ll know they’re ready when the shells feel crisp and the seeds rattle slightly inside.
💧 Step 2: Moisten and Prepare the Stratification Medium
Fill a quart-sized resealable plastic bag with 2 inches of moistened peat moss or coconut coir. The medium should feel like a wrung-out sponge—damp but not dripping. I like to mix in a handful of perlite for extra aeration, which helps prevent mold. Sprinkle the cleaned seeds evenly over the medium, spacing them about 1 inch apart.
Seal the bag loosely—just enough to keep moisture in but allow some airflow. Place it in a ziplock bag (double-bagging prevents leaks) and label it with the seed type and date. This is where many gardeners go wrong: sealing too tightly traps too much humidity, which can cause rot. A slightly open bag or one with small ventilation holes works best.
☀️ Step 3: Stratify in the Refrigerator for 6-12 Weeks
Store the bag in your refrigerator’s crisp drawer, where temperatures hover around 35-45°F. Check the moisture level every 2 weeks—if the medium feels dry, mist it lightly with water. You’ll see condensation inside the bag, which is normal. This mimics the natural winter chilling period seeds need to break dormancy.
Patience is key here. Some seeds, like maple or oak, need 90-120 days of cold treatment, while others, like hickory or walnut, may only require 60 days. If you’re unsure, err on the longer side. You’ll know stratification is working when the seeds plump up slightly or small roots begin to form—this usually happens after 4-6 weeks.
🌿 Step 4: Plant the Stratified Seeds
After the cold period, remove the seeds from the bag and plant them ½ inch deep in a well-draining seed-starting mix. Use small pots or a seed tray to give each seed room to grow. Keep the soil consistently moist but not soggy—use a spray bottle to avoid disturbing the seeds. Place the pots in a warm, bright spot with indirect light for 4-6 weeks.
Germination can take 2-12 weeks, depending on the species. I’ve had hickory seeds sprout in 3 weeks and stubborn oaks take nearly 3 months. Once the first true leaves appear, gradually introduce the seedlings to direct sunlight to harden them off. This slow transition prevents shock and encourages strong root development.
⏰ Step 5: Transplant Seedlings Outdoors
Wait until all danger of frost has passed in your area—usually 2-4 weeks after your last frost date. Choose a location with well-draining soil and partial shade for the first year. Dig a hole twice as wide as the seedling’s root ball but only as deep as the container it came in. Gently loosen the roots if they’re circling.
Water the seedling deeply before transplanting to reduce shock, then mulch around the base with 2 inches of organic mulch to retain moisture and suppress weeds. Young seedlings are delicate, so avoid fertilizing for the first 6-8 weeks. Instead, focus on keeping the soil consistently moist and protecting them from strong winds or direct sun until they establish a strong root system.
Tips & tricks for perfect tree seed stratification
These little details make all the difference when you're mimicking nature's winter process.
Pod Collection Timing: Harvest pods after the first frost when they've naturally released from the tree. This ensures they're fully mature but still dry enough to handle. I've learned the hard way that waiting until late winter can mean pods that are too dry or even sprouting prematurely—both of which ruin the stratification process.
Medium Moisture Secret: The "wrung-out sponge" test is your best friend here. If you squeeze the peat moss or coconut coir and water drips out, it's too wet. If it crumbles when you touch it, it's too dry. The right moisture level prevents both rot and dehydration during those crucial 6-12 weeks in the fridge. I keep a spray bottle handy for quick adjustments every 2 weeks.
Stratification Check: After about 4-6 weeks in the refrigerator, check for signs of success—seeds that have plumped up slightly or show tiny root hairs. This is your cue that dormancy is breaking. If you don't see this by week 6, your seeds might need an extra 2-4 weeks of cold treatment. Don't rush it—patience here means stronger seedlings later.
Transplant Timing: Those 2-4 weeks after your last frost date are critical. Check nighttime temperatures—if they're consistently above 50°F, your seedlings are ready. I've transplanted too early and lost seedlings to unexpected frosts, so always verify with your local weather service or plant hardiness zone map.
Pro Tips for Tree Seed Pods
- These little details make all the difference when you're mimicking nature's winter process.
- Pod Collection Timing: Harvest pods after the first frost when they've naturally released from the tree. This ensures...
- Medium Moisture Secret: The "wrung-out sponge" test is your best friend here. If you squeeze the peat moss or coconut...
Frequently asked questions
Got questions about tree seed pods and cold stratification? You’re not alone! Here are some of the most common queries—and their answers—to help you get the best results for next season’s blooms.
What is cold stratification, and why do seed pods need it?
Cold stratification mimics winter’s natural process, breaking seed dormancy so they’ll germinate reliably. Many tree seed pods (like those from maples, oaks, or hickories) require this step to trigger growth hormones. Without it, seeds may stay dormant or sprout unevenly. Think of it as a “wake-up call” for your future trees!
How long should I cold-stratify seed pods?
The ideal duration depends on the species, but most tree seed pods need 60–90 days in the fridge (or buried outdoors in a protected spot). Check your seed packet for specifics—some, like serviceberry, thrive with just 30–60 days, while others (e.g., walnut) may need longer. Pro tip: Label your pods to track progress!
Can I skip cold stratification for some seed pods?
Some seeds (like those from Paulownia or Catalpa) germinate without stratification, but tree seed pods rarely bypass this step. If you’re impatient, try a hot water soak (160°F for 5–10 minutes) as a shortcut—but success rates drop. When in doubt, stratify!
My seed pods are moldy after stratification—what went wrong?
Mold usually means excess moisture or poor airflow. Fix it by:
- Drying pods thoroughly before storage (pat with a paper towel).
- Using a ventilated container (like a mesh bag) to prevent condensation.
- Checking for damp substrate—switch to damp (not soggy) peat moss if needed.
How do I know if my stratified seed pods are still viable?
Test viability by cutting open a few pods—look for plump, firm seeds with no shriveled or discolored centers. For extra peace of mind, do a float test: Drop seeds in water. Viable ones sink; floaters are likely dead. If most pass, your batch is ready for planting!
Wrapping up and next steps
From maple helicopters to mesquite pods, you now have the blueprint to unlock next season’s blooms through cold stratification! 🌱 Whether you’re a gardener eager for vibrant flowers or a nature enthusiast preserving wild beauty, this method transforms patience into predictable success.
Start small—grab a few pods, test the process, and watch your garden thrive with confidence.
Next step: Pick a seed pod today, follow the steps, and share your progress with fellow green thumbs. Your future trees (and their blooms!) will thank you. 🌿✨