
Lawn
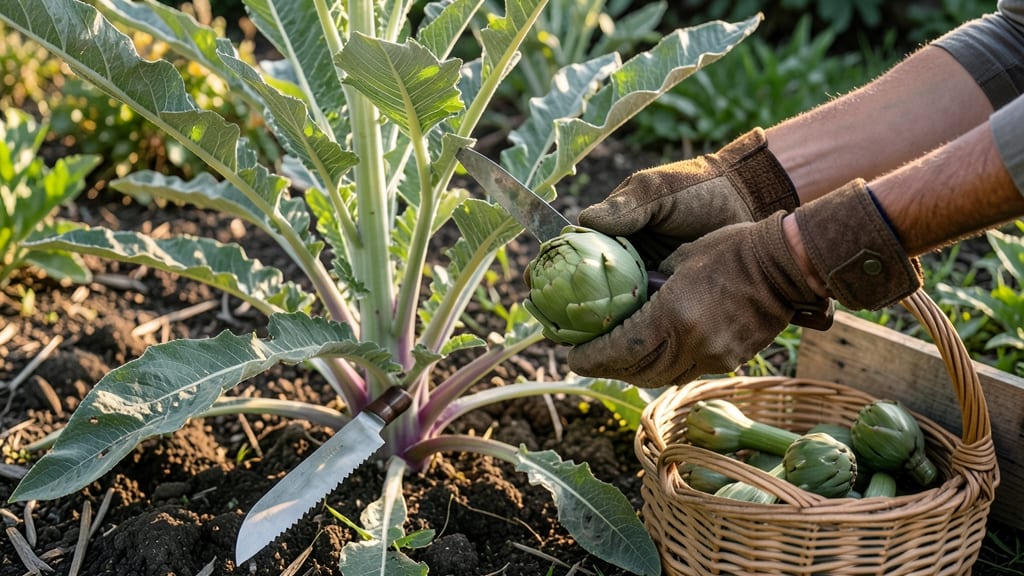
Harvesting artichoke seed pods isn’t just about saving seeds—it’s about unlocking next year’s garden potential. 🌱 The key is timing: wait until the pods turn from green to a dry, papery brown, usually 4-6 weeks after the artichokes bloom.
If you harvest too early, the seeds won’t be viable; too late, and they’ll scatter in the wind.
Once you’ve got the pods, the real work begins. Split them open with your fingers or a knife, then spread the seeds on a tray to dry for 2-3 weeks in a warm, dry spot.
This step is critical—wet seeds rot, and you’ll end up with nothing but frustration. Think of it like curing herbs: patience pays off.
Clean seeds by winnowing them in a sieve or letting a fan blow away the chaff. Store them in a sealed container in the fridge for up to 2 years, and you’ll have a stash ready for spring planting.
The first time you see those familiar fuzzy leaves emerge, you’ll know it worked.
Don’t let dormancy scare you off—most artichoke seeds need a cold snap to break it. A quick 4-week fridge stint mimics winter and boosts germination rates. With these steps, you’ll go from seed pod to thriving plants in no time.
📚 In This Guide
- What you need
- Instructions
- Tips and common mistakes
- Wrapping up and next steps
What you need
- ● Mature artichoke plants (preferably Cynara cardunculus varieties like 'Green Globe' or 'Violetto' for best seed viability). Quantity: 1–3 plants (or 5–10 if cross-pollination is a concern).
- ● Pruning shears or sharp scissors (sterilized with rubbing alcohol to prevent disease).
- ● Paper bags or breathable mesh bags (1–2 per plant; 10–12" in diameter). Why? Allows airflow while protecting pods from pests.
- ● Permanent marker (to label bags with plant names/dates).
- ● Ruler or measuring tape (for tracking pod maturity; aim for 1.5–2.5" in length).
- ○ Drying tray or screen (optional but helpful for even airflow; 12"x12" minimum).
- ● Seed envelope or airtight container (for long-term storage; e.g., glass jars with silica gel packets).
- ● Humidity monitor (ideal range: 40–50% during drying).
- ● Food dehydrator (set to 95°F for gentle drying).
- ● Fine-mesh sieve (for separating seeds from chaff post-harvest).
- ● Plant journal/notebook (to log pod sizes, drying times, and germination tests).
- ● Gloves (nitrile or cotton; artichoke spines can be persistent!).
Step-by-Step guide to harvesting artichoke seed pods without damaging viability
Here’s how to collect seeds from artichokes without crushing them—key for saving next year’s crop.
🌱 Step 1: Identify and Select Mature Seed Pods
Wait until artichoke heads turn brown and dry—this means the seeds inside are fully mature. Gently squeeze the head; if it feels light and brittle, it’s ready. Avoid green or firm heads—they won’t yield viable seeds. I always check two to three heads per plant to ensure a good seed supply.
Use clean, sharp pruning shears to cut the entire head off at the base. This prevents damaging the plant and ensures you capture all seeds. Lay the head on a flat surface, like a cutting board, to dry for 3-5 days in a warm, dry spot. No direct sunlight—just indirect light and good airflow.
✂️ Step 2: Open the Seed Pods Gently
Once the head is completely dry, place it in a paper bag and gently twist it open. The outer bracts will separate easily, revealing the fuzzy seed pod inside. Avoid tearing—this can damage the seeds. I like to use a small knife to carefully slice open the pod if it resists.
Empty the seeds into the bag and shake it gently to remove any remaining chaff. The seeds should be small, dark, and slightly oval. Discard any seeds that look shriveled or discolored—these won’t germinate. Store the good seeds in a cool, dry place for up to two years if kept dry.
💧 Step 3: Test Seed Viability Before Planting
To ensure your seeds will sprout, fill a small glass with warm water and add 10-15 seeds. Let them soak for 24 hours. Viable seeds will sink to the bottom—discard any that float. This simple test saves time and frustration later.
After soaking, spread the viable seeds on a paper towel and place them in a sealed plastic bag. Store them in the fridge for 2-4 weeks to break dormancy. This cold treatment mimics winter conditions and boosts germination rates. I always label the bag with the date and variety—artichokes take 60-90 days to mature, so timing matters.
☀️ Step 4: Prepare for Next Season’s Planting
Start seeds indoors 8-10 weeks before your last frost date in well-draining potting mix. Plant them ¼ inch deep in small pots or seed trays. Keep the soil moist but not soggy—artichokes hate wet roots. A grow light ensures strong seedlings; natural light alone often makes them leggy.
Transplant seedlings outdoors after the last frost when soil is at least 60°F. Space them 3-4 feet apart—artichokes need room to grow. Mulch around the base to retain moisture and suppress weeds. Here’s the thing—artichokes are slow starters, so be patient. You’ll see first buds in 60-90 days, but the real payoff comes the following year.
Tips & tricks for perfect artichoke seed pod harvesting
These little-known tricks will help you maximize your seed yield while keeping those delicate pods intact.
Timing is Everything: The 3-5 day drying period in Step 1 is non-negotiable—this is when the seed pods fully mature and become brittle enough to open cleanly. I've learned the hard way that rushing this step leads to stubborn pods that tear rather than twist open. Place your drying heads on a screen or rack to allow airflow on all sides, which speeds up the process by about 24 hours compared to flat surfaces.
Gentle is the Key: When opening those fuzzy seed pods in Step 2, think of them like delicate flowers rather than tough husks. The twist-and-pull method works best when the pod is completely dry—if you feel any resistance, let it dry another day. I've found that using a small butter knife (not a sharp one) works better than fingers for slicing open stubborn pods without damaging the seeds inside.
Viability Test Tricks: The 24-hour water test in Step 3 is foolproof, but here's a pro tip: use room-temperature water instead of warm. Warm water can cause viable seeds to absorb too much moisture and sink prematurely. Also, shake the glass gently before discarding floaters—sometimes seeds get stuck to the sides. For extra accuracy, test 20 seeds instead of 10-15, as this gives you a more reliable sample size.
Pro Tips for Artichoke Seed Pod
- These little-known tricks will help you maximize your seed yield while keeping those delicate pods intact.
- Timing is Everything: The 3-5 day drying period in Step 1 is non-negotiable—this is when the seed pods fully mature a...
- Gentle is the Key: When opening those fuzzy seed pods in Step 2, think of them like delicate flowers rather than toug...
Frequently asked questions
Got questions about harvesting artichoke seed pods?
You’re not alone! Here are answers to the most common queries—from timing to troubleshooting—so you can maximize your seed yield with ease.
When is the best time to harvest artichoke seed pods?
Harvest seed pods when they’re fully mature but before they split open or dry out completely. Look for pods that turn brown, feel dry to the touch, and have a papery texture—usually 8–12 weeks after flowering. Morning harvests prevent overnight moisture loss, preserving seed viability.
How long does it take for artichoke seed pods to mature?
Maturation time varies by variety, but most artichoke seed pods take 60–90 days from pollination to full ripeness. Warm climates (70–80°F) speed up the process, while cooler weather may extend it. Monitor pods weekly—early harvest = higher-quality seeds!
Can I use store-bought artichokes to grow new plants?
No—store-bought artichokes are bred for edible buds, not seed production. Their seed pods are often sterile or hybrid, meaning they won’t grow true-to-type plants. For viable seeds, use pods from open-pollinated heirloom varieties grown in your garden.
What should I do if my seed pods are being eaten by pests?
Common culprits include slugs, snails, and birds. Prevent damage by:
- Handpick pests early in the day.
- Use row covers for young pods.
- Apply diatomaceous earth around plants (safe for seeds).
- Hang reflective tape to deter birds.
How do I store harvested artichoke seed pods?
Store pods in a cool (50–60°F), dry place with good airflow (e.g., paper bags or mesh sacks). Keep them away from direct sunlight to prevent moisture loss. Seeds remain viable for 2–3 years if stored properly—label pods by variety!
Wrapping up and next steps
Growing artichoke seed pods is a rewarding journey that connects you to nature’s bounty—especially when you master the art of zero-twist harvesting for viable seeds! 🌱 With the right tools, patience, and a little know-how, you can propagate your own plants or share seeds with fellow gardeners.
Whether you’re a seasoned gardener or a curious beginner, this guide has given you the confidence to try.
Ready to take the next step? Start small—plant a few pods this season, experiment with your technique, and watch your garden thrive. Happy growing, and may your artichoke harvest be as abundant as your success! 🌟