
Size
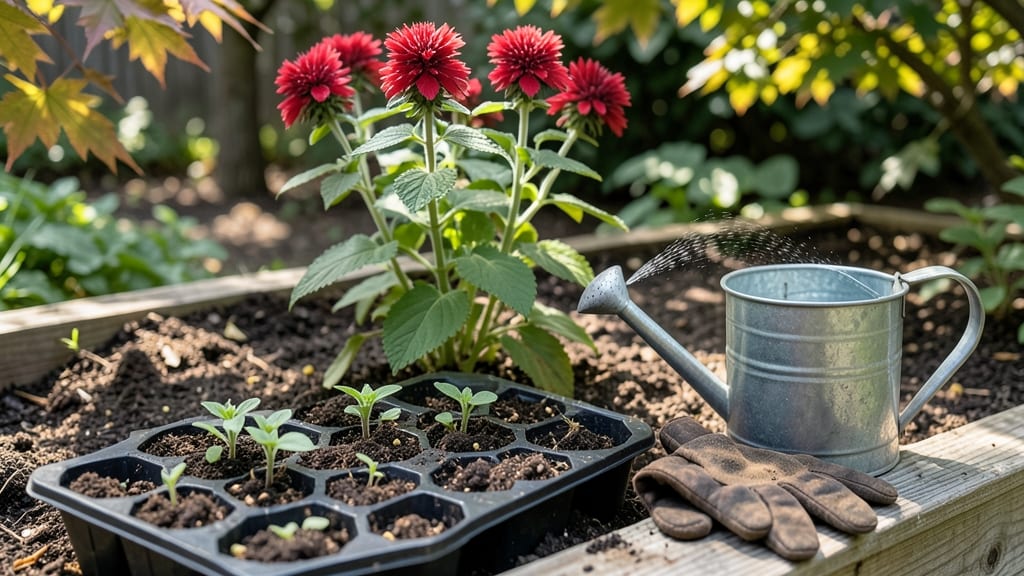
Growing bee balm seed in a garden means vibrant red blooms that hum with pollinators by midsummer. 🌸 I’ve learned the hard way—cold-stressed seedlings need patience, but the payoff is worth it. These hardy perennials reward you with years of color and fragrance once established.
Start with well-draining soil and a sunny spot—bee balm thrives in full sun but tolerates partial shade. Plant seeds just ¼ inch deep in early spring or late summer, keeping the soil consistently moist but never soggy.
Germination takes 10-20 days, so stay patient and protect tender seedlings from frost.
Once sprouted, thin seedlings to 18-24 inches apart to give them room to grow. Bee balm pairs beautifully with coneflowers, black-eyed Susans, and lavender, creating a pollinator magnet that lasts all season. The key? Consistent moisture and occasional deadheading to encourage more blooms.
Troubleshooting is simple: yellowing leaves often mean overwatering, while stunted growth signals too much shade. With the right care, your bee balm will multiply over time, turning into a low-maintenance, high-impact garden staple that keeps coming back year after year.
📚 In This Guide
- What you need
- Instructions
- Tips and common mistakes
- Wrapping up and next steps
What you need
- ● Bee balm seeds: Choose a variety like Monarda didyma (scarlet bee balm) or Monarda fistulosa (wild bergamot). Buy 1–2 packets (50–100 seeds each) for a small garden or 3–5 packets for a larger patch.
- ● Seed-starting mix: A high-quality, sterile potting soil (1–2 bags, 1–2 cubic feet each) to prevent damping-off disease.
- ● Containers: Biodegradable peat pots (5–10, 2–3 inches deep) or seed trays with cells (1–2 trays, 72–128 cells each).
- ○ Grow lights or sunny windowsill: A full-spectrum LED grow light (optional but helpful for indoor starts) or a south-facing window with 6+ hours of sunlight.
- ● Watering can or spray bottle: A fine-mist sprayer for gentle watering or a small watering can with a narrow spout.
- ● Plant labels: Durable markers or tags (10–20) to track varieties.
- ● Garden gloves: Protect your hands from prickly stems (a pair of lightweight gardening gloves works well).
- ● Trowel or transplant tool: A small hand trowel (3–4 inches wide) for moving seedlings.
- ● Mulch: Organic mulch (straw, shredded leaves, or wood chips) to retain moisture and suppress weeds.
- ○ Fertilizer: A balanced, slow-release fertilizer (5-10-5 or 10-10-10) for transplanting (optional but recommended).
- ● Pollinator-friendly companions: Native wildflowers or herbs (like lavender or coneflowers) to plant nearby for extra bee appeal!
Step-by-step guide to growing bee balm from seed
Here's how to cultivate these hardy, pollinator magnets—no fancy tricks required.
🌱 Step 1: Start Seeds Indoors 10-12 Weeks Before Last Frost
Bee balm seeds need cold stratification to germinate properly, so I begin indoors using the paper towel method. Place damp paper towels in a sealed plastic bag with the seeds, then refrigerate for 2-3 weeks. Check daily—they're ready when tiny white roots appear. This mimics winter's natural chilling period and breaks dormancy.
After stratification, sow seeds ¼ inch deep in seed-starting mix in small pots. Keep the soil consistently moist but never soggy. A humidity dome helps maintain even moisture, but remove it once seedlings emerge to prevent fungal issues. Germination takes 14-21 days at 65-75°F, so be patient—cold stratification can delay sprouting.
☀️ Step 2: Harden Off and Transplant After Frost Danger Passes
When seedlings develop 4-6 true leaves and night temperatures stay above 50°F, it's time to transplant. I harden off seedlings gradually over 7-10 days by placing them outside in partial shade for increasing durations each day. This toughens their cell walls and prevents transplant shock.
Choose a site with full sun to partial shade—bee balm tolerates both but blooms most prolifically in morning sun with afternoon shade. Space plants 18-24 inches apart to allow airflow and reduce fungal diseases. Dig holes twice as wide as the root ball to encourage root spread and water deeply after planting.
💧 Step 3: Maintain Consistent Moisture and Fertility
Bee balm thrives in moist, well-draining soil with regular watering. I water deeply 1-2 times per week during establishment, ensuring the top 2-3 inches of soil remain moist but not waterlogged**. Mulch with 2-3 inches of organic mulch to retain moisture and suppress weeds—this is especially critical during hot summer months.
Feed plants with a balanced, water-soluble fertilizer (10-10-10) every 4-6 weeks during the growing season. Too much nitrogen produces lush foliage but fewer flowers, so I cut back to half-strength fertilizer once blooming begins. Deadhead spent blooms regularly to encourage continuous flowering and prevent self-seeding where you don't want it.
✂️ Step 4: Divide and Renew Every 3-4 Years
Bee balm forms dense clumps over time, and divisions every 3-4 years rejuvenates growth. I divide plants in early spring or fall when temperatures are mild. Dig up the entire clump, then separate it into sections with a sharp spade, ensuring each piece has 3-5 shoots. Replant divisions immediately in prepared soil.
This is also the time to address any crowded areas. Bee balm spreads aggressively, so I keep it contained with underground barriers if needed. The plants handle division well, and you'll see vigorous new growth within 4-6 weeks—a great way to propagate free plants for friends or expand your garden.
⏰ Step 5: Prepare for Winter and Next Season
Bee balm is hardy to USDA zones 3-9, but in colder regions, I cut back stems to 2-3 inches tall in late fall. Leave the basal foliage intact—it provides insulation for the crown and protects against winter dieback. In spring, new growth emerges quickly once temperatures rise above 50°F.
For continuous blooms, I stagger plantings by sowing seeds every 2 weeks in early spring. This ensures a steady succession of flowers from early summer through fall. The more you grow, the more pollinators you'll attract—hummingbirds, bees, and butterflies will make your garden their favorite stop.
Tips & tricks for perfect bee balm cultivation
These insider strategies will help you coax vibrant bee balm blooms that thrive season after season.
Stratification Success: The 2-3 week cold stratification period is non-negotiable for bee balm seeds—this mimics winter conditions and breaks their natural dormancy. I place seeds between damp paper towels in a sealed bag, then store them in the refrigerator's crisper drawer where temperatures stay consistently around 35-40°F. Pro tip: Check daily for root development—once you see those tiny white roots, your seeds are ready to plant.
Harden Off Gradually: Rushing the 7-10 day hardening-off process can shock delicate seedlings. Start with just 30 minutes of outdoor exposure on day one, then gradually increase by 30 minutes daily. I place my seedlings in a sheltered spot with partial shade to prevent sudden temperature swings. Watch for leaves that look slightly wilted—they're telling you to bring them back inside for another day.
Soil and Spacing Strategy: Bee balm thrives in moist but well-draining soil, so I always amend my garden beds with 2-3 inches of compost before planting. The 18-24 inch spacing between plants isn't just about aesthetics—it creates airflow that prevents fungal diseases like powdery mildew, which can devastate bee balm blooms. For container growing, use pots at least 12 inches deep with drainage holes.
Fertilizer Timing: The 4-6 week feeding schedule is crucial, but timing matters even more. I apply my first dose of 10-10-10 fertilizer when seedlings show their 4-6 true leaves—this gives them a boost right when they need it. Once blooming begins, I switch to half-strength fertilizer to prevent excessive leaf growth at the expense of flowers. The secret? Feed in the morning so plants have time to absorb nutrients before evening.
Pro Tips for Bee Balm Seed Grow A Garden
- These insider strategies will help you coax vibrant bee balm blooms that thrive season after season.
- Stratification Success: The 2-3 week cold stratification period is non-negotiable for bee balm seeds—this mimics wint...
- Harden Off Gradually: Rushing the 7-10 day hardening-off process can shock delicate seedlings. Start with just 30 min...
Frequently asked questions
Got questions about growing bee balm from seed? You’re not alone! Here are answers to the most common queries to help you cultivate a thriving garden of these cold-hardy beauties.
When is the best time to plant bee balm seeds?
Plant bee balm seeds indoors 8–10 weeks before your last frost date (typically February–March in most climates). Transplant seedlings outdoors after the soil warms to at least 50°F (10°C) and all frost risk has passed—usually late spring. If you’re in a cooler zone, start seeds early to give them time to establish before summer heat arrives!
Why aren’t my bee balm seeds germinating?
Bee balm seeds need consistent moisture and warmth (70–75°F or 21–24°C) to sprout. Try these fixes:
- Use a seedling heat mat or place pots on a sunny windowsill.
- Keep soil damp (not soggy) with a spray bottle or humidity dome.
- Be patient—germination can take 2–4 weeks!
How do I attract more pollinators to my bee balm?
Bee balm is a pollinator magnet, but you can boost traffic with these tips:
- Plant in full sun (6+ hours/day)—bees and butterflies love it!
- Avoid pesticides (neonicotinoids are especially harmful).
- Add companion plants like coneflowers, milkweed, or lavender for a pollinator buffet.
- Leave some stems standing after blooming to provide winter shelter for beneficial insects.
Can bee balm survive winter in cold climates?
Yes! Bee balm is perennial in USDA Zones 3–9 and thrives in cold winters. To protect it:
- Mulch heavily with 3–4 inches of straw or leaves after the first frost.
- Avoid cutting back until early spring (when new growth appears).
- In extreme cold (<0°F/-18°C), add a light layer of burlap over the crown.
What can I do if my bee balm gets powdery mildew?
Powdery mildew (a white, dusty fungus) is common in humid conditions. Combat it with:
- Improve airflow by spacing plants 18–24 inches apart.
- Water at the base (avoid wetting leaves) in the morning so foliage dries quickly.
- Apply a baking soda spray (1 tsp baking soda + 1 quart water + a drop of dish soap) weekly.
- Remove and dispose of infected leaves (don’t compost them!).
Wrapping up and next steps
Growing bee balm from seed is a rewarding journey that brings vibrant blooms and buzzing pollinators to your garden year after year! With the right soil, sunlight, and a little patience, you’ll soon enjoy clusters of cheerful flowers that even cold snaps can’t dim.
Whether you’re a seasoned gardener or just starting out, bee balm is a hardy, low-maintenance plant that’ll add beauty and life to your outdoor space.
Now that you’re armed with all the tips and tricks, roll up your sleeves and get planting! 🌱 Start with just a few seeds, experiment with different varieties, and watch your garden transform into a pollinator paradise. Happy growing—and enjoy the sweet rewards of your labor! 🐝💐