
Lawn
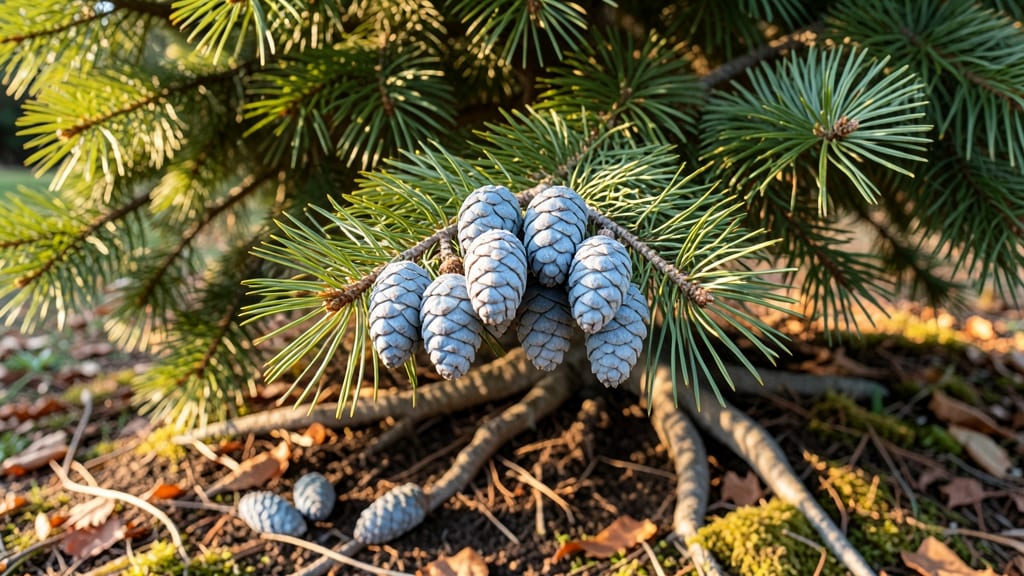
Those tiny cedar seed pods hold the secret to growing your own towering evergreens—if you crack the cold-moist prep trick. 🌱 I’ve struggled with spotty germination until I learned the exact balance of moisture and chilling that finally made seeds sprout reliably.
The key isn’t just planting them; it’s tricking them into breaking dormancy the way nature would over winter.
Start by harvesting mature pods in late fall when they’ve turned brown and brittle—usually after the first frost. Inside, you’ll find tiny seeds that need 60-90 days of cold, moist stratification to wake up.
Skip this step, and you’ll be waiting months (or forever) for germination. I use a simple plastic bag method with damp peat moss, but a fridge works too.
Once stratified, sow seeds ¼ inch deep in well-draining soil, keeping it consistently moist but never soggy. Young seedlings emerge slowly—count on 4-8 weeks—but once they appear, they’re tough enough to handle transplanting.
The payoff? A 10-foot tree in just a few years, all from those little pods you’d normally ignore.
This method works for Eastern Red Cedar, Western Red Cedar, and even Juniper—just adjust the cold period slightly. The biggest mistake? Rushing the process. Patience here means fewer failed attempts and more reliable results. Ready to grow your own cedar forest?
📚 In This Guide
- What you need
- Instructions
- Tips and common mistakes
- Wrapping up and next steps
What you need
- ● Cedar seed pods: 100–200 fresh, mature pods (harvested from healthy trees in late summer/fall).
- ● Plastic storage bag: 1 gallon-sized with a zip-top closure (for cold-moist stratification).
- ● Water: Distilled or dechlorinated (to avoid chemical exposure).
- ● Paper towels or coffee filters: 2–3 sheets (for moisture retention).
- ● Plastic wrap or aluminum foil: Enough to seal the bag tightly.
- ● Refrigerator: A standard fridge set to 34–40°F (1–4°C) for stratification.
- ● Small pots or seed trays: 2–3 inch diameter (biodegradable or plastic).
- ● Seed starting mix: 1–2 bags of sterile, well-draining potting soil (e.g., Pro-Mix or coco coir blend).
- ● Spray bottle: For gentle watering.
- ○ Heat mat (optional but helpful): A 70°F (21°C) mat to speed germination.
- ● Grow lights: LED or fluorescent (12–16 hours/day) for indoor seedling growth.
- ● Humidity dome: To maintain moisture during early stages.
- ● pH test kit: To check soil pH (ideal range: 5.5–7.0).
- ● Fungicide: A mild solution (e.g., Neem oil) to prevent damping-off.
- ● Label markers: To track planting dates and varieties.
Step-by-step instructions for germinating cedar seed pods
Here's how to break dormancy and coax those stubborn cedar seeds to sprout.
🌱 Step 1: Collect and Prepare Fresh Seed Pods
Harvest mature cedar seed pods when they've turned from green to brown and begin opening naturally. I like to collect them in late summer or early fall when they're fully ripe but still attached. Store them in a paper bag for a few weeks to allow any remaining seeds to dry completely before processing.
Open the pods carefully—cedar seeds are tiny and easily scattered. Empty the contents onto a clean white surface to make sorting easier. You'll see small, winged seeds mixed with chaff. Use a soft brush or your breath to separate the viable seeds from debris. Aim to gather at least 50 clean seeds to ensure good germination rates.
💧 Step 2: Perform Cold-Moist Stratification
Place the cleaned seeds in a sealed plastic bag with a damp paper towel. The towel should be moist but not dripping—squeeze it gently to check. Add about 1 tablespoon of distilled water to the bag, then seal it tightly. This creates a humid environment that mimics winter moisture conditions.
Place the sealed bag in your refrigerator's crisper drawer where temperatures stay consistently between 35-40°F. Store the bag upright so seeds don't accumulate at the bottom. Check weekly for mold—if you see any, open the bag to air out for a few hours before resealing. Cold stratification typically takes 6-8 weeks, but some seeds may need up to 12 weeks to break dormancy.
☀️ Step 3: Sow Stratified Seeds in Prepared Soil
Fill small seedling trays with a sterile seed-starting mix (never garden soil—it's too dense). Moisten the mix until it holds together when squeezed but doesn't drip. Cedar seeds are tiny, so I use a fine mist spray bottle to water the surface evenly. Press the soil down lightly to create a firm seedbed.
Sow seeds 1/8 inch deep—just barely covering them. I use a toothpick to create tiny holes and place one seed in each. Space seeds about 1/4 inch apart in rows 1/2 inch apart. Place the tray in a clear plastic dome or cover with plastic wrap to maintain humidity. Keep the tray in indirect light at room temperature (65-70°F) until germination begins.
🌿 Step 4: Provide Warmth and Light for Germination
Once seeds begin sprouting (usually 4-8 weeks after sowing), remove the cover immediately. Cedar seedlings are delicate and need fresh air to prevent damping-off. Move the tray to a bright, indirect light location—south-facing windows work well. You'll see tiny green needles emerge first, followed by the main shoot.
When seedlings reach 1 inch tall, transplant them to individual 2-inch pots with fresh seed-starting mix. Keep the soil consistently moist but never soggy—cedar seedlings hate wet feet. Gradually introduce them to direct sunlight over 1-2 weeks to prevent shock. True cedar trees take years to mature, but proper early care ensures strong, healthy growth.
⏰ Step 5: Transition to Outdoor Conditions
After seedlings develop 3-4 sets of needles (usually 6-8 weeks after germination), they're ready for outdoor hardening. Place them in a sheltered spot for 1-2 hours the first day, gradually increasing exposure over 2 weeks. Choose a location with partial shade—young cedars can scorch in intense afternoon sun.
Plant outdoors after the last frost when soil temperatures reach at least 50°F. Space seedlings 3-4 feet apart in well-draining soil. Mulch around the base with 1 inch of organic mulch to retain moisture and suppress weeds. Water deeply once a week unless rainfall provides adequate moisture. Cedar trees are drought-tolerant once established, but young plants need consistent care.
Tips & tricks for germinating cedar seed pods
These little-known tricks will help you maximize your cedar seed germination success with minimal fuss.
Pod Selection Matters: The timing of your pod collection makes all the difference. Harvest when pods are fully brown but still slightly closed—this indicates peak ripeness. I've found that pods collected in late September often yield the highest germination rates because they've had time to fully mature but haven't yet opened naturally. Store them in a paper bag for 2-3 weeks before processing to ensure complete dryness, which prevents mold during stratification.
Stratification Setup: When creating your cold-moist environment in Step 2, pay special attention to the damp paper towel. It should be wrung out thoroughly—excess water creates anaerobic conditions that promote mold growth. I like to place the sealed bag in a zip-top plastic bag with a tiny hole punched in it for extra security against leaks. The upright storage position prevents seeds from accumulating at the bottom where they might suffocate. Remember, those 35-40°F temperatures are non-negotiable—any warmer and the stratification process won't work properly.
Sowing Precision: For Step 3, precision is key with those tiny seeds. I've found that using a toothpick to create planting holes works best—just press it straight down about 1/8 inch deep, then gently tap the seed into place. The spacing of 1/4 inch between seeds and 1/2 inch between rows gives each seedling room to grow without competition. After sowing, I give the tray a very light misting with distilled water (not tap water) to prevent mineral buildup that could inhibit germination. The plastic dome creates a greenhouse effect that maintains perfect humidity levels.
Pro Tips for Cedar Seed Pods
- These little-known tricks will help you maximize your cedar seed germination success with minimal fuss.
- Pod Selection Matters: The timing of your pod collection makes all the difference. Harvest when pods are fully brown ...
- Stratification Setup: When creating your cold-moist environment in Step 2, pay special attention to the damp paper to...
Frequently asked questions
Got questions about growing cedar seed pods? You’re not alone! Here are answers to the most common queries—from timing to troubleshooting—to help you succeed with your cold-moist prep method.
When is the best time to plant cedar seed pods?
Plant cedar seed pods in early fall (September–October) for natural stratification. If sowing indoors, start 8–10 weeks before the last frost. Avoid spring planting—the seeds need cold moisture to break dormancy effectively.
How long should I keep the seeds cold and moist?
Cold-moist stratification typically takes 6–12 weeks. Place seeds in a sealed container with damp (not soggy) peat moss or paper towels, then refrigerate. Check weekly—if mold appears, reduce moisture. Patience pays off!
Can I use cedar seed pods from my yard?
Yes, but ensure they’re from a healthy, non-treated tree (avoid areas sprayed with herbicides). Collect pods when they’re brown and dry (late summer/fall). Store them in a cool, dry place until stratification.
Why aren’t my cedar seeds germinating?
Common culprits:
- Insufficient cold: Seeds need 40–50°F (4–10°C) for 2+ months.
- Too dry or wet: Keep medium consistently moist (like a wrung-out sponge).
- Old seeds: Viability drops after 1–2 years. Test freshness with a float test (sink = viable).
Are there alternatives to cedar seed pods for cold stratification?
If cedar isn’t your focus, try these easy-to-stratify seeds:
- Pine, spruce, or fir (conifers like cedar).
- Apple, pear, or cherry (fruit tree seeds).
- Echinacea or black cohosh (perennials).
Wrapping up and next steps
Cultivating cedar seed pods is a rewarding journey that combines patience with nature’s resilience—especially when you embrace the cold-moist prep method for germination. By understanding the right conditions, materials, and troubleshooting tips, you’re already setting yourself up for success.
Whether you’re restoring native landscapes or simply nurturing these unique trees, your efforts will contribute to a thriving ecosystem. 🌱
Ready to dive in? Start by gathering your supplies, then follow the step-by-step guide to give those seed pods the best chance to sprout. Your green thumb is closer than you think—just plant, wait, and watch nature work its magic!