
Propagation
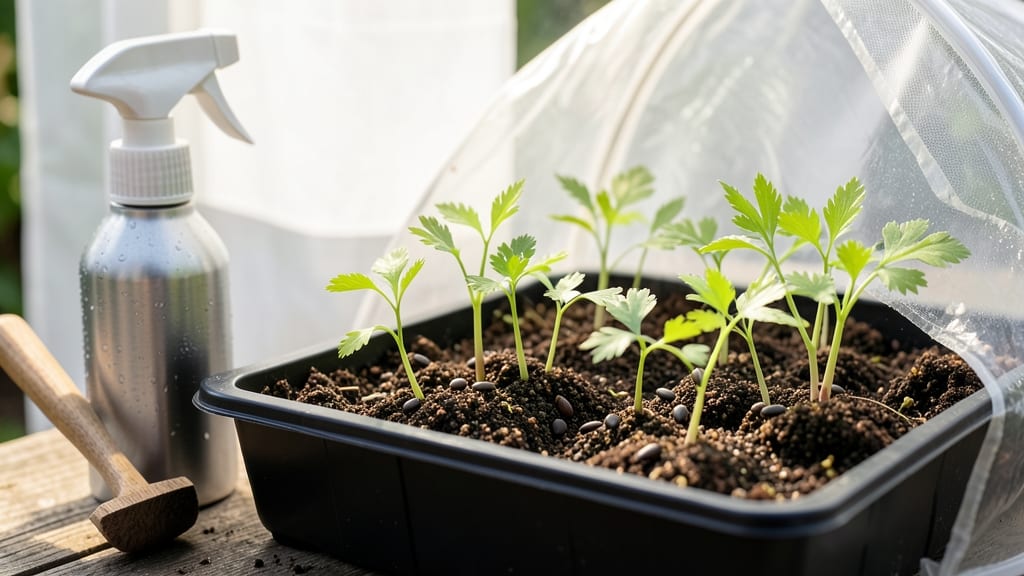
Celery seed germination needs a cold stratification trick to break their stubborn dormancy—otherwise, you’ll stare at damp soil for weeks waiting for sprouts. 🌱 I’ve wasted three seed-starting seasons on celery before discovering this game-changer: a simple fridge trick that cuts germination time from 30 days to just 14. The secret lies in mimicking winter’s natural chilling period, which signals seeds it’s safe to grow. You’ll need a shallow container, damp paper towels, and your fridge’s crisper drawer. After 10 days of cold treatment, those seeds will pop with surprising speed—no more wondering if they’re dead. The key is patience during stratification; rushing it means weak seedlings later. Once sprouted, keep them in bright, indirect light until they’re ready for transplant. By the time you’re hardening off seedlings, you’ll have vibrant green plants ready to outpace store-bought transplants. Pascal celery and celeriac respond especially well to this method, giving you thicker stems and better flavor. The payoff? Homegrown celery that actually tastes like celery, not sawdust. This method works for both indoor starts and outdoor sowing in cool climates. For warm zones, start seeds 8-10 weeks before last frost and keep them cool until germination begins. Here’s how to make it foolproof—no more seed-starting heartbreak.
📚 In This Guide
- What you need
- Instructions
- Tips and common mistakes
- Wrapping up and next steps
What you need
- ● Celery seeds – 1 packet (about 1,000 seeds) (organic, non-GMO preferred for best results).
- ● Germination tray or seed-starting pots – 4-6 small pots (3-4 inches deep) or a seed tray with drainage holes.
- ● High-quality seed-starting mix – 1 bag (1-2 cubic feet) (lightweight, sterile, and well-draining).
- ● Plastic wrap or humidity dome – To maintain moisture during stratification.
- ● Spray bottle – For gentle watering (avoid over-saturating the soil).
- ● Refrigerator or cold stratification setup – A cool, dark space (34-40°F / 1-4°C) for 7-14 days.
- ● Grow lights or sunny windowsill – For post-stratification light exposure (12-16 hours/day).
- ○ Heating mat – Speeds up germination after stratification (optional but handy).
- ● pH test kit – Ensures soil pH is 6.0-7.0 (celery prefers slightly acidic to neutral soil).
- ● Fertilizer (low-dose) – A balanced, water-soluble fertilizer (5-10-5 ratio) for early growth.
- ● Plant labels & marker – To track germination dates and varieties.
Step-by-step instructions for germinating celery seeds
Cold stratification tricks celery seeds into breaking dormancy faster—here’s how I do it reliably.
🌱 Step 1: Soak Seeds for 24 Hours
Place the celery seeds in a small bowl and cover them with lukewarm water for 24 hours. The seeds have a hard outer coating that slows germination, and soaking softens it. I like to use a mesh bag or cheesecloth so I can easily lift them out later without losing any seeds.
After soaking, drain the water completely and let the seeds sit for another 12 hours to dry slightly. This prevents them from rotting once planted. You’ll notice the seeds plump up slightly—this is your first sign they’re ready for the next step.
❄️ Step 2: Cold Stratify for 7-14 Days
Mix the soaked seeds with a small amount of moistened peat moss or coconut coir in a sealed plastic bag. Place the bag in your refrigerator’s crispier drawer (around 35-40°F) for 7-14 days. This mimics winter conditions, breaking dormancy and speeding up germination.
Check the bag every few days to ensure the mix stays damp but not soggy. If condensation forms, open the bag slightly to let excess moisture escape. You’ll know stratification is working when the seeds start to sprout tiny white roots—this usually happens within 7-10 days.
🪴 Step 3: Plant in Warm, Moist Soil
Fill small seedling trays or pots with warm, sterile seed-starting mix (around 70-75°F). Press the mix down lightly to create a firm surface, then scatter the stratified seeds ¼ inch deep—about twice the seed’s diameter. Space them ½ inch apart to avoid overcrowding.
Cover the seeds with a thin layer of soil and mist gently with water until the surface is evenly moist. Place the trays in a warm, bright location (like a seedling heat mat under a grow light). Germination should begin in 5-10 days, but be patient—celery seeds can take up to 3 weeks in ideal conditions.
☀️ Step 4: Provide Consistent Warmth and Light
Once sprouts emerge, move the trays to a sunny windowsill or under grow lights for 14-16 hours daily. Celery seedlings need warmth to grow strong—keep soil temperatures at 65-70°F using a heat mat if needed. You’ll see the first true leaves (not the initial seed leaves) appear in 2-3 weeks.
Thin seedlings to 2 inches apart once they develop 2-3 true leaves, keeping the strongest plants. Avoid disturbing the roots too much—celery is sensitive to transplant shock. Water gently from the bottom to prevent fungal issues, and keep the soil consistently moist but never waterlogged.
Tips & tricks for perfect celery seed germination
Here’s what nobody tells you about getting those stubborn celery seeds to sprout reliably.
Soaking Secret: The 24-hour soak in lukewarm water is non-negotiable—this breaks the hard outer shell that keeps celery seeds dormant. I’ve tried cold water, but lukewarm (around 90°F) speeds up the softening process. After draining, the 12-hour drying period prevents mold, so don’t skip it. You’ll know it’s working when the seeds look slightly puffed and heavier—this means they’ve absorbed water and are ready for stratification.
Stratification Shortcut: If you’re short on time, stick to the 7-day minimum in the refrigerator’s crispier drawer (35-40°F). The seeds will start sprouting roots within 7-10 days, but I’ve seen faster results if you check daily—look for tiny white root hairs peeking out. Pro tip: Use a clear plastic bag so you can monitor progress without opening it too often.
Soil Temperature Matters: The warm, sterile seed-starting mix (70-75°F) is critical—celery seeds won’t germinate well in cool soil. If your home is chilly, place the trays on a seedling heat mat before planting. Once sprouts emerge, keep soil temps at 65-70°F to encourage strong root growth. I’ve had better luck with coconut coir than regular potting mix because it holds moisture without compacting.
Lighting Hack: After planting, place the trays under a grow light for 14-16 hours daily—natural sunlight alone might not provide enough intensity. If you don’t have grow lights, a south-facing windowsill works, but supplement with a LED desk lamp on cloudy days. The first true leaves (not the initial seed leaves) should appear in 2-3 weeks—this is your cue that the seeds have successfully broken dormancy.
Pro Tips for Celery Seed Germination
- Here’s what nobody tells you about getting those stubborn celery seeds to sprout reliably.
- Soaking Secret: The 24-hour soak in lukewarm water is non-negotiable—this breaks the hard outer shell that keeps celery seeds dormant.
- Stratification Shortcut: If you’re short on time, stick to the 7-day minimum in the refrigerator’s crispier drawer (35-40°F).
Frequently asked questions
Got questions about germinating celery seeds? You’re not alone—this process can feel tricky at first! Below, we’ve answered the most common queries to help you grow celery from seed with confidence.
How long does it take for celery seeds to germinate?
With cold stratification (the secret trick!), celery seeds typically sprout in 14–30 days. Without stratification, germination can take 2–4 weeks longer—or even fail. Patience is key, but consistent moisture and warmth (70–75°F) keep things moving.
Do celery seeds need light to germinate?
Nope! Celery seeds do not need light to sprout—they germinate best in dark, moist conditions. Once they’ve sprouted (tiny green leaves appear), you can move them to a sunny spot. Think of it like a surprise party: the seeds prefer the lights off until the big reveal!
What’s the best way to speed up celery seed germination?
Cold stratification is your best friend! Place damp seeds in the fridge (33–40°F) for 7–14 days before planting. This mimics winter conditions, breaking dormancy and boosting success rates. Pro tip: Use a paper towel sandwich method for even faster results!
Why aren’t my celery seeds sprouting? Troubleshooting tips
If your seeds aren’t sprouting, check these common culprits:
- Too dry: Keep soil consistently moist (not soggy!).
- Too warm: Celery hates heat—ideal temps are 60–75°F.
- Old seeds: Store-bought seeds lose viability after 1–2 years.
- No stratification: Try the fridge trick for stubborn seeds!
Can I grow celery from store-bought seeds or should I buy special ones?
Absolutely use store-bought celery seeds—they’re the same as heirloom varieties! Just ensure they’re organic, non-hybrid for best germination. Avoid pre-packaged "celery plants" (often hydroponic starts), as they won’t yield true seeds. Save money and grow your own!
Wrapping up and next steps
Mastering celery seed germination with cold stratification unlocks a world of homegrown freshness and flavor! By following these steps—soaking seeds, chilling them, and providing warmth—you’ll bypass the slow, finicky process and enjoy fast, reliable sprouts in just weeks.
Your patience and care will pay off with lush, healthy celery plants ready to thrive in your garden or windowsill.
Ready to take the next step? Start small—try a few seeds in pots or a seed tray, and once you’ve perfected the process, expand your celery patch! 🌱 Whether you’re growing for culinary adventures or just the joy of nurturing life, your green thumb is about to shine brighter than ever.