
Lawn
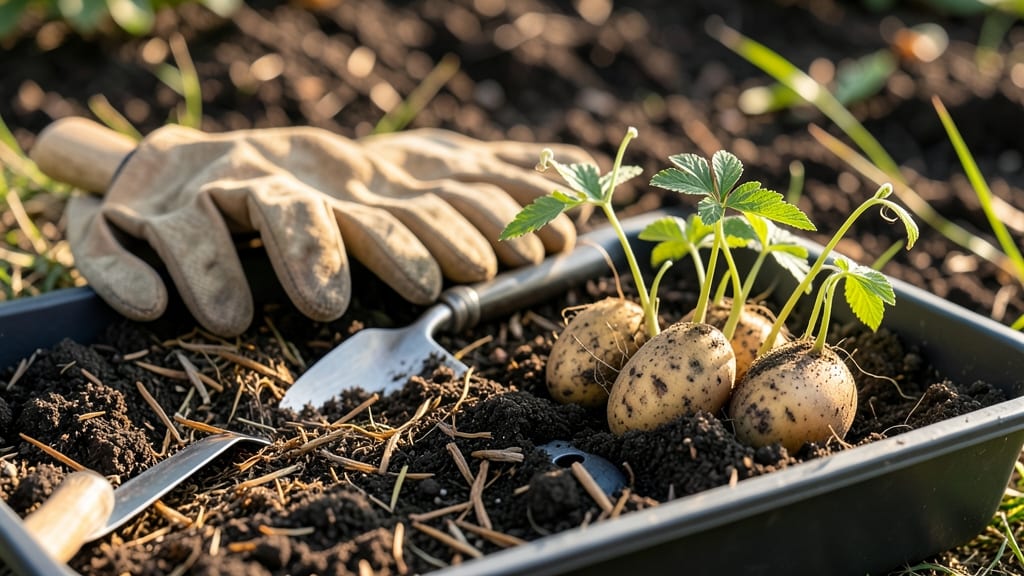
Using chitted seed potatoes gives you a 10-14 day head start on the growing season—no fancy tools or science, just a sunny windowsill or cool basement. 🌱 I learned this trick after watching my first batch of potatoes take forever to sprout, and now I plant mine weeks earlier than neighbors, which means earlier harvests and bigger yields.
The process is simple: expose the potatoes to light and cool temperatures so they start growing before they even hit the soil.
All you need are your seed potatoes, a bright spot (like an east-facing window), and a little patience. The ideal temperature is between 45-55°F, which mimics early spring conditions. If your home runs warmer, a basement or garage works too—just keep them out of freezing temps.
You’ll see tiny white sprouts (called "chits") appear in about 2-3 weeks, signaling they’re ready for planting.
Once chitted, your potatoes will hit the garden stronger and faster, producing tubers weeks ahead of unchitted ones. The plants establish deeper roots sooner, resist frost better, and even handle transplant shock like pros.
You’ll know it’s working when your hills burst with vibrant green foliage within days of planting—proof that those early sprouts paid off.
If sprouts grow too long before planting, simply trim them back to ½ inch to prevent stress. And if your climate is still too cold? No problem—store them in a cool, dark place until soil temps warm up.
The key is consistency: keep them light, keep them cool, and soon you’ll be harvesting potatoes that make your neighbors green with envy.
📚 In This Guide
- What you need
- Instructions
- Tips and common mistakes
- Wrapping up and next steps
What you need
- ● Seed potatoes: 5–10 lbs (or ~5–10 medium-sized potatoes), certified disease-free and labeled for your climate zone (e.g., Russet, Yukon Gold, or Red Pontiac).
- ● Chitting container: A shallow tray, egg carton, or mesh bag (with drainage holes if using a container).
- ○ Growing medium (optional but recommended): Peat-free potting mix (1–2 gallons) or
- ● Coconut coir or vermiculite (for moisture retention).
- ● Spray bottle: For gentle misting (avoid soaking).
- ● Sharp knife or pruning shears: For cutting seed potatoes (if needed).
- ○ Thermometer (optional): To monitor temperatures (ideal: 45–55°F for chitting).
- ● Labeling tags: To track potato varieties if mixing types.
- ○ Gloves (optional): For handling soil or spuds comfortably.
- ○ Grow lights (optional): If chitting in low-light areas (12–14 hours/day).
- ● Access to a cool, dark space (e.g., basement, garage, or pantry) with indirect light.
- ● Time: 4–6 weeks for sprouting (longer for slower varieties).
- ● Patience! 😉 Sprouts should be 1–2 inches long before planting outdoors.
Step-by-Step instructions for chitting seed potatoes
Here's how to jumpstart your potatoes with this simple cold prep method—you'll see sprouts in just days.
🌱 Step 1: Choose and Prepare Your Seed Potatoes
Select certified disease-free seed potatoes (organic or untreated is best). Look for ones with 1-2 inch diameter—they'll produce the most uniform sprouts. Cut larger potatoes into 2-3 inch pieces, ensuring each has at least 1-2 eyes (the dimples where sprouts emerge). Let the cut surfaces dry for 1-2 days to prevent rotting.
I like to store my potatoes in a cool, dark place for a week before chitting. This helps them wake up from dormancy and develop stronger sprouts. Avoid refrigerating them—the cold can damage the tubers. Once you're ready to start, place them in a bright, cool spot (around 50-60°F) to encourage early sprouting.
💧 Step 2: Set Up the Chitting Environment
Find a location that stays consistently cool but has good airflow—like a sunny windowsill or a shelf near an open window. I use a cardboard egg carton or small paper cups to hold each potato upright. This keeps them stable and prevents moisture from pooling around the cut sides.
Arrange the potatoes so their eyes face upward—this is where the sprouts will emerge. If you're using a windowsill, position them on the north-facing side to avoid overheating. You'll see tiny green shoots appear in 2-4 weeks, signaling they're ready for planting.
☀️ Step 3: Monitor and Maintain the Chitting Process
Check your potatoes every 3-5 days to ensure they're not drying out or developing mold. If the sprouts grow longer than 1 inch, they're ready to plant. Longer sprouts mean faster establishment in the soil.
Here's the thing—if your sprouts turn green and leggy, they've been exposed to too much light. Move them to a slightly darker spot but keep them cool. Avoid watering them during this stage—excess moisture can cause rot. Once the sprouts reach ½ to 1 inch, they're perfect for planting.
⏰ Step 4: Prepare for Planting (When to Move Them Outdoors)
Timing is everything. Plant your chitted potatoes 2-3 weeks before your last frost date—this gives the sprouts time to establish roots before the ground warms up. If you're in a cooler climate, you can plant them even earlier.
Before planting, I like to harden off the potatoes by placing them in a shady outdoor spot for a few hours a day for 3-5 days. This helps them adjust to outdoor conditions. Once they're ready, plant them 4 inches deep with the sprouts facing upward. Space them 12 inches apart in rows that are 3 feet apart.
Tips & tricks for perfect chitted seed potatoes
These simple tricks will help you get the fastest, healthiest sprouts every time—no guesswork involved.
Potato Selection Tip: The size and condition of your seed potatoes make all the difference. Look for firm potatoes with at least 1-2 eyes—these are the growth points where sprouts will emerge. If you're working with larger potatoes, cutting them into 2-3 inch pieces with 1-2 eyes each ensures uniform sprouting. After cutting, let those surfaces dry for 1-2 days—this critical step prevents rot when you start chitting.
Environmental Control: That 50-60°F temperature range in Step 1 isn't just arbitrary—it's the sweet spot for waking up potato dormancy without shocking the tubers. If your home tends to run warmer, place a small fan nearby to maintain airflow. And here's what nobody tells you—if your sprouts start looking pale or leggy, they're getting too much light. Move them to a slightly darker spot but keep them cool; you want sturdy, green sprouts, not weak, stretched-out ones.
Monitoring Strategy: The 3-5 day check-ins in Step 3 are your secret weapon against mold and rot. I like to use a small notebook to track each potato's progress—draw a quick sketch of the sprouts and note their length. This helps you spot problems early, like blackened spots (too much moisture) or shriveled tubers (drying out). When those sprouts hit ½ to 1 inch, they're ready to plant—longer sprouts mean faster root establishment in the soil.
Hardening Off Hack: That 3-5 day hardening off period before planting is where most gardeners fail. Start with just 1-2 hours a day in shade, then gradually increase exposure. Think of it like sun protection for your potatoes—they're used to indoor conditions and need time to adjust. Pro tip: If you're in a cooler climate, you can actually plant your chitted potatoes 2 weeks before your last frost date—those sprouts will give you a head start on the season.
Pro Tips for Chitted Seed Potatoes
- These simple tricks will help you get the fastest, healthiest sprouts every time—no guesswork involved.
- Potato Selection Tip: The size and condition of your seed potatoes make all the difference. Look for firm potatoes wi...
- Environmental Control: That 50-60°F temperature range in Step 1 isn't just arbitrary—it's the sweet spot for waking u...
Frequently asked questions
Got questions about chitting seed potatoes? You’re not alone—this method can feel like a gardening superpower! Here are some of the most common concerns to help you grow like a pro:
What exactly does “chitting” mean, and why bother?
Chitting is the process of pre-sprouting seed potatoes in a cool, bright spot (like a windowsill) to encourage early growth. It gives your plants a head start, leading to faster harvests and stronger tubers. Think of it as giving your potatoes a “warm-up” before planting—no more waiting for slow starts!
How long should I chit my seed potatoes before planting?
Most gardeners chit potatoes for 4–6 weeks before the last frost date in your area. Look for sprouts about 1–2 inches long—they should be firm, not leggy. If they get too long, they’ll struggle to support themselves in the soil. Adjust timing based on your climate!
What if my chitted potatoes start to rot or mold?
If you spot soft, mushy sprouts or fuzzy mold, it’s likely from too much moisture or warmth. Discard affected tubers immediately—don’t risk planting them! Store your potatoes in a cool (40–50°F), dark, and dry place (like a paper bag) until planting. Proper airflow is key!
Can I chit potatoes in a dark closet instead of near a window?
Yes! You don’t need direct sunlight—just a consistent temperature (50–60°F) and indirect light. A dark closet, basement, or even a seedling tray under grow lights works. Just rotate them weekly so sprouts grow evenly. No windowsill? No problem!
What’s the best way to plant chitted potatoes?
Plant them “rose-end down” (the side with the most sprouts) about 4 inches deep in loose, well-draining soil. Space them 12–15 inches apart in rows 3 feet apart. Water lightly after planting, and avoid disturbing the sprouts—they’re delicate early on!
Can I chit potatoes too early and store them?
If you chit potatoes 2–3 months early, store them in a cool, dark place (like a fridge) until planting. Check them weekly—discard any that shrivel or rot. Just avoid refrigerating them long-term, as it can turn their starches to sugar and make them taste sweeter (and less ideal for planting).
Wrapping up and next steps
Growing your own potatoes from chitted seed potatoes is a rewarding way to ensure a thriving garden—especially when you skip the cold prep! 🌱 By understanding the right conditions, timing, and care, you’ve got everything you need for fail-proof sprouting and a bountiful harvest.
Whether you’re a seasoned gardener or just starting out, this method makes the process simple and effective.
Now that you’re armed with the know-how, take the next step—plant those chits in well-draining soil and watch your potato patch flourish! Happy gardening! 🌟