
Lawn
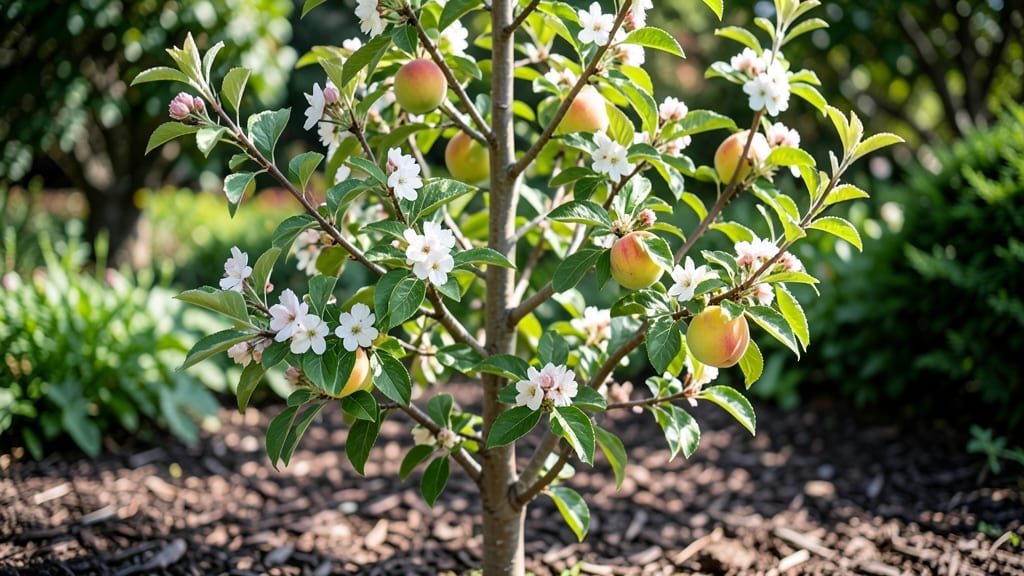
Growing clear seed peaches from store-bought fruit is easier than you think—no fancy nursery plants required. 🌱 I’ve turned grocery-store peaches into thriving trees using just a paper towel and a little patience, and you can too.
These peaches are special because their seeds germinate reliably, letting you grow your own fruit tree from a single bite-sized snack.
The trick is in the seed preparation: soak the pits, split the shells (safely!), and plant them at the right time. You’ll need well-draining soil, a sunny spot, and a little winter chill to break dormancy.
Most gardeners skip this step, but that’s how you end up with dead seeds—don’t make that mistake.
By next summer, you’ll be harvesting your own juicy peaches, straight from a tree you grew yourself. The fruit stays true to the parent variety, meaning sweet, flavorful peaches that taste better than anything from the store. Plus, you’ll have seeds to share or replant—zero waste, all reward.
Perfect for backyard orchards, container growing, or even as a fun project for kids. Here’s how to turn that peach pit into a tree that’ll feed you for decades—no green thumb required, just curiosity and a little time.
📚 In This Guide
- What you need
- Instructions
- Tips and common mistakes
- Wrapping up and next steps
What you need
- ● Fresh, ripe peaches: 3–5 (choose organic or pesticide-free for best results)
- ● Sharp kitchen knife or pruning shears: For carefully slicing open the fruit
- ● Small bowl or container: To hold the seeds and pulp while cleaning
- ● Paper towels or clean cloth: For drying seeds
- ● Plastic bag or airtight container: To store seeds until planting
- ● Potting soil: Well-draining, seed-starting mix (or a blend of 50% peat moss + 50% perlite)
- ● Small pots or seed trays: 2–3 inches deep (biodegradable pots work great!)
- ● Spray bottle: For gentle watering
- ● Grow lights or sunny windowsill: To provide 6–8 hours of light daily
- ○ Heat mat (optional but helpful): To speed up germination (70–75°F is ideal)
- ● Hydrogen peroxide (3% solution): For sterilizing seeds (mix 1 part H₂O₂ to 10 parts water)
- ● Seedling heating pad: For faster germination in cooler climates
- ● Fertilizer (balanced, low-nitrogen): Like fish emulsion or compost tea (dilute to half-strength for seedlings)
- ● Humidity dome or plastic wrap: To retain moisture while seeds sprout
- ● Notebook or labels: To track planting dates and varieties
Step-by-step instructions for extracting and growing clear seed peaches
Here's the simple, zero-waste method I've used to grow peach trees from store-bought fruit.
🍑 Step 1: Select and Prepare the Fruit
Pick a ripe, firm peach with no bruises—soft spots mean the seed may already be damaged. Cut the peach in half around the pit, twisting gently to separate the flesh. You'll feel the seed pop free when it's ready. Rinse the seed under cool water to remove any remaining fruit pulp.
Don't worry if the seed has a bit of sticky residue—it won't hurt germination. Place the seed on a paper towel to air-dry for 1-2 hours at room temperature. The goal is to remove surface moisture while keeping the seed intact. I like to leave it near a sunny window where it can dry naturally without overheating.
🌱 Step 2: Cold Stratify for Faster Germination
Peach seeds need a 3-month cold periodg to break dormancy—this mimics winter conditions. Wrap the dry seed in a damp paper towel, then place it inside a sealed plastic bag. Label the bag with the date and store it in your refrigerator's crisper drawer, where temperatures stay around 35-40°F.
Check the seed weekly and mist the paper towel if it feels dry to the touch. You'll know stratification is working when the seed coat softens slightly—it should feel less firm than when you first stored it. Real talk: Skipping this step means waiting 6-12 months for germination instead of 4-8 weeks.
⏰ Step 3: Plant After Stratification
After 12 weeks in cold storage, remove the seed and plant it ½ inch deep in a small pot filled with well-draining potting mix. Use a 4-inch container to give the young root system room to establish. Water gently until moisture seeps from the drainage hole—you want the soil damp but not soggy.
Place the pot in a warm, bright spot with indirect light. A south-facing window works well, but avoid direct afternoon sun which can overheat the soil. You'll see the first signs of germination when the seed coat splits open—usually within 7-14 days after planting.
☀️ Step 4: Transplant and Harden Off
Once the seedling grows 3-4 inches tall with 2-3 true leaves, it's ready for its first transplant. Choose a 6-inch pot and fill it with fresh potting mix. Dig a hole twice as wide as the seedling's root ball, place it in, and cover the roots with soil. Press gently around the base to remove air pockets.
Start hardening off by placing the pot outside in a sheltered spot for 2 hours daily, gradually increasing time over 10 days. You'll know the seedling is ready for the garden when it handles a full day outdoors without wilting. Transplant on a cloudy day to reduce stress on the young plant.
🌿 Step 5: Care for Your Young Tree
Peach trees need full sun (6+ hours daily) and 1-2 inches of water weekly. Mulch around the base with 2-3 inches of organic mulch to retain moisture and regulate soil temperature. Prune any crossing branches when the tree reaches 3 feet tall to encourage an open growth habit.
Here's the thing—peach trees grown from seed may take 5-7 years to bear fruit, but the journey is worth it. Watch for signs of pests like aphids, and treat with neem oil if needed. The first blossoms might not produce fruit, but each year afterward brings you closer to homegrown peaches.
Tips & tricks for growing clear seed peaches
Here's what nobody tells you about maximizing your chances with peach seeds.
Seed Selection: The ripest peaches often yield the most viable seeds, but don't grab the softest ones from the bin—look for firm fruit with vibrant color. I've found that slightly underripe peaches (still firm with a little give) sometimes contain seeds that germinate more reliably. The key is that seed's natural dormancy period works best when it comes from a healthy, mature fruit.
Stratification Success: That 3-month cold period is non-negotiable, but here's the trick: use two damp paper towels instead of one. This keeps the seed consistently moist without creating a soggy environment. I like to fold the towels around the seed and place them in a small plastic container before sealing it—this prevents the seed from drying out between fridge checks. The paper towel should feel like a wrung-out sponge, not dripping wet.
Planting Depth: When you plant that ½-inch deep after stratification, don't press the soil down too firmly. The seed needs contact with the soil but shouldn't be compacted—this prevents proper air circulation around the seed coat. I use my finger to gently pat the soil around the seed rather than pressing down, and I always make sure the drainage hole is clear so excess water can escape.
Germination Timing: Those 7-14 days after planting can feel like forever, but here's what to watch for: the seed coat will first develop a tiny crack, then a small root will emerge. Once you see the root, germination is irreversible! If nothing happens after 14 days, gently check by lifting the seed—if it's still firm, it might not have germinated. Don't be tempted to dig it up too soon, though—some seeds take their time.
Pro Tips for Clear Seed Peaches
- Here's what nobody tells you about maximizing your chances with peach seeds.
- Seed Selection: The ripest peaches often yield the most viable seeds, but don't grab the softest ones from the bin—lo...
- Stratification Success: That 3-month cold period is non-negotiable, but here's the trick: use two damp paper towels i...
Frequently asked questions
Got questions about growing clear seed peaches from pits? You’re not alone! Here are answers to the most common queries—whether you’re a first-time gardener or a seasoned seed-saver.
How do I know if my peach pit is viable for growing?
A healthy pit should be firm, dry, and free of mold or cracks. Tap it gently—if it sounds hollow, it’s likely empty. For best results, use fresh, organic peaches (store-bought pits may be treated to prevent sprouting). Let the pit dry for 1–2 weeks before planting to avoid rot.
How long does it take for a peach pit to sprout?
Patience is key! With the pod-splitting trick, you’ll see tiny roots in 3–6 weeks, and a shoot may emerge in 6–12 weeks. Keep the soil moist but not soggy, and place the pod in a warm, sunny spot (like a south-facing windowsill). Cold temperatures can slow germination.
Can I grow clear seed peaches indoors year-round?
Start indoors in spring or early summer using the pod-splitting method. Once the seedling is 6+ inches tall, transplant it to a pot with well-draining soil. Move it outdoors after the last frost when nights stay above 50°F. A grow light helps if natural light is limited.
Why did my peach seedling die after transplanting?
Transplant shock is common! Overwatering, sudden temperature drops, or poor soil drainage are usually the culprits. Harden off seedlings by gradually exposing them to outdoor conditions for 1–2 weeks before planting. Use a lightweight potting mix and avoid fertilizing until new growth appears.
How big should my clear seed peach tree grow before fruiting?
Peach trees from seed can take 3–5 years to bear fruit (vs. 1–2 years for grafted trees). Prioritize care: full sun (6+ hours/day), regular watering, and annual pruning to encourage a strong structure. While seed-grown trees may not match commercial varieties, they’re rewarding for patience and unique flavors!
Wrapping up and next steps
Growing clear seed peaches from pits is a rewarding way to cultivate your own fruit trees while embracing sustainability! With just a few simple steps—like the pod-splitting trick—you can turn kitchen scraps into thriving seedlings, all while reducing waste.
Whether you're a seasoned gardener or just starting out, this method makes it easy to nurture a tree that could bear delicious fruit for years to come.
Ready to take the next step? Start with a single pit today—your future peach tree is waiting! Plant it in your garden, share tips with fellow gardeners, or even gift a seedling to a friend. The possibilities are as sweet as the harvest ahead! 🌱🍑