
Lawn
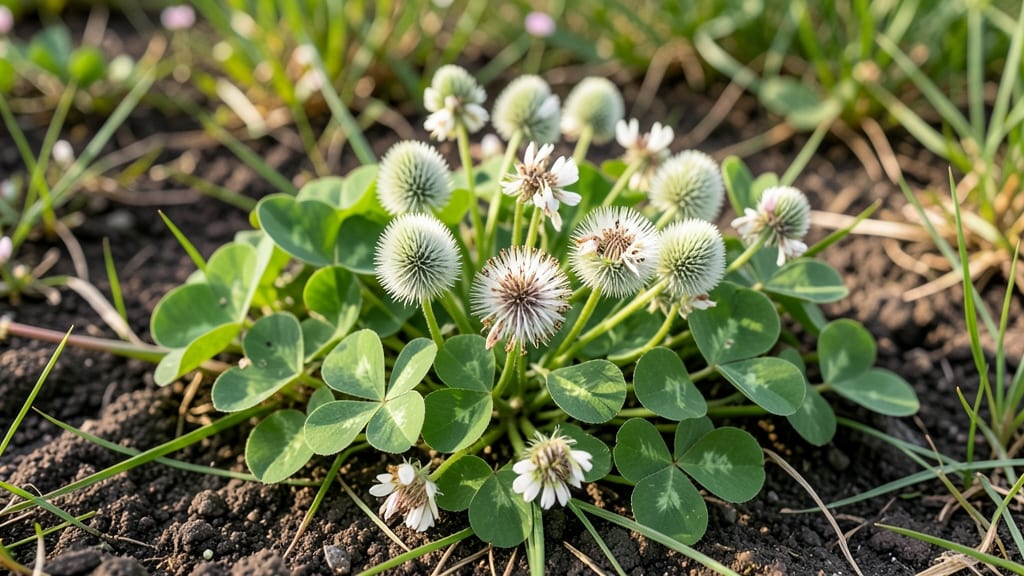
Harvesting clover seed heads is easier than you think—no wrestling with stubborn stems or messy twists. ✨ The fluffy white puffs aren’t just pretty; they’re packed with pollinator-friendly seeds that spread effortlessly (or can be collected for future planting).
My first attempt left seeds everywhere, but now I’ve perfected a method that keeps everything contained and useful.
You’ll need scissors or pruning shears, a paper bag or breathable mesh sack, and a sunny day when the seed heads are fully dry but haven’t scattered yet. Look for clover blooms that have turned brown and fluffy—these are ready to harvest.
The best time is late summer or early fall, when most clover varieties release their seeds naturally.
Cut the seed heads just above the first set of leaves, then gently shake them over your bag to collect the seeds. Store them in a cool, dry place until spring planting—this method gives you pollinator-friendly forage without the wind carrying seeds away.
The process takes less than 10 minutes and turns a wild patch into a resource for your garden.
If you’re growing clover for wildlife, leave some seed heads untouched—they’ll feed birds and insects all winter. For gardeners, collected seeds make low-maintenance ground cover that spreads beautifully. Just avoid harvesting after rain, when seeds stick together and clump awkwardly.
📚 In This Guide
- What you need
- Instructions
- Tips and common mistakes
- Wrapping up and next steps
What you need
- ● Pruning shears or sharp scissors: 1 pair (preferably bypass-style for clean cuts). Look for 5-inch blades with ergonomic handles for comfort.
- ● Gloves: 1 pair (gardening gloves with tactile grip to protect hands from prickly stems and seeds).
- ● Large paper bags or breathable mesh bags: 2–4 bags (10–15 gallon capacity). Label them for different clover varieties if harvesting multiple types.
- ● Newspaper or cardboard: 1–2 sheets (to lay under clover plants and catch stray seeds during harvest).
- ● Rake or stiff brush: 1 (for gently loosening seeds from heads before bagging).
- ○ Small hand trowel or fork: 1 (optional, for digging up stubborn clover plants if needed).
- ● Mature clover plants: Ensure seed heads are fully brown and dry (usually late summer to early fall). Twist-test a few—if seeds release easily, they’re ready!
- ● Dry weather: Harvest on a sunny, wind-free day to prevent moisture from sticking seeds together.
- ● Clear workspace: Trim surrounding grass or weeds to 3–6 inches tall for easier access to clover plants.
- ● 🌡️ Timing matters: Harvest in the morning when dew is low to avoid damp seed heads.
- ● ✨ Bag it fresh: Transfer seeds to bags immediately after harvesting to prevent scattering.
- ● 🔄 Reuse or recycle: Old burlap sacks or even clean pillowcases work in a pinch!
How to harvest clover seed heads without the twisting frustration
Here’s the method I’ve used for years—no stubborn stems, no wasted seed, just clean harvests every time.
🌿 Step 1: Identify Mature Seed Heads
Look for clover seed heads that have turned a deep, dry brown color—this means the seeds are fully mature and ready for harvest. The pods should feel crisp rather than soft or green. I always check in late summer or early fall when the weather is dry, as humidity can make the stems slippery and harder to handle.
Gently shake a few seed heads over a dark surface like a piece of cardboard. If the seeds rattle inside and don’t fall out immediately, they’re still too green. Wait another week or two—patience here prevents wasted effort. Harvesting too early means immature seeds that won’t store well or germinate properly.
✂️ Step 2: Cut Stems at the Right Angle
Use clean, sharp pruning shears or scissors to cut the stems at a 45-degree angle, about 2-3 inches below the seed head. This angle prevents water from pooling on the cut, which could rot the stem. I always make the cut just above a leaf node to encourage new growth—clover is a hardy plant and will regenerate quickly if given the right conditions.
Don’t pull or twist the stems—this can damage the plant and leave behind broken pieces that may harbor pests. Instead, hold the stem firmly with one hand and cut cleanly with the other. You’ll notice the seed heads will release more easily when the stems are cut properly, reducing the risk of them snapping off mid-harvest.
🪴 Step 3: Dry the Seed Heads Properly
Lay the harvested seed heads on a clean, dry surface in a well-ventilated area away from direct sunlight. Too much sun can cause the seeds to overheat and lose viability, while poor airflow can lead to mold. I use a mesh screen or a piece of window screen stretched over a frame—this allows air to circulate while keeping the seeds contained.
Check the seed heads daily and gently shake them to release any loose seeds. After 5-7 days, the pods should open easily, revealing the small, round clover seeds inside. If the pods still feel tough, give them a few more days. Once fully dry, store the seeds in a paper bag or breathable fabric sack—plastic traps moisture and can cause spoilage.
💧 Step 4: Clean and Store for Long-Term Use
Spread the dried seed heads on a clean sheet of paper and gently rub them between your hands or with a fine-mesh sieve to separate the seeds from the chaff. This step is crucial for purity—any debris left behind can attract pests or mold during storage. I like to do this outside on a breezy day; the wind helps carry away lighter debris while the seeds settle.
Once cleaned, transfer the seeds to an airtight container like a glass jar with a tight-sealing lid. Store them in a cool, dark place—a pantry or basement works well. Label the container with the date and variety if you’re growing multiple types. Properly stored, clover seeds can remain viable for 2-3 years, though germination rates may drop slightly over time.
⏰ Step 5: Time Your Harvest for Optimal Yield
Plan your harvest for a dry, calm day—rain or high humidity can make the seed heads stick together and difficult to process. I usually aim for early morning harvests when the dew has evaporated but the air is still cool, which helps preserve seed quality. If you’re harvesting for livestock feed, you can leave the seed heads attached slightly longer to ensure maximum seed production.
Here’s the thing—clover regenerates quickly, so you can harvest seed heads every 2-3 weeks during peak season without stressing the plant. Just avoid cutting more than one-third of the plant at a time to ensure it has enough energy to recover. Over-harvesting weakens the plant and reduces future yields.
Tips & tricks for perfect clover seed harvesting
These simple strategies will help you avoid the common pitfalls of harvesting clover seed heads—and keep your plants happy for future harvests.
Timing is Everything: In Step 1, when checking for mature seed heads, look for that crisp texture and deep brown color—but don't rely solely on appearance. I've found that the "shake test" over dark cardboard is foolproof. If seeds don't rattle freely, they're not ready yet. This prevents wasted effort on immature seeds that won't store well. The 2-3 week waiting period between checks is worth it for proper maturation.
Tool Selection Matters: For Step 2, I can't emphasize enough how important sharp tools are. Dull pruning shears will crush stems and make clean cuts impossible. I keep a dedicated pair of shears just for harvesting—sterilized with rubbing alcohol between uses. This prevents plant damage and makes the 45-degree angle cut much easier. The angle isn't just about aesthetics; it's about preventing water pooling that could lead to rot.
Drying Strategy: In Step 3, when drying your seed heads, I've learned that airflow is more critical than sunlight. While you want to avoid direct sun, I've had success using a small fan on low setting to circulate air around my mesh drying setup. This cuts the drying time from 7 days to 5-6 days while preventing mold. Just be sure to check daily—those pods should feel papery and open easily by the end of the drying period.
Storage Wisdom: For Step 4, when it comes to long-term storage, I've found that glass jars with tight lids work better than paper bags for most people. The jars create an airtight seal that protects against moisture and pests, while still allowing you to see the seed level. I always date my jars and write the variety name—this has saved me from confusion when I've stored multiple types. The 2-3 year viability window is accurate, but I've noticed red clover seeds maintain better germination rates than white clover over time.
Pro Tips for Clover Seed Heads
- These simple strategies will help you avoid the common pitfalls of harvesting clover seed heads—and keep your plants ...
- Timing is Everything: In Step 1, when checking for mature seed heads, look for that crisp texture and deep brown colo...
- Tool Selection Matters: For Step 2, I can't emphasize enough how important sharp tools are. Dull pruning shears will ...
Frequently asked questions
Got questions about harvesting clover seed heads? You’re not alone!
Here are some of the most common queries—and answers—to help you tackle the process with confidence.
When is the best time to harvest clover seed heads?
Harvest clover seed heads when 70-80% of the seed pods turn brown but before they shatter or fall to the ground. This usually happens in late summer to early fall, depending on your climate. Morning harvests work best—dew-free but cool conditions prevent premature seed loss.
How do I know if the seed heads are fully mature?
Look for dry, papery pods that rattle when shaken. If the seeds inside are light brown or tan and easily released with a gentle squeeze, they’re ready. Avoid harvesting if pods are still green or seeds are hard and unripe.
What’s the easiest way to remove seed heads without damaging the plant?
Use sharp pruning shears or scissors to snip seed heads just above the first set of leaves. For large patches, a garden sickle or hedge trimmer speeds up the process. Avoid pulling—this can uproot the plant and reduce future yields.
Can I harvest clover seed heads by hand, or do I need tools?
Hand-harvesting works for small areas! Wear gloves to protect against prickly stems, and use a bucket or mesh bag to collect seeds. For bigger patches, tools like a seed stripper or pruning shears save time and effort.
What should I do if my clover seed heads won’t open or release seeds?
If pods stay closed, they may be underripe or overly moist. Try drying them in a well-ventilated, shaded spot for a few days. For stubborn pods, gently crush them with a rolling pin (wear gloves!) or spread them on a tarp to let seeds fall naturally.
Wrapping up and next steps
Harvesting clover seed heads doesn’t have to be a tangled mess—with the right tools and techniques, you can enjoy a stress-free process that rewards you with lush, healthy lawns or even fresh forage.
Whether you’re saving seeds for propagation or simply tidying up your yard, mastering this skill is easier than you think! 🌱
Now that you’re armed with knowledge, why not take the next step? Try harvesting a small batch of seed heads this weekend, experiment with drying methods, or even share your newfound skills with fellow gardening enthusiasts. Happy harvesting—your lawn (and future plants!) will thank you! ✨