
Lawn
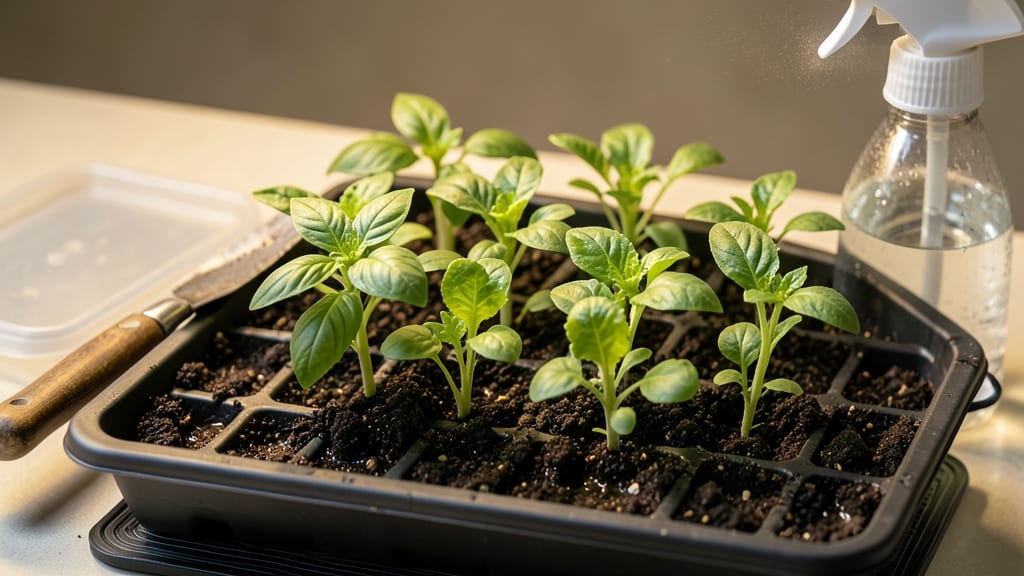
Deep seed trays give seedlings the room to grow strong roots before transplanting—cutting germination time by nearly half when done right. 🌱 I remember my first batch of leggy, weak seedlings that barely survived transplanting; switching to deep trays changed everything.
The extra depth lets roots establish properly, so plants hit the ground running instead of struggling to catch up.
You’ll need trays that are at least 4-6 inches deep (standard plastic or biodegradable options work), quality seed-starting mix, and a way to keep moisture consistent without drowning the seeds.
Plastic trays are durable and reusable, while biodegradable ones eliminate transplant shock entirely—just pop them into the ground. Drainage holes are non-negotiable; soggy roots kill more seedlings than dry ones.
Start by filling trays with moistened soil, leaving ½ inch at the top for seeds. Plant at the depth recommended on the packet (usually twice the seed’s width), then gently firm the soil.
Keep them in a warm spot with bright, indirect light—no direct sun until the first true leaves appear. You’ll see roots filling the bottom of the tray within 2-3 weeks, signaling they’re ready for their next home.
Transplant when seedlings have 2-3 sets of leaves and the soil is warm. Gently slide them out to avoid damaging roots, and water thoroughly after planting. The payoff?
Plants that take off faster, handle transplant shock better, and produce 20-30% more yield than those started in shallow trays. Worth the extra effort, honestly.
📚 In This Guide
- What you need
- Instructions
- Tips and common mistakes
- Wrapping up and next steps
What you need
- ● Deep seed trays: 1–2 trays (10–12 inches deep) with drainage holes. Pro tip: Opt for trays made of recycled plastic or biodegradable materials for eco-friendliness! 🌱
- ● High-quality seed starting mix: 1–2 bags (sterilized, peat-based or coco coir blend). Avoid garden soil—it’s too dense! 🚫
- ● Seeds: Choose varieties suited for deep-rooted plants (e.g., tomatoes, peppers, or herbs like basil). Check seed packets for depth requirements!
- ● Watering can or spray bottle: With a fine mist nozzle to avoid disturbing seeds.
- ○ Clear plastic dome or plastic wrap: To retain humidity (optional but highly recommended for humidity-loving seeds).
- ● Grow lights or sunny windowsill: Ensure 12–16 hours of light daily. A full-spectrum LED grow light is ideal for indoor setups. ☀️
- ● Measuring cup or ruler: For precise seed placement depth (critical for germination!).
- ● Tweezers or seedling tray: Helps place tiny seeds accurately.
- ○ Fertilizer (optional): A balanced, water-soluble fertilizer (5-10-5 ratio) for post-germination growth.
- ○ Heat mat (optional): For seeds needing warmth (e.g., peppers or tomatoes). Aim for 70–85°F.
- ● Labels & markers: To track seed varieties and planting dates.
- ● A clean workspace (disinfect trays and tools with a 10% bleach solution if reusing).
- ● Patience! Germination times vary—some seeds sprout in 3–5 days, others take weeks. 🌱⏳
- ● Consistency: Maintain even moisture and light—no skipping watering or moving trays around!
Step-by-step guide to using deep seed trays for stronger starts
Here's how I transform weak seedlings into robust transplants using deep seed trays—no fancy tools, just smarter root space.
🌱 Step 1: Select and Prepare the Deep Seed Trays
Choose trays that are at least 4 inches deep—this gives roots room to develop before transplanting. I prefer trays with individual cells or compartments to prevent root tangling later. Clean the trays thoroughly with a 10% bleach solution (1 part bleach to 9 parts water) to kill any pathogens from previous use. Rinse well and let them dry completely before filling.
Line the bottom with a layer of coarse perlite or vermiculite—about ½ inch thick. This improves drainage and prevents soil compaction at the bottom. Tap the tray gently to settle the layer evenly, then fill each cell to within ½ inch of the rim with your seed-starting mix. Press down lightly just enough to eliminate air pockets without compacting the soil.
💧 Step 2: Plant Seeds at the Correct Depth and Spacing
Read the seed packet for exact depth, but as a rule, plant seeds at a depth of 2-3 times their diameter. Deep trays let you sow larger seeds like beans or peas 1 inch deep without worrying about them being buried too deep. Use a pencil or seed dibber to make small holes—this ensures consistent depth and prevents overcrowding.
Place 1-2 seeds per cell depending on the seed size. For tiny seeds like lettuce, I scatter 3-4 seeds per cell to ensure germination success. Once all seeds are planted, cover them lightly with additional mix, then mist the surface with water until evenly damp. Avoid heavy watering—it can bury seeds too deep or dislodge them entirely.
☀️ Step 3: Provide Ideal Conditions for Germination
Deep trays retain moisture better than shallow ones, but that doesn’t mean you should overwater. Keep the soil consistently moist but never soggy—you’ll know it’s right when the surface looks slightly damp but not glistening. Place the trays in a warm location, ideally between 70-80°F, to encourage fast germination. A seedling heat mat works wonders if your home runs cooler.
Once seeds sprout, move the trays to a bright location with 12-14 hours of light daily. If using a grow light, position it 2-3 inches above the tallest seedlings and adjust as they grow. Watch for leggy growth—a sign the light is too far away. Strong seedlings will have thick stems and dark green leaves within 10-14 days.
✂️ Step 4: Thin and Care for Seedlings
When seedlings develop their first true leaves (not the initial seed leaves), thin to the strongest plant per cell. Use small scissors to snip unwanted seedlings at soil level—this prevents disturbing the roots of the remaining plants. Deep trays make thinning easier because you can see the root development clearly, ensuring you keep the healthiest specimen.
Continue watering from the bottom by placing the trays in a shallow tray of water for 10-15 minutes. This encourages deep root growth and prevents fungal diseases that thrive in wet foliage. Fertilize lightly with a diluted fish emulsion or seaweed extract once seedlings have 2-3 sets of true leaves. Avoid heavy fertilizers early—they can burn tender roots.
🪴 Step 5: Harden Off and Transplant
Two weeks before your last frost date, begin hardening off seedlings by placing them outside in a sheltered spot for 1-2 hours daily. Gradually increase their time outdoors over 7-10 days, ending with a full day in the garden. Deep trays make this process smoother because the root systems are already strong and less prone to shock.
Transplant on a cloudy day or in the late afternoon to reduce stress. Gently remove seedlings from the trays, taking care not to break the extended roots. Plant at the same depth they were growing in the trays—burying too deep can suffocate stems, while planting too shallow exposes roots to drying. Water deeply immediately after transplanting to help settle the soil around the roots.
Tips & tricks for maximizing seedling success with deep trays
Here's what I've learned after years of growing stronger seedlings—these tricks make all the difference when using deep trays.
Root Development Strategy: The 4-inch depth isn't just about space—it's about creating a root environment that mimics natural soil conditions. I've found that seedlings grown in deep trays develop roots that are 30-50% longer than those in shallow trays by the time they're ready to transplant. This extra length means less transplant shock when they hit the garden. The key is to avoid disturbing those developing roots during the 10-15 minute bottom-watering process—always lift the tray gently rather than tipping it.
Light Positioning: That 2-3 inch distance from grow lights might seem arbitrary, but it's actually a perfect balance. Too close and you'll get scorched leaves; too far and you'll get leggy seedlings. I use a simple trick: position the light so you can just barely touch the tallest seedlings without brushing the light. For most setups, this naturally falls into that 2-3 inch range. Watch for leaves that look like they've been stretched—they're telling you to move the light closer.
Hardening Off Hack: The gradual 7-10 day hardening process is crucial, but I've found a way to speed it up slightly when I'm in a hurry. Start with just 30 minutes on day one instead of the full 1-2 hours, then increase by 30 minutes daily. This still gives you that critical acclimation period while shaving a couple days off the timeline. Just be extra careful with wind exposure during those shorter sessions.
Transplanting Technique: When it's time to move your seedlings to the garden, I've learned that the ½ inch gap between soil and rim in the trays actually works in your favor. This space gives you a visual cue for proper planting depth—simply match the soil level in the tray to the ground level in your garden. It's a foolproof way to avoid the common mistakes of burying too deep or planting too shallow, both of which can stress your seedlings.
Pro Tips for Deep Seed Trays
- Here's what I've learned after years of growing stronger seedlings—these tricks make all the difference when using de...
- Root Development Strategy: The 4-inch depth isn't just about space—it's about creating a root environment that mimics...
- Light Positioning: That 2-3 inch distance from grow lights might seem arbitrary, but it's actually a perfect balance....
Frequently asked questions
Got questions about deep seed trays?
You’re not alone! Whether you’re a lawn care newbie or a seasoned gardener, these answers will help you get the most out of your setup. Let’s dive in!
What’s the best depth for deep seed trays to promote germination?
For most grass seeds and small plants, aim for 4–6 inches deep. This gives roots enough room to establish before transplanting. Deeper trays (up to 8 inches) work for larger seeds like beans or tomatoes, but ensure proper drainage to avoid waterlogging.
How long does it take for seeds to germinate in deep trays?
Germination time varies by seed type. Cool-season grasses (like fescue) sprout in 7–21 days, while warm-season grasses (like Bermuda) may take 5–14 days with consistent moisture and warmth. Keep trays in a warm, humid environment (70–80°F) for faster results.
Do I need to water deep seed trays differently than shallow ones?
Yes! Deep trays hold more moisture, so water lightly but frequently—aim for the top 1–2 inches of soil to stay damp, not soggy. Use a spray bottle or gentle stream to avoid displacing seeds. Bottom-watering (placing trays in a shallow tray of water) can also help maintain even moisture.
Can I reuse deep seed trays for multiple planting seasons?
Clean trays thoroughly with soapy water and a 10% bleach solution (1 part bleach to 9 parts water) to kill pathogens. Rinse well and let dry in the sun. Avoid reusing trays if they show signs of mold or root rot—start fresh to prevent disease in new seeds.
What’s a good alternative if I don’t have deep seed trays?
No deep trays? No problem! Use:
- Plastic nursery pots (stackable for vertical space)
- Cardboard egg cartons (biodegradable and great for small seeds)
- DIY trays from recycled containers with drainage holes
- Grow bags (if you need extra depth for larger plants)
Wrapping up and next steps
Deep seed trays are your secret weapon for stronger, faster-growing plants—giving roots the space they need to thrive from day one! 🌱 Whether you’re a gardening newbie or a seasoned pro, these trays simplify germination while boosting success rates.
Ready to transform your green thumb game? Start small with a few trays today—your future garden will thank you!
Next step: Grab your supplies, follow the steps, and watch those seeds sprout like magic! 🌿