
Lawn
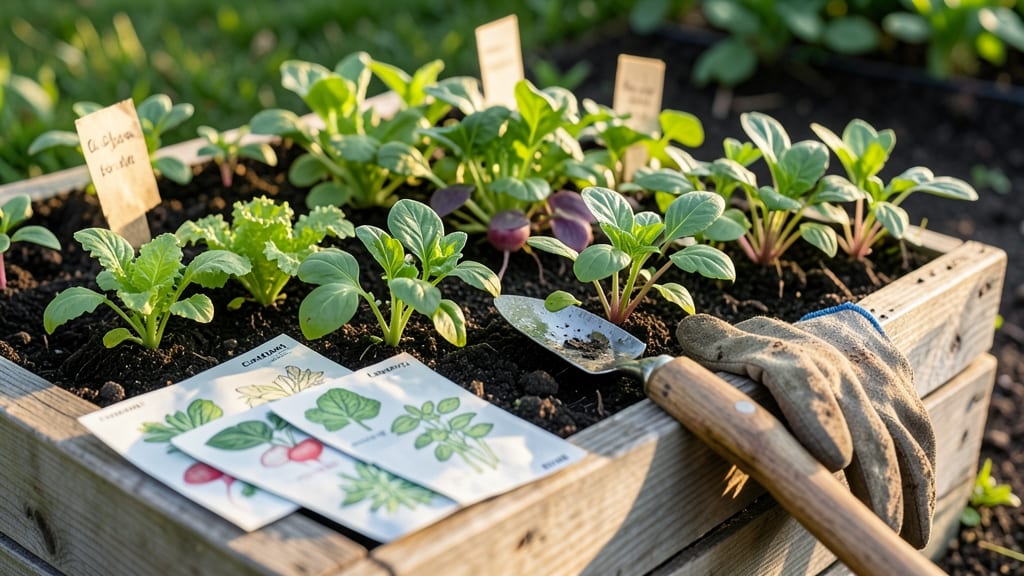
Creating a green seed garden starts with a vision of blooms that feed pollinators and save seeds for next year. 🌱 I’ve designed mine around heirloom marigolds, cosmos, and borage—plants that attract bees while producing seeds I can dry and store.
The key is blending beauty with function, where every flower serves a purpose beyond decoration.
You’ll need a sunny spot (at least 6 hours of light daily), well-draining soil, and a mix of annuals and perennials that self-seed easily. My setup includes labeled rows for seed-saving varieties, a small greenhouse corner for starts, and drip irrigation to keep things thriving without waste.
The best part? This garden works in small spaces or full yards.
By mid-summer, your plot will buzz with pollinators while filling seed envelopes for next year’s harvest. The marigolds repel pests, the cosmos self-sow effortlessly, and the borage attracts beneficial insects—all while giving you a steady supply of organic seeds. It’s a living archive of biodiversity.
Start small with 5-10 varieties you love, and expand as you master seed-saving. The first year is about learning which plants perform best in your climate. Soon, you’ll have a self-sustaining garden that feeds both wildlife and your future planting seasons.
📚 In This Guide
- What you need
- Instructions
- Tips and common mistakes
- Wrapping up and next steps
What you need
- ● Seeds: Choose a mix of native, pollinator-friendly varieties like bee balm, coneflowers, milkweed, lavender, and sunflowers. Aim for 1–2 lbs of seed per 100 sq ft.
- ● High-quality potting soil: 50 lbs (or enough to fill your garden beds). Opt for organic, well-draining soil with compost.
- ● Mulch: 2–3 inches of organic mulch (e.g., straw, wood chips, or shredded leaves) to retain moisture and suppress weeds.
- ● Compost or fertilizer: 10–20 lbs of balanced organic fertilizer (e.g., 10-10-10) or compost to enrich the soil.
- ● Garden gloves (1 pair) – Protect your hands from thorns and dirt.
- ● Hand trowel or transplanting spade – For digging and planting seeds.
- ● Rake or hoe – To loosen soil and remove weeds.
- ● Watering can or hose with a gentle spray nozzle – For consistent moisture.
- ● Measuring tape or string – To mark garden bed dimensions.
- ○ Optional: Seedling trays (if starting indoors)
- ● Drip irrigation kit (for automated watering)
- ● Bird netting (to protect young plants from pests)
- ● A sunny location with at least 6–8 hours of direct sunlight daily.
- ● A well-drained garden bed (avoid low-lying areas where water pools).
- ● Access to a water source (hose or rain barrel).
- ● Knowledge of your local climate and frost dates (check seed packets for planting times!).
How to design a pollinator-packed green seed garden
Here's the approach I've used to create thriving, year-round havens for bees, butterflies, and hummingbirds.
🌱 Step 1: Choose a Sunny, Sheltered Location
Select a spot that receives at least 6 hours of direct sunlight daily—most pollinator plants thrive in full sun. I always look for areas with some wind protection, like near a fence or building, because fluttering wings can't compete with gusts. Avoid low-lying areas where cold air pools in winter, as many pollinator plants need winter interest too.
Test your site by observing it for a full day. Notice where sunlight shifts throughout the morning and afternoon. The ideal location will have morning sun to wake up bees early and afternoon warmth to extend the blooming season. If your yard has partial shade, focus on shade-tolerant natives like Heuchera or Astilbe for those areas.
🌿 Step 2: Select a Diverse Mix of Seasonal Bloomers
Plan for continuous color by choosing plants that bloom at different times. Start with early spring bloomers like Lungwort or Bleeding Heart, then add summer favorites like Coneflower and Black-Eyed Susan, and finish with fall-blooming Goldenrod and Asters. I always include at least three plants per season to ensure pollinators always have fresh nectar.
Prioritize native species—they've co-evolved with local pollinators and provide the best nutrition. For example, Milkweed is essential for monarch butterflies, while Bee Balm attracts hummingbirds. Mix heights and textures too: tall Joe Pye Weed provides vertical structure, while low Creeping Thyme covers the ground and attracts ground-nesting bees.
✂️ Step 3: Prepare the Soil and Plant Strategically
Loosen the soil to a depth of 12 inches to improve drainage and root penetration. Amend with 2-3 inches of compost mixed into the top layer—this feeds beneficial microbes that help plants absorb nutrients. I avoid chemical fertilizers because they can harm pollinators, instead using organic matter to build soil health over time.
Plant in odd-numbered groupings (3, 5, or 7 plants per cluster) to create natural-looking drifts that pollinators recognize as food sources. Space perennials 18-24 inches apart and annuals 12-18 inches apart to allow airflow and reduce disease. Water deeply after planting to settle roots, then mulch with 2-3 inches of organic mulch to retain moisture and suppress weeds.
💧 Step 4: Establish a Water Source for Pollinators
Add a shallow dish filled with pebbles and water placed at ground level—this gives bees and butterflies an easy way to drink without drowning. I place mine near the garden's edge where pollinators can access it while foraging. Change the water every 2-3 days to prevent mosquito breeding, and add a few floating marbles to give smaller insects a landing spot.
For hummingbirds, include a small fountain or dripping spout—these birds prefer moving water. Position it where they can see it from their favorite perches. Avoid deep containers; pollinators need shallow access. This simple addition can double the number of visitors to your garden, especially during dry spells when natural sources are scarce.
☀️ Step 5: Maintain with Pollinator-Friendly Practices
Water deeply once weekly during dry spells, aiming for 1 inch of water per week. Let the soil dry slightly between waterings to prevent fungal diseases that can harm plants and pollinators. I water in the early morning so foliage dries quickly, reducing the risk of mildew.
Avoid pesticides entirely—even "organic" sprays can be toxic to pollinators. Instead, handpick pests or use physical barriers like row covers. Deadhead spent blooms regularly to encourage continuous flowering, but leave some seed heads for winter interest and food for birds. This balance keeps your garden productive and pollinator-friendly year-round.
Tips & tricks for perfect pollinator gardens
These practical insights will help you create a thriving ecosystem that keeps bees buzzing and butterflies fluttering all season long.
Location Intelligence: In Step 1, when choosing your sunny spot, pay special attention to microclimates. Morning sun is crucial for waking up bees early, but afternoon warmth helps extend the blooming season. I've found that areas near south-facing fences receive the most consistent sunlight—this is where I place my most sun-loving pollinator plants like Coneflower and Black-Eyed Susan. For partial shade areas, native plants like Heuchera become your secret weapon.
Seasonal Layering Strategy: The key to year-round interest in Step 2 is creating a "bloom calendar" in your head. Start with early spring's Lungwort and Bleeding Heart, then transition to summer's Milkweed and Bee Balm, and finish with fall's Goldenrod. I like to sketch a simple diagram showing which plants bloom when—this helps me visualize gaps I might have missed. Remember, the goal is continuous nectar, not just seasonal bursts.
Soil Science: When preparing your soil in Step 3, don't just loosen to 12 inches—think about the long-term health of your garden. I've learned that adding a layer of 2-3 inches of compost isn't just about nutrients; it's about creating a sponge-like structure that holds moisture while allowing excess to drain. For heavy clay soils, mix in some coarse sand to improve drainage, while sandy soils benefit from additional organic matter to retain moisture.
Water Source Design: The shallow dish with pebbles in Step 4 is a game-changer for pollinators, but here's the secret: placement matters just as much as the design. Position it where you've observed pollinators already visiting—this could be near your Bee Balm or Joe Pye Weed. I've noticed that bees prefer water sources that are easily accessible from their flight paths, so avoid placing it in isolated corners. For hummingbirds, a dripping fountain should be visible from their favorite perches—typically 3-5 feet above ground level.
Pro Tips for Green Seed Garden
- These practical insights will help you create a thriving ecosystem that keeps bees buzzing and butterflies fluttering...
- Location Intelligence: In Step 1, when choosing your sunny spot, pay special attention to microclimates. Morning sun ...
- Seasonal Layering Strategy: The key to year-round interest in Step 2 is creating a "bloom calendar" in your head. Sta...
Frequently asked questions
How long does it take for a green seed garden to attract pollinators?
Most pollinator-friendly plants bloom within 6–12 weeks of planting, depending on the variety. Fast growers like cosmos or zinnia may attract bees and butterflies in as little as 4–6 weeks. For year-round appeal, mix fast-bloomers with perennials like coneflowers or lavender, which return every season.
Can I plant a green seed garden in any season?
Timing depends on your climate! In cool regions, start seeds indoors 6–8 weeks before the last frost or sow directly in spring. For warm climates, plant in fall to avoid summer heat. Always check seed packets for days to germination—some seeds (like basil) sprout in 5–7 days, while others (like dill) take 2–3 weeks.
Are there budget-friendly alternatives to expensive pollinator seeds?
Skip pricey seed mixes and opt for open-pollinated heirloom seeds (often cheaper and reusable). Visit local seed swaps, check thrift stores for gardening books, or harvest seeds from your neighbors’ plants (with permission!). Native wildflowers like black-eyed Susans or milkweed are also cost-effective and hardy.
What do I do if my green seed garden isn’t attracting pollinators?
Try these fixes:
- Add water: Shallow dishes with pebbles and water give thirsty bees a drink.
- Plant in clusters: Pollinators prefer 3–5 plants of the same type for easy foraging.
- Skip pesticides: Even "organic" sprays can harm pollinators—opt for neem oil or soapy water sprays instead.
- Include diverse blooms: Mix annuals (fast blooms) with perennials (long-season support).
Can I grow a green seed garden in containers or small spaces?
Yes! Use deep pots (12+ inches) for root crops like carrots or radishes, and window boxes for herbs and flowers. Choose compact varieties (e.g., bush beans, dwarf sunflowers) and ensure containers have drainage holes. Vertical gardens with trellises work great for cucumbers or nasturtiums—maximizing space while keeping pollinators happy!
Wrapping up and next steps
Creating a green seed garden packed with pollinator-friendly blooms is a rewarding way to support local ecosystems while enjoying year-round beauty. Whether you're a seasoned gardener or just starting, these vibrant, low-maintenance plants will bring life to your lawn and attract bees, butterflies, and hummingbirds. 🌸
Ready to take the next step? Start small—plant a few seeds or seedlings this week, and watch your garden transform into a thriving haven. Your green thumb (and the pollinators!) will thank you.