
Propagation
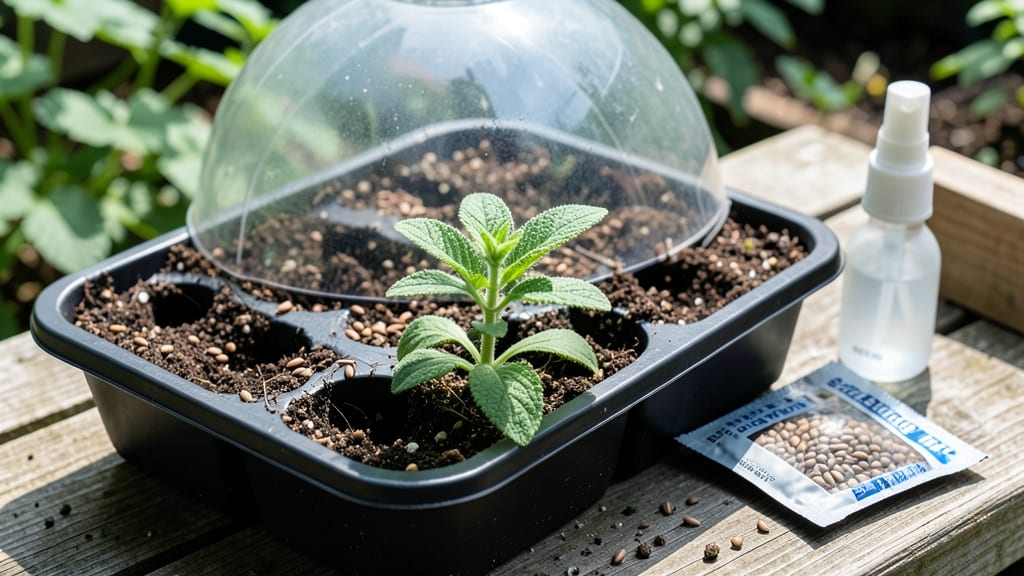
Growing catnip from seed indoors delivers purr-worthy results in just 7 days—no waiting months for transplants. 🌱 I’ve grown catnip indoors for years, and the secret to fast germination lies in warmth, moisture, and patience.
The first tiny leaves appear quicker than you’d expect, especially when you mimic the conditions catnip loves in the wild.
You’ll need 3 simple supplies: a shallow tray or small pot (at least 6 inches deep), well-draining potting mix, and a spray bottle for gentle watering. Place your tray near a sunny window or under a grow light—catnip thrives on bright, indirect light for those first critical weeks.
The key is keeping the soil consistently moist but never soggy, which is where most beginners stumble.
Once those first leaves appear, you’ll watch them grow into fragrant, fuzzy foliage that cats can’t resist. The plants stay compact indoors, making them perfect for windowsills or small spaces. Plus, catnip naturally repels pests like fleas and ants, so you’re growing a dual-purpose herb.
This method works year-round, even in cold climates. Whether you’re growing for your feline friend or your garden, the process is foolproof once you get the hang of it. Ready to get started?
📚 In This Guide
- What you need
- Instructions
- Tips and common mistakes
- Wrapping up and next steps
What you need
- ● Catnip seeds: 1 packet (50–100 seeds, non-GMO preferred for best results)
- ● Seed-starting trays or small pots: 2–4 (2–3 inches deep, with drainage holes)
- ● Seed-starting mix: 1 bag (lightweight, sterile, and well-draining—avoid garden soil)
- ● Spray bottle: 1 (for gentle watering to avoid disturbing seeds)
- ● Plastic wrap or humidity dome: 1 (to create a mini greenhouse effect)
- ● Grow lights or sunny windowsill: 1 (12–16 hours of light daily; LED grow lights work best)
- ○ Small fan (optional but helpful): 1 (for airflow to prevent damping-off disease)
- ● Heating mat: 1 (70–75°F range to speed up germination—catnip loves warmth!)
- ● Fertilizer (balanced, water-soluble): 1 small bottle (dilute to half-strength for seedlings)
- ● pH testing kit: 1 (ideal soil pH for catnip: 6.0–7.0)
- ● Transplanting pots (3–4 inches): 2–4 (for when seedlings outgrow their starter homes)
- ● Catnip companion plant seeds: 1 packet (e.g., basil or mint to deter pests naturally)
Step-by-step instructions for growing catnip indoors
Here's how to coax those fast, feathery catnip leaves indoors—no garden required.
🌱 Step 1: Prepare Containers and Seed Starting Mix
Use small, shallow containers—2-3 inches deep—with drainage holes. I like biodegradable peat pots because they eliminate transplant shock later. Fill each with a sterile seed-starting mix (never garden soil—it's too dense and may carry fungal spores). Moisten the mix until it holds together when squeezed but doesn't drip water.
Press the soil down lightly with your fingers so the surface is firm but not packed. You want air pockets gone but the mix loose enough for delicate catnip roots to push through. Tap the container gently on the table once to settle everything evenly. Here's the thing—catnip seeds are tiny, so accuracy matters. I use a toothpick to make a 1/8-inch deep hole for each seed.
🌱 Step 2: Sow Seeds and Create Ideal Germination Conditions
Plant 2-3 seeds per container at that 1/8-inch depth—any deeper and they'll struggle to reach light. Cover lightly with a sprinkle of additional mix, then mist gently with a spray bottle until the surface looks evenly damp. Catnip seeds germinate fastest at 70-75°F, so place the containers in a warm spot like on top of the fridge or under a seedling heat mat.
Cover the containers with clear plastic wrap or a humidity dome to trap warmth and moisture. Check daily but resist the urge to water—condensation inside the dome creates the perfect microclimate. You'll see the first sprouts in 5-7 days, but don't be surprised if some take up to 10 days in cooler rooms. This is the moment that matters: once 50% of seeds have sprouted, remove the cover immediately to prevent damping-off disease.
☀️ Step 3: Provide Light and Prevent Leggy Growth
The instant those first true leaves appear (they'll look like tiny mint leaves), move the seedlings to a bright, south-facing window or under a grow light. Catnip needs 12-14 hours of light daily to grow strong. Without enough light, stems stretch desperately upward (called "leggy"), and the plants never recover proper strength.
You'll see leggy growth as thin, pale stems with leaves spaced far apart. To fix this, move the light closer—2-3 inches above the plants—or rotate the containers daily so they grow upright. Strong catnip seedlings have thick stems, deep green color, and compact spacing between leaves. Here's where it gets fun: once they reach 2-3 inches tall, you can pinch off the top set of leaves to encourage bushier growth.
💧 Step 4: Water and Fertilize for Healthy Growth
Water when the top inch of soil feels dry—catnip hates soggy roots but also won't tolerate bone-dry soil. I use a spray bottle to water gently from the top, avoiding the leaves to prevent fungal issues. After the first true leaves appear, switch to a balanced liquid fertilizer (diluted to half strength) every 4-6 weeks to keep them thriving. Real talk: catnip grows fast, so don't skip the fertilizer if you want lush, aromatic foliage.
Once seedlings have 4-6 sets of leaves, you can transplant them into larger containers if needed. I like to keep mine in 6-inch pots because catnip grows into a medium-sized bush. Don't overcrowd—each plant needs space to develop its signature square stems and aromatic leaves. Here's the secret: catnip loves warmth, so keep it in a spot where temperatures stay between 65-80°F for the best growth.
Tips & tricks for growing catnip indoors successfully
Fast germination isn't just luck—it's science. Here's how to maximize your catnip's potential from seed to harvest.
Germination Temperature: The 70-75°F range is non-negotiable for speed. If your home runs cooler, place containers on a seedling heat mat or near a warm appliance. I've seen germination times cut in half by maintaining consistent warmth—especially during those critical first 7 days. Pro move: Use a small thermometer to monitor soil temperature if you're unsure.
Light Strategy: Catnip's 12-14 hours of daily light requirement is strict. If using windows, rotate containers every 2-3 days so all sides get equal exposure. For grow lights, position them 2-3 inches above the plants and adjust as they grow. The instant you notice leggy stems (thin, pale growth), it's time to intervene—this is your plant begging for more light.
Container Selection: Those 2-3 inch deep containers are perfect for starters, but don't overlook drainage. I've ruined batches by using decorative pots without holes—catnip roots need oxygen. For long-term growth, upgrade to 6-inch pots when plants show 4-6 sets of leaves. The key is balance: shallow enough for roots to spread, but deep enough for stability as they grow.
Fertilizer Timing: The 4-6 week fertilizer schedule is ideal, but here's the secret: dilute that liquid fertilizer to half strength. Catnip is sensitive to salts, and over-fertilizing causes leaf burn. I switch to a quarter-strength solution if I notice yellowing between leaves—this is your plant's SOS signal for too much nutrition. Always water thoroughly after fertilizing to rinse excess salts from the root zone.
Pro Tips for Grow Catnip From Seed Indoors
- Fast germination isn't just luck—it's science. Here's how to maximize your catnip's potential from seed to harvest.
- Germination Temperature: The 70-75°F range is non-negotiable for speed.
- Light Strategy: Catnip's 12-14 hours of daily light requirement is strict.
Frequently asked questions
How long does it take for catnip seeds to germinate indoors?
Catnip seeds typically germinate in 7–14 days indoors when kept in warm, moist conditions (around 70–75°F). With proper care—like using a heat mat and keeping the soil consistently damp—you can see sprouts in as little as 5–7 days! Patience is key, but don’t worry if it takes a little longer.
Can I grow catnip indoors without a grow light?
Yes, but with limitations! Catnip can survive under natural sunlight (like a sunny windowsill), but it’ll grow slower and may become leggy. If your space lacks bright light, supplement with a basic LED bulb (6–8 hours/day) to ensure healthy growth. Avoid cold drafts—catnip thrives in warmth!
Will my cat go crazy if I grow catnip indoors?
Once mature (around 8–12 weeks), your cat will likely love it—rolling, rubbing, and maybe even overindulging. To manage this, grow catnip in a hanging planter or elevated shelf out of reach, or train your cat to play with a designated "catnip toy" instead.
What if my catnip seeds don’t sprout?
Don’t panic! Try these fixes:
- Check moisture: Keep soil damp (not soggy) and use a spray bottle for gentle watering.
- Warmth boost: Place seeds on a heat mat or near a warm spot (like a sunny window).
- Fresh seeds: Catnip seeds lose viability quickly—try new seeds if older ones fail.
- Patience: Some seeds take up to 3 weeks to sprout.
Can I use catnip grown indoors for my cat?
Yes! Indoor-grown catnip is safe and just as effective as outdoor-grown. Just ensure you:
- Use organic, non-toxic soil (no pesticides!).
- Avoid overwatering to prevent mold.
- Harvest leaves when mature (soft and aromatic).
Wrapping up and next steps
Growing catnip from seed indoors is a rewarding and quick process—just seven days to germination! With the right setup, patience, and a little love, you’ll have thriving catnip ready to share with your feline friends (or even harvest for your own use). 🐱✨
Now that you’re armed with the know-how, take the next step: grab those seeds, set up your grow space, and watch your catnip sprout in record time. Happy growing—your curious kitty (and your green thumb) will thank you!