
Size
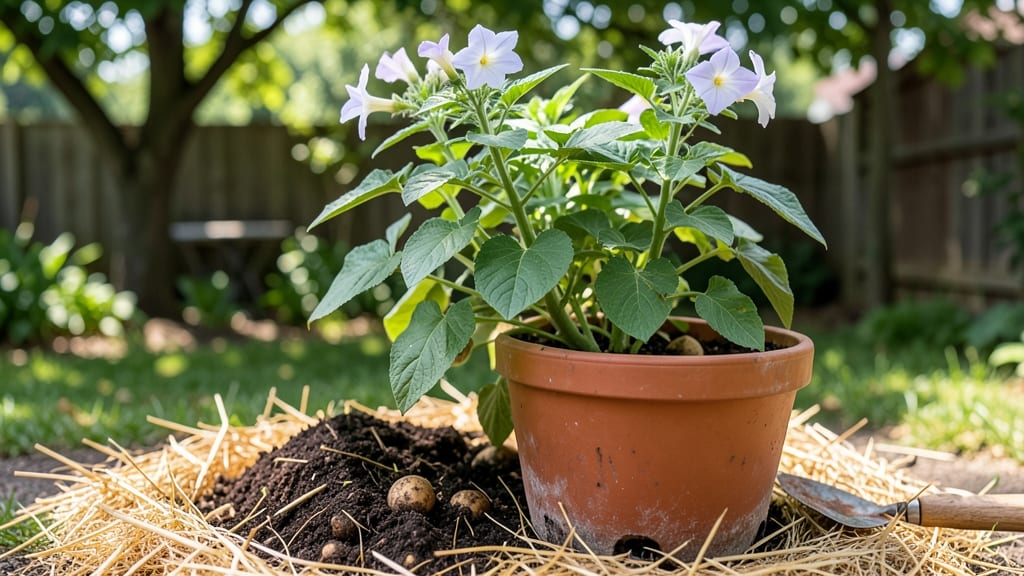
Growing seed potatoes in pots turns a small balcony into a harvest of crisp, homegrown spuds. ✨ I’ve turned my tiny patio into a potato patch—no yard needed—using just a few basic supplies and a sunny spot.
The secret lies in the right container size, well-draining soil, and patience as those knobby tubers swell underground.
You’ll need a 5-gallon container (or deeper) for each potato, well-draining potting mix, and seed potatoes cut into chunks with at least one "eye." Place them 4 inches deep, eyes up, and water lightly—no soggy soil.
Within 8-12 weeks, you’ll have fingerlings or full-sized potatoes ready to dig, depending on the variety.
The best part? No weeds, no gophers, and no bending over—just a steady supply of fresh potatoes from a 12-inch-deep pot. Keep the soil moist but not waterlogged, and watch for green shoots breaking through. When the foliage yellows, it’s time to harvest.
Perfect for small spaces, urban gardens, or anyone who wants foolproof potatoes without the backbreaking work. Even my black thumb grew a pound of spuds last year—here’s how you can too.
📚 In This Guide
- What you need
- Instructions
- Tips and common mistakes
- Wrapping up and next steps
What you need
- ● Seed potatoes: 2–3 certified disease-free seed potatoes per pot (look for varieties like Yukon Gold, Red Pontiac, or Fingerlings).
- ● Containers: Pots at least 10–12 inches deep and 12–18 inches wide (one pot per seed potato or a larger pot for multiple). Drainage holes are a must!
- ● Potting mix: A high-quality, well-draining mix (avoid garden soil—it compacts and holds too much moisture). Aim for 10–20 pounds, depending on pot size.
- ○ Chicken wire or mesh: A 12-inch tall cylinder (optional but helpful for "hilling" as plants grow).
- ● Watering can or hose with a gentle spray nozzle: For even moisture without disturbing the soil.
- ● Fertilizer: A balanced, organic fertilizer (e.g., 10-10-10) or compost. Use sparingly—too much nitrogen = leafy growth, fewer tubers!
- ● Gloves: To protect your hands from soil and sharp edges.
- ● Trowel or small shovel: For planting and hilling.
- ● Spray bottle: To mist chitted potatoes (pre-sprouted seed potatoes) before planting.
- ● Mulch (straw or grass clippings): To retain moisture and regulate soil temperature.
- ● Grow lights (if indoors): To supplement 12–14 hours of light daily for optimal growth.
Step-by-step instructions for growing seed potatoes in containers
Here's my foolproof method for turning small seed potatoes into a bountiful harvest using just containers and minimal space.
🪴 Step 1: Choose the Right Containers and Prepare the Growing Medium
Select containers that are at least 12 inches deep—seed potatoes need room to develop tubers. I use 5-gallon buckets with drainage holes because they're sturdy and hold enough soil for a good harvest. Fill each container with a mix of 50% potting soil and 50% compost to create a loose, nutrient-rich medium that encourages tuber formation.
Moisten the mix until it's damp but not soggy—you should be able to squeeze a handful and have it hold together without dripping. Avoid garden soil; it compacts too easily and can harbor diseases that will stunt your potatoes. This is where you set the foundation for healthy growth, so don't skimp on the quality of your mix.
🌱 Step 2: Chit Your Seed Potatoes and Plant Correctly
Before planting, place your seed potatoes in a bright, cool spot (50-60°F) for 2-3 weeks to encourage chitting—this means letting them sprout small green shoots. Once they've chitted, plant them with the sprouts facing upward and eyes (buds) pointing toward the light. Bury them 4 inches deep in the soil, spacing them 6 inches apart in each container.
Cover them lightly with soil and water gently to settle everything. If you plant too shallow, the potatoes will develop near the surface and turn green from sunlight, making them bitter. This step is critical—don't rush it. A little patience now means fewer problems later.
💧 Step 3: Maintain Moisture and Gradually Add Soil
Keep the soil consistently moist but never waterlogged—you want it to feel like a wrung-out sponge. Water when the top inch feels dry, and always water at the base to avoid wetting the foliage, which can lead to disease. As the stems grow, add more soil around the base, burying the stems up to 12 inches deep over time. This process, called "earthing up," encourages more tuber formation.
You'll know you're doing it right when the soil level reaches the bottom of the container. This method mimics the natural hilling process in garden beds and prevents the potatoes from turning green. Real talk: This is where most people mess up—don't skip earthing up, or you'll end up with small, underdeveloped tubers.
☀️ Step 4: Provide Full Sun and Monitor for Pests
Seed potatoes need full sun (6-8 hours daily) to thrive. Place your containers in the sunniest spot you have—even a balcony or patio will work if it gets enough light. If you notice the leaves yellowing or the plants wilting, they might be getting too much heat. In that case, provide some afternoon shade to prevent stress.
Watch for colorado potato beetles and aphids, which love to munch on potato leaves. If you spot them, remove them by hand or use an organic insecticide like neem oil. Healthy plants will have deep green leaves and strong stems. If the leaves start to yellow or the stems weaken, it's a sign of overwatering or disease—adjust your care routine immediately.
⏰ Step 5: Harvest at the Right Time for Maximum Yield
When the flowers appear and then die back, it's time to start checking for harvest readiness. Gently dig around the base of the plant with your hands or a small trowel. New potatoes will be ready in about 10-14 weeks, but if you leave them in the ground a bit longer, you'll get larger tubers. Harvest on a dry day to make handling easier.
Empty the container carefully, brushing off excess soil to reveal your potatoes. Let them cure in a dark, dry place for a week before storing. This step is often overlooked, but curing helps the skins toughen up, which extends their shelf life. You'll be amazed at how many potatoes you can grow in such a small space—this is where container gardening truly shines!
Tips & tricks for perfect container-grown seed potatoes
A few simple strategies will help you avoid common mistakes and maximize your harvest when growing potatoes in containers.
Container Selection: While 5-gallon buckets work well, you can also use fabric grow bags or large plastic bins—just ensure they're at least 12 inches deep. Avoid metal containers as they can heat up too much in direct sun, which stresses the plants. I've had great success with black fabric grow bags because they retain moisture better than plastic while still allowing good drainage.
Chitting Check: When chitting your seed potatoes (Step 2), aim for 1-2 inch sprouts before planting. If your kitchen stays cooler than 60°F, you might need to extend the chitting time to 3-4 weeks. Place them near a sunny window or under a grow light to encourage strong, healthy sprouts. Remember, the stronger the sprouts, the better your harvest will be.
Soil Mix Upgrade: For even better results, consider adding a handful of perlite or vermiculite to your 50/50 potting soil and compost mix. This improves drainage and aeration, which prevents waterlogging—a common issue in containers. The extra air pockets encourage stronger root development, leading to more potatoes. Just mix it in thoroughly before planting.
Harvest Timing: The 10-14 week window for new potatoes is flexible based on your climate. In cooler areas, you might need the full 14 weeks, while warmer climates can produce harvestable potatoes in as little as 9 weeks. Watch for the flowers dying back as your primary indicator—this means the plant is redirecting energy to tuber formation. For larger potatoes, leave them in the ground up to 20 weeks.
Pro Tips for Grow Seed Potatoes In Pots
- A few simple strategies will help you avoid common mistakes and maximize your harvest when growing potatoes in contai...
- Container Selection: While 5-gallon buckets work well, you can also use fabric grow bags or large plastic bins—just e...
- Chitting Check: When chitting your seed potatoes (Step 2), aim for 1-2 inch sprouts before planting. If your kitchen ...
Frequently asked questions
Got questions? You’re not alone! Growing potatoes in pots is easy once you know the tricks. Here are answers to the most common queries to help you grow like a pro.
Can I use any pot for growing potatoes?
Not all pots work—opt for containers at least 12–18 inches deep (deeper is better) with drainage holes. Plastic, fabric grow bags, or sturdy ceramic pots all work, but avoid shallow planters. Pro tip: Drill extra holes if your pot lacks them!
How long does it take for potatoes to grow in pots?
From planting seed potatoes to harvest, expect 90–120 days for most varieties. Early harvests (like ‘Yukon Gold’) may be ready in 60–80 days. Watch for flowers—they signal tubers are forming below!
What if my potatoes turn green or sprouts grow too fast?
Green spots mean toxic solanine—keep pots in partial shade if sunlight is intense. For fast sprouts, bury the potato deeper (leave just the top exposed) or use a light-blocking cover like a cardboard box.
Can I reuse soil from last year’s potato harvest?
Nope! Potatoes deplete nutrients and risk disease buildup. Refresh soil with compost or a balanced fertilizer (10-10-10) before replanting. Bonus: Mix in perlite for better drainage!
What can I do if my potatoes aren’t forming?
Check these fixes:
Not enough light? Move pots to a sunnier spot (6+ hours/day).
Overcrowded? Thin sprouts to 2–3 per potato.
Poor soil? Add worm castings or a slow-release fertilizer.
Remember: Patience is key—some varieties take longer!Wrapping up and next steps
Growing seed potatoes in pots is a rewarding way to enjoy fresh, homegrown spuds—even in small spaces!
With just a few simple steps—choosing the right container, pre-sprouting your potatoes, and providing the right care—you’ll be harvesting delicious tubers in no time. Don’t let limited space stop you—get creative and start your container potato garden today!
Ready to take the next step? Try experimenting with different varieties or even grow them indoors under grow lights for year-round harvests! 🌱