
Size
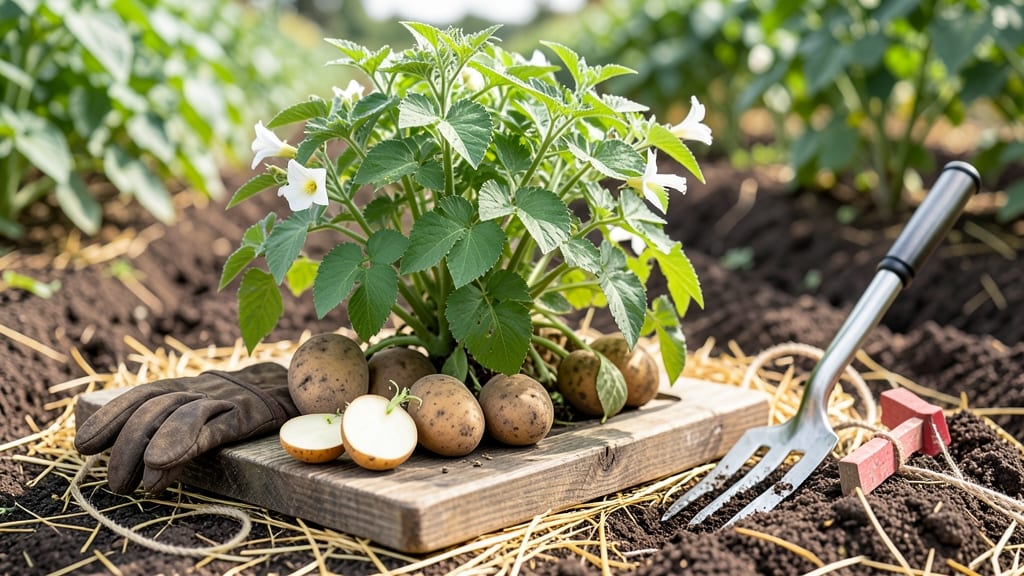
Growing seed potatoes starts with chitting—those little sprouts you see before planting—and it’s the secret to fast, bushy harvests that outperform store-bought tubers. 🌱 I’ve tried every method, and chitting in egg cartons (yes, really) gives you a head start on the season, with plants that emerge strong and ready to grow.
The key is timing: begin chitting 4-6 weeks before your last frost, and you’ll have vigorous starts that hit the garden at the perfect moment.
You’ll need certified seed potatoes (not grocery store ones—they’re treated to prevent sprouting), a sunny windowsill or grow light, and a way to contain the sprouts (egg cartons work perfectly). Plant them cut-side down in moist peat moss or paper towels, and keep them in bright light.
Within 2-3 weeks, you’ll see those first green shoots—proof your potatoes are waking up and ready to grow.
By planting chitted potatoes, you skip the slow start of unchitted tubers and get a jump on the season. Your plants will establish faster, resist early blight better, and produce more tubers in the same space.
The first harvests arrive weeks ahead of schedule, and the flavor? Nothing beats homegrown potatoes fresh from the earth.
Works for any climate—just adjust your chitting timeline to match your frost dates. Whether you’re growing in raised beds, containers, or directly in the soil, this method scales easily. Let’s get those sprouts growing!
📚 In This Guide
- What you need
- Instructions
- Tips and common mistakes
- Wrapping up and next steps
What you need
- ● Seed potatoes – Certified disease-free, organic seed potatoes (not grocery-store spuds!). Choose varieties like Yukon Gold, Red Pontiac, or Fingerlings. Quantity: 3–5 lbs (enough for ~10–15 plants, depending on size).
- ● Chitting tray or egg cartons – A shallow tray with drainage holes or biodegradable egg cartons for pre-sprouting (chitting). Size: At least 2–3 inches deep.
- ● Potting mix or compost – Lightweight, well-draining soil or a seed-starting mix for chitting. Quantity: 1–2 cups per tray.
- ● Garden bed or containers – A sunny spot with loose, fertile soil (pH 5.0–6.5) or 5-gallon grow bags (if container gardening). Depth: At least 12 inches deep.
- ● Organic fertilizer – A balanced 10-10-10 or 5-10-10 fertilizer (or compost) to boost growth. Quantity: 1–2 cups per 10 sq ft of bed.
- ● Mulch (straw or grass clippings) – To retain moisture and suppress weeds. Quantity: 2–3 inches thick.
- ● Watering can or hose with a gentle nozzle – For consistent moisture without overwatering.
- ● Plant labels – To track varieties (especially if growing multiple types).
- ● Garden twine or clips – For staking tall varieties like Purple Viking.
- ● Potato grow bags – If space is limited (prevents digging and makes harvesting easier!).
- ● Potato clipper – For harvesting without damaging tubers.
- ● Garden thermometer – To monitor soil temps (ideal: 45–85°F).
Step-by-step instructions for growing seed potatoes
Here's how to grow vigorous potato plants from seed potatoes—no fancy tools, just proven techniques.
🌱 Step 1: Chit Your Seed Potatoes for Early Growth
Place your seed potatoes in a bright, cool spot—like a sunny windowsill—4-6 weeks before your last frost date. The eyes (those tiny dimples) should face upward. I like to set them on a tray with a little water to encourage sprouting without rotting. Within 10-14 days, you'll see green shoots (sprouts) emerge from the eyes.
Once sprouts reach about 1-2 inches tall, they're ready for planting. Here's the thing—if you skip chitting, your plants will take longer to mature, and your harvest will be smaller. The chitting process gives you a 2-3 week head start on growth, which is huge for short-season climates.
🪴 Step 2: Prepare Planting Containers or Garden Beds
Fill your containers or garden beds with loose, well-draining soil mixed with compost (about 1 part compost to 3 parts soil). Seed potatoes need 6-8 inches of depth and space to spread—plant them 12 inches apart in rows 3 feet apart. If using containers, make sure they're at least 12 inches deep to accommodate the growing tubers.
Dig a hole 4-6 inches deep and place your chitted seed potato with the sprouts facing upward. Cover it with 2-3 inches of soil, leaving the top half exposed to light. This ensures the sprouts stay above ground while the tubers develop below. I like to add a handful of balanced fertilizer (10-10-10) to the hole to give the plants a nutrient boost right away.
☀️ Step 3: Plant and Maintain Ideal Growing Conditions
After planting, water the soil until it's moist but not soggy. Potatoes need consistent moisture—about 1 inch per week—but they hate sitting in water. Mulch the soil with straw or grass clippings to retain moisture and keep the soil cool. As the plants grow, hill the soil around the stems every 2-3 weeks to encourage more tuber formation.
When the plants reach 6 inches tall, mound soil up to their leaves, leaving just the top few inches exposed. Repeat this process until the plants flower. This method, called earthing up, protects new tubers from light (which turns them green and bitter) and gives them more room to grow. Keep the area weed-free—competition steals nutrients from your potatoes.
✂️ Step 4: Harvest at the Right Time for Maximum Yield
Potatoes are ready to harvest when the flowers fade and the foliage starts to yellow. For new potatoes, you can dig up a few small tubers 2-3 weeks before the plant fully dies back. For a full harvest, wait until the foliage turns completely brown and dies back naturally. Use a fork to gently loosen the soil and pull the potatoes out carefully—don’t dig too deep or you’ll miss the smaller ones.
Let them cure in a dark, dry place for 1-2 weeks before storing. This toughens their skins and helps them keep longer. If you harvest too early, the skins will be thin and prone to bruising. If you wait too long, the tubers can split or rot in the ground. Timing is everything—watch for those brown, crispy leaves as your cue to dig.
Tips & tricks for fast, bushy seed potato harvests
These little tricks will help you skip the common mistakes and get the fastest, most vigorous potato plants possible.
Timing is Everything: Start your 4-6 week chitting process as soon as you know your last frost date. I've learned the hard way that starting too late means smaller plants and delayed harvests. Place your seed potatoes in egg cartons (to keep them upright) on a tray with just enough water to keep them moist—not soggy. This prevents rot while encouraging those vital sprouts to grow. The 1-2 inch sprouts should be ready right when planting time arrives—no waiting around!
Soil Secrets: That 1 part compost to 3 parts soil ratio is non-negotiable for fast growth. I swear by adding a handful of worm castings (optional but game-changing) to the planting hole—it gives your tubers an immediate nutrient boost. For containers, mix in some perlite to improve drainage. The goal is loose, airy soil that encourages root expansion. When planting, bury your chitted potatoes 4-6 inches deep with sprouts facing up—this ensures the tubers develop below ground while the stems stay above for photosynthesis.
Watering Wisdom: The 1 inch per week guideline is perfect, but timing matters just as much. Water in the morning so the soil has time to dry slightly during the day—this prevents rot. I use a soaker hose to deliver water directly to the roots without wetting the leaves. When you see the soil surface dry out between waterings, that's your cue to water again. Overwatering is the #1 reason potatoes fail to thrive, so don't drown them!
Hilling Hack: That 2-3 week hilling schedule (mounding soil around stems) might seem tedious, but it's what creates those massive yields. Start when plants reach 6 inches tall
Pro Tips for Grow Seed Potatoes
- These little tricks will help you skip the common mistakes and get the fastest, most vigorous potato plants possible.
- Timing is Everything: Start your 4-6 week chitting process as soon as you know your last frost date. I've learned the...
- Soil Secrets: That 1 part compost to 3 parts soil ratio is non-negotiable for fast growth. I swear by adding a handfu...
Frequently asked questions
Got questions about growing seed potatoes?
You’re not alone! Here are answers to the most common queries—from timing tricks to troubleshooting woes—so you can grow a thriving harvest with confidence.
How do I know when my seed potatoes are ready to plant?
Plant your chitted (sprouted) seed potatoes after the last frost when soil reaches 45°F (7°C). Look for 1-inch (2.5 cm) sprouts and firm, plump tubers. In warmer climates, aim for 2-4 weeks before your last frost date—earlier in cooler zones. Pro tip: Wait until soil is workable to avoid rot!
Can I plant seed potatoes too early?
Yes, but timing matters! Planting too early in cold soil risks rot or stunted growth. If you must plant ahead, use row covers or black plastic mulch to warm the soil. Alternatively, chit indoors first (3–4 weeks before planting) to jumpstart growth. Patience pays off—wait for soil temps to stabilize!
What if my seed potatoes sprout but don’t grow after planting?
Don’t panic! Slow starts often mean cool soil or poor drainage. Try these fixes:
- Warm the soil with black plastic or straw mulch.
- Ensure 6+ hours of sunlight daily—potatoes need light to thrive.
- Check for overwatering (soggy soil = rot). Aim for 1–1.5 inches of water weekly.
Can I grow potatoes from grocery-store potatoes?
Technically yes, but it’s risky! Store-bought potatoes are treated to prevent sprouting and may carry diseases. If you try it:
- Choose organic, untreated potatoes (like fingerlings or Yukon Golds).
- Chit them first (place in a bright, cool spot for 3–4 weeks).
- Plant only small tubers (bigger ones waste energy).
How do I prevent potato bugs and diseases?
Vigilance is key! Here’s how to protect your crop:
- Rotate crops—never plant potatoes in the same spot two years in a row.
- Use row covers early to block flea beetles and Colorado potato beetles.
- Remove and dispose of diseased foliage (don’t compost!).
- Water at the base (not leaves) to reduce blight risk.
Wrapping up and next steps
Growing your own seed potatoes is a rewarding journey that starts with a little patience and the right techniques—like chitting. Whether you're a beginner or a seasoned gardener, these steps ensure fast, bushy plants and a bountiful harvest. You’ve got this! 🌱
Now that you’re armed with knowledge, why not take the next step? Try experimenting with different varieties or share your newfound skills with fellow gardeners. Happy planting—and may your potato patch thrive! 🥔✨