
Lawn
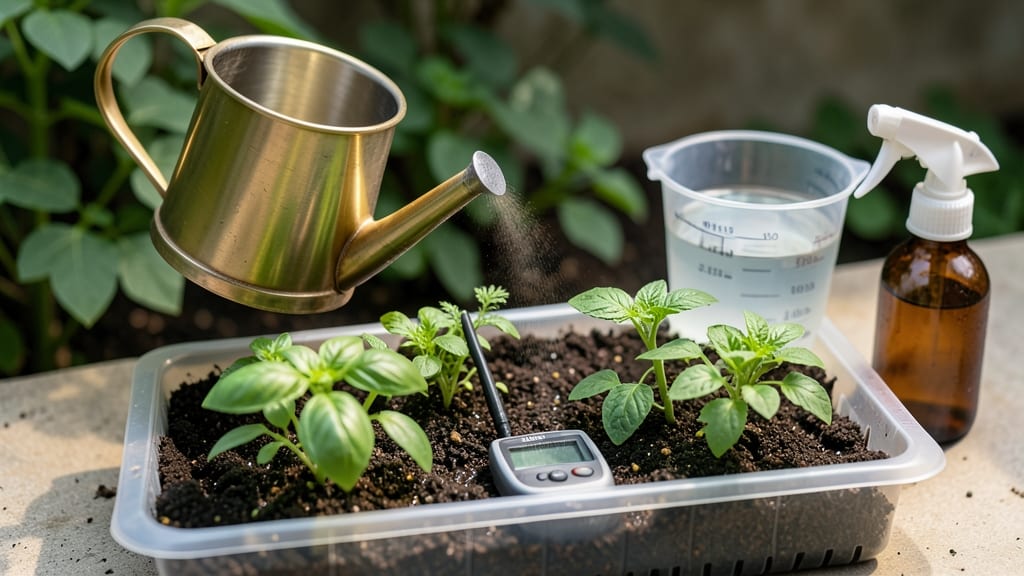
Watering seed trays wrong can turn your tiny sprouts into a science experiment gone wrong—drowned roots or moldy messes. ✨ The secret is bottom-watering with just enough moisture to keep seeds happy without drowning them, and I’ve perfected this after years of killing seedlings (yes, it’s possible).
You’ll need a tray with drainage holes, a shallow dish or saucer, and either a spray bottle or a gentle watering can—no forceful streams that disturb seeds.
The goal is consistent, even moisture without soggy soil or crusty surfaces that block air. Think of it like a damp sponge, not a swamp.
Start with a light mist over the soil surface, then place the tray in the dish with just enough water to lift to the bottom. Within 5-10 minutes, the soil will draw up moisture evenly—no puddles, no dry spots.
Check daily, and you’ll see those first green shoots emerge strong and steady.
Mold or uneven sprouts? You’re either overwatering or not draining properly. Let the soil dry slightly between waterings, and always use room-temperature water. This method works for herbs, veggies, and flowers—no more guesswork, just reliable germination.
📚 In This Guide
- What you need
- Instructions
- Tips and common mistakes
- Wrapping up and next steps
What you need
- ● Seed trays – Choose biodegradable or reusable trays with drainage holes (6"–12" x 20"–24" trays work well for most seeds).
- ● Watering can or spray bottle – A fine-mist nozzle (like a 1-quart spray bottle) or a watering can with a gentle rose attachment for even distribution.
- ● Seed starting mix – A lightweight, sterile potting mix (avoid garden soil—it compacts and holds too much moisture). 1–2 cubic feet per tray.
- ● Seeds – Your chosen variety (check seed packets for depth and spacing requirements).
- ○ Tray cover or plastic wrap – Optional but helpful for humidity (use clear plastic wrap or a humidity dome if included with your trays).
- ● Flat surface or seed tray stand – Elevate trays slightly to improve drainage and airflow (a plastic tray with feet or wooden pallets work great).
- ● Bottom tray or saucer – Collects excess water to prevent soggy trays (use a shallow plastic or ceramic tray).
- ● pH testing kit – Ensures your water and soil are in the ideal 5.8–6.5 range for most seeds.
- ● Heating mat – Speeds up germination for slow-starting seeds (set to 70–75°F).
- ● Grow lights or sunny windowsill – Seedlings need 12–16 hours of light daily (a LED grow light is ideal).
- ● Funnel or scoop – Makes filling trays with soil mess-free and even.
- ● Labeling tags – Track seed varieties and planting dates (use wooden sticks or plant markers).
Step-by-Step instructions for watering seed trays
Mastering this simple technique ensures strong, even germination without drowning your seeds.
💧 Step 1: Prepare Trays with Bottom Watering in Mind
Place your seed trays in a shallow container or saucer filled with about ½ inch of water. This creates a reservoir that draws moisture upward through the drainage holes. I like to use a clear container so I can watch the water level rise as the soil absorbs it—this helps me avoid leaving trays sitting in standing water.
Never let the trays sit in more than ½ inch of water at a time. The soil should pull moisture up gradually, not get waterlogged. You'll know it's working when the bottom of the tray feels damp but not soggy after 10-15 minutes. This method prevents the surface from staying too wet, which can suffocate seeds or cause rot.
🌱 Step 2: Mist the Soil Surface Gently
Before placing trays in the water reservoir, give the soil surface a light misting with a spray bottle. I use a fine-mist setting and hold the bottle about 6 inches above the soil to avoid displacing seeds. The goal is to dampen the top ¼ inch without creating pools of water.
Watch for condensation forming on the tray lid or plastic wrap—this tells me the humidity level is perfect. If you see beads of water on the surface, the soil is too wet. In this case, let it sit uncovered for 5 minutes to evaporate excess moisture before proceeding. This step mimics natural rainfall while keeping seeds from sitting in soggy conditions.
⏰ Step 3: Allow Time for Even Moisture Distribution
Once trays are in the water reservoir, let them sit for 15-20 minutes while the soil draws up moisture from below. You'll see the water level in the saucer drop slightly as the soil absorbs it. This upward movement ensures roots get hydration without surface disturbance that can bury seeds deeper than intended.
After the allotted time, lift the tray out and check the soil's moisture level. The top should feel damp but not wet to the touch. If it's still glistening, let it sit uncovered for another 5 minutes to prevent fungal growth. I always test with my finger—if water beads form on my skin, the soil is too wet. This patience prevents the most common seedling killer: overwatering before germination.
☀️ Step 4: Maintain Consistent Moisture Without Overwatering
From this point on, water only when the top ½ inch of soil feels dry to the touch. I check this by pressing my finger gently into the soil—if it springs back without sticking, it's dry enough. For most seed trays, this means watering every 2-3 days, but adjust based on your home's humidity and temperature.
Here's the thing—once seeds have sprouted, I switch to bottom watering only. Simply place the tray back in the shallow water reservoir for 10 minutes, then remove and drain any excess. This keeps the soil surface dry while roots continue to absorb moisture. The key is consistency: seedlings need steady hydration, but never soggy conditions. You'll see strong, sturdy stems when you do it right.
Tips & tricks for perfect seedling watering
Here's what nobody tells you about keeping your seedlings thriving without the guesswork.
Container Clarity Matters: That clear container in Step 1 isn't just for looks—it lets you monitor the water level as the soil absorbs moisture. I've ruined trays by overestimating how quickly soil would draw up water. Watch the water level drop below the soil line before removing trays, especially with dense seed mixes that absorb slower. This prevents the dreaded "muddy bottom" that suffocates roots.
The 5-Minute Fix: When you see condensation on your tray lid in Step 2, that's your golden signal for perfect humidity. But if you notice water beading on the surface, don't panic—just uncover for exactly 5 minutes. I learned this the hard way after watching seedlings develop mold from trapped moisture. This quick fix mimics natural evaporation cycles that seeds experience outdoors.
Finger Test Precision: In Step 3, when checking soil moisture, press your finger about ½ inch deep—not just the surface. The top layer can feel damp while roots below stay dry. I use my index finger because it's the most sensitive—if it springs back clean, you're good. If it sticks slightly, let it dry another 5 minutes. This simple check prevents the #1 killer of young seedlings: overwatering before germination.
Seasonal Adjustments: The 2-3 day watering schedule in Step 4 works for spring/summer, but winter conditions change everything. In cooler months, I extend to 4-5 days between waterings because evaporation slows dramatically. Always check that top ½ inch—if it feels cool to the touch, it's dry enough. Your seedlings will thank you with stronger stems when they reach for the light.
Pro Tips for Water Seed Trays
- Here's what nobody tells you about keeping your seedlings thriving without the guesswork.
- Container Clarity Matters: That clear container in Step 1 isn't just for looks—it lets you monitor the water level as the soil absorbs moisture.
- The 5-Minute Fix: When you see condensation on your tray lid in Step 2, that's your golden signal for perfect humidity.
Frequently asked questions
Got questions about keeping your seed trays happy and healthy? You’re not alone! Here are some of the most common concerns—and their solutions—to help you avoid soggy seeds or dry starts.
How often should I water seed trays?
Water seed trays gently every 1–2 days, checking the top inch of soil for moisture. Overwatering suffocates seeds, while underwatering dries them out. Use a spray bottle or fine mist to keep soil damp, not soggy. Pro tip: If the tray feels light, it’s thirsty!
Can I reuse seed trays or soil from last year?
Reusing trays is fine if they’re clean, but never reuse soil—it may harbor fungus or pests. Sterilize trays with a 10% bleach solution (rinse well!) or use new, sterile seed-starting mix. Fresh soil prevents mold and ensures strong germination.
Why are my seeds not germinating, even with water?
Check these first:
- Temperature: Most seeds need warmth (70–85°F). Use a heat mat if your space is chilly.
- Light: Some seeds (like lettuce) need darkness to sprout—cover with a damp paper towel until they break soil.
- Depth: Plant seeds too deep? Follow package instructions (usually 2x their width).
What’s the best way to water without washing away seeds?
Use a spray bottle or a watering can with a rose attachment (fine mist) to avoid dislodging seeds. Water slowly from the sides or top, then let excess drain. For stubborn trays, try the bottom-watering trick: Place the tray in a shallow dish of water for 10 minutes—seeds stay put!
Do I need to fertilize seed trays right away?
Nope! Seedlings thrive on the nutrients in fresh seed-starting mix. Wait until they have 2–3 true leaves (not cotyledons—the first baby leaves) before using a diluted liquid fertilizer (½ strength). Over-fertilizing burns tender roots.
Wrapping up and next steps
Mastering the art of watering seed trays ensures your little sprouts grow strong and healthy—no guesswork needed! 🌱 Whether you’re misting, bottom-watering, or using a spray bottle, consistency is key. With the right technique, you’ll set the stage for vibrant seedlings ready to thrive in their new home.
Now that you’re equipped with the know-how, take the next step: grab those trays and give your seeds the love they deserve. Happy gardening—your future garden will thank you! 🌿