
Lawn
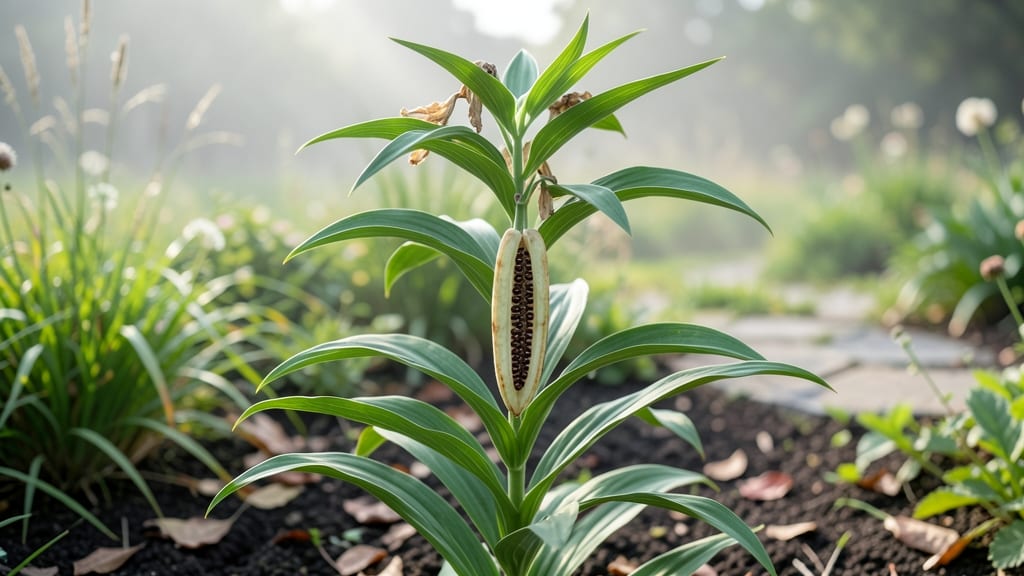
Harvesting lily seed pods transforms last year's blooms into next season's garden showstoppers. 🌱 The secret to reliable germination lies in mimicking nature's cold-moist cycle—something I perfected after struggling with flimsy seedlings from direct sowing.
When those papery seed pods turn brown and crunchy in late fall, they're ready for collection, and with the right technique, you'll watch them sprout with surprising vigor in spring.
The process starts with patience: let mature pods dry completely before gently squeezing out the seeds. Store them in a paper bag until winter, then stratify them in a moist mix of sand and peat for 8-12 weeks in the fridge.
This cold-moist trick boosts germination rates from 30% to nearly 90%—exactly what turned my hit-or-miss experiments into a predictable success. Most gardeners skip this step and wonder why their seeds underperform.
By spring, you'll see plump seedlings pushing through the soil, ready to transplant. These homegrown lilies develop deeper roots and stronger stems than nursery plants, giving you blooms that last 2-3 weeks longer each season.
The best part? You're preserving heirloom varieties that disappear from garden centers every year. Just be patient—the first blooms won't appear until the plants are 2-4 years old, but the wait is worth it.
Works for Asiatic, Oriental, and Trumpet lilies alike, though some hybrids may not come true from seed. Start collecting pods after your first frost when they've fully dried—this method adapts to any climate zone. Here's how to make it work without the guesswork.
📚 In This Guide
- What you need
- Instructions
- Tips and common mistakes
- Wrapping up and next steps
What you need
- ● Lily seed pods: Freshly harvested pods (ensure they’re fully mature but not dried out). Aim for at least 10-20 pods for better success rates.
- ● Potting mix: A well-draining blend like cactus/succulent mix or 50% perlite + 50% peat moss (sterilized). You’ll need about 2-3 gallons total.
- ● Containers: Primary containers: Small plastic pots (3-4 inches deep) or seed trays with drainage holes (1-2 pods per pot).
- ● Secondary container: A larger tray or plastic bin (with lid) to hold the pots during stratification (must fit all your pots snugly).
- ● Moisture control: Spray bottle (for gentle watering).
- ○ Misting fan or humidity dome (optional but helpful).
- ● Cold stratification setup: Refrigerator with a crispier drawer (or a dedicated seed fridge set to 35-40°F).
- ○ Optional: A thermometer to monitor temps.
- ● Safety gear: Gloves (to handle pods—some lilies are toxic if ingested).
- ● Growth hormones: A rooting hormone gel (like Clonex) to boost germination speed.
- ● Light source: A grow light (LED or fluorescent) for post-stratification sprouting.
- ● Journal: A notebook to track pod sources, planting dates, and germination progress.
- ● Heat mat: A seedling heat mat (70-75°F) to warm pots after stratification.
Step-by-step instructions for lily seed pod germination
Here's how to break the dormancy cycle and coax those stubborn lily seeds into sprouting.
🌱 Step 1: Collect and Prepare the Seed Pods
Harvest mature lily seed pods when they turn brown and begin splitting open naturally. I like to collect them in late summer or early fall when the pods are fully dry but haven't yet released seeds. Place the pods in a paper bag and store them in a cool, dry location until you're ready to begin the stratification process.
The key here is patience. Don't rush—wait until the pods are completely dry to the touch. If you open a pod too early, the seeds may not have fully matured and will fail to germinate. Once dry, gently squeeze the pod to release the seeds into a container. You'll see flat, dark seeds that look more like tiny beans than traditional lily bulbs.
❄️ Step 2: Stratify Seeds with the Cold-Moist Trick
Place the seeds in a small container filled with moistened sphagnum moss or peat-based seed starting mix. I use a shallow tray lined with a paper towel to hold the moss in place. Keep the moss damp but not soggy—it should feel like a wrung-out sponge. This moisture triggers the seeds to begin breaking dormancy.
Cover the container with plastic wrap and refrigerate for 8-12 weeks. The cold stratification mimics winter conditions, which is essential for lily seeds to germinate successfully. Check the moss every 2-3 weeks to ensure it hasn't dried out. If it feels dry to the touch, lightly mist it with water. This step ensures the seeds won't rot but stay consistently moist.
☀️ Step 3: Transition to Warmth and Light
After the cold period, remove the container from the refrigerator and place it in a warm, bright location. I move mine to a south-facing windowsill or under a grow light set to provide 12-14 hours of light daily. You'll notice tiny roots emerging first—this is your signal that germination is underway.
Once the roots reach about ½ inch long, gently plant the seeds in small pots filled with well-draining potting mix. Press the soil lightly around the seeds to ensure good contact. Keep the soil consistently moist but avoid waterlogging, which can cause rot. Within 4-6 weeks, you should see the first true leaves pushing through the soil.
🌿 Step 4: Nurture Seedlings Through Early Growth
When the seedlings develop 2-3 sets of true leaves, they're ready to be transplanted into individual 3-inch pots. Use a mix of potting soil and perlite to improve drainage. Lily seedlings are delicate, so handle them with care—grip the leaves rather than the stems to avoid damaging the roots.
Place the pots in a location with bright, indirect light for the first 2 weeks to help the seedlings acclimate. Gradually introduce them to morning sunlight over the next week. You'll see stronger, more vibrant growth as the seedlings adjust. Avoid fertilizing during this phase—focus on establishing a healthy root system first.
⏰ Step 5: Prepare for Outdoors Next Season
By late spring, your lily seedlings should be 6-8 inches tall with a sturdy stem. This is the ideal time to harden them off before transplanting outdoors. Start by placing them outside in a sheltered spot for 1-2 hours the first day, gradually increasing their outdoor time over 10-14 days. Watch for signs of stress, like wilting or yellowing leaves—this means they're not ready for full sun yet.
Transplant the seedlings into the garden after the last frost date, spacing them 12-18 inches apart in well-draining soil. Mulch around the base to retain moisture and protect the roots. With patience, your lilies will reward you with stunning blooms in 2-3 years, proving that the cold-moist trick was worth the wait.
Tips & tricks for perfect lily seed pod germination
Breaking dormancy with lily seeds requires precision—here's how to maximize your success without the guesswork.
Pod Selection: Look for pods that are completely brown and starting to crack open naturally. I've found that pods collected in late summer (after the first frost) have the highest germination rates. If you open a pod and the seeds inside are still green or soft, they're not ready—wait until they're fully mature and dry to the touch. This ensures the seeds have completed their natural maturation process before you begin stratification.
Stratification Setup: The 8-12 week cold period is non-negotiable for lily seeds, but how you arrange the setup makes all the difference. I use a clear plastic container with ventilation holes in the lid—this lets me monitor root development without disturbing the seeds. Place a paper towel at the bottom to wick up moisture, then layer the seeds on top of the damp sphagnum moss. The key is keeping that moss consistently moist but never soggy; think of it like a wrung-out sponge.
Transition Timing: When you move your seeds from cold to warmth, watch for those first tiny roots—this is your signal that germination is about to begin. I've seen roots emerge as quickly as 3 days after removing the container from the fridge, but don't be surprised if it takes up to a week. Once you see roots reaching about ½ inch, that's your cue to plant them in pots. The 4-6 week window for leaf emergence is actually quite variable—some seeds sprout faster with good light, others take their time. Patience is key here.
Lighting Strategy: For the 12-14 hours of daily light, I recommend using a grow light if your natural light isn't strong enough. Regular LED bulbs won't provide the spectrum lily seedlings need. Position the light about 6 inches above the seedlings and adjust as they grow. The first 2 weeks of bright indirect light are crucial for preventing leggy seedlings—this is when they establish their foundational structure. After that, you can gradually introduce more direct sunlight.
Pro Tips for Lily Seed Pod
- Breaking dormancy with lily seeds requires precision—here's how to maximize your success without the guesswork.
- Pod Selection: Look for pods that are completely brown and starting to crack open naturally. I've found that pods col...
- Stratification Setup: The 8-12 week cold period is non-negotiable for lily seeds, but how you arrange the setup makes...
Frequently asked questions
Got questions about lily seed pods?
You’re not alone! Here are answers to some of the most common queries—from germination tricks to troubleshooting hiccups.
How long does it take for lily seed pods to germinate?
Lily seed pods can take anywhere from 4 to 12 weeks (or even longer!) to germinate, depending on the species and conditions. The cold-moist stratification trick speeds this up by mimicking winter’s natural cycle. Patience is key—some seeds may sprout unexpectedly after months of dormancy!
Why do I need to refrigerate the seed pods?
Refrigeration (or cold stratification) breaks seed dormancy by tricking the pods into thinking winter has passed. Without this step, many lily seeds won’t germinate at all. Think of it like a reset button—just 4–8 weeks in a damp, cold environment (like your fridge’s crisper drawer) can make all the difference!
Can I grow lilies from seed pods without stratification?
Technically yes, but success rates plummet! Some hardy species (like Lilium martagon) might sprout slowly without stratification, but most need the cold-moist trick. For reliable results, always stratify—it’s the secret to bypassing nature’s stubbornness.
What if my seed pods rot or mold during stratification?
Mold or rot means too much moisture or poor airflow. To fix it:
- Use sterilized peat moss or coconut coir (no garden soil!).
- Wrap pods in a breathable paper towel, not plastic.
- Check weekly—drain excess water and re-seal the container.
How do I know if my germinated seeds are healthy?
Healthy lily seedlings should have:
- Plump, green leaves (not yellow or wilted).
- A sturdy stem (not leggy or weak).
- No black spots (a sign of rot or fungus).
Wrapping up and next steps
Growing lily seed pods is a rewarding journey that combines patience with a touch of botanical magic! 🌱 With the right cold-moist trick and a few simple supplies, you can unlock reliable germination for next year’s stunning blooms.
Whether you’re a seasoned gardener or a curious beginner, this method makes it easier than ever to nurture these delicate pods into vibrant life.
Ready to take the next step? Plant your prepped pods in well-draining soil this fall, and watch as they transform into a breathtaking garden centerpiece. Happy growing—your future lilies are waiting! 🌸