
Propagation
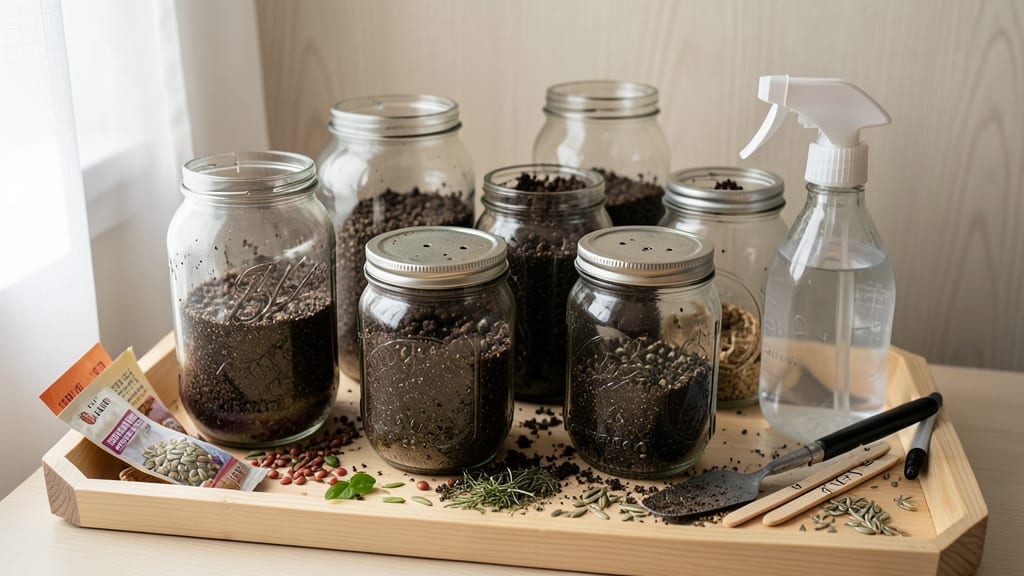
Turn these old jars into seed-starting powerhouses—no extra cost, just stronger seedlings. ✨ I’ve saved hundreds on seedling trays by repurposing glass jars, and the results speak for themselves: sturdy roots, perfect drainage, and seedlings that transplant like pros. The best part?
You’re keeping plastic out of landfills while giving your plants the ideal start. The secret lies in two simple modifications: drilling drainage holes and using a breathable lid (like a coffee filter) to control moisture without drowning roots. No fancy equipment—just jars, a drill, and a little patience.
My first batch of peppers grew so strong, I barely lost any during transplanting. You’ll end up with healthier seedlings that outpace store-bought starts, all while reducing waste. The jars stay clean, stack neatly, and even double as propagators later in the season.
No more flimsy plastic trays—just reliable, reusable containers that work as hard as you do. Works for any jar size, from tiny jam jars to gallon-sized canning containers. Here’s how to make it foolproof—even for beginners who’ve killed seedlings before.
📚 In This Guide
- What you need
- Instructions
- Tips and common mistakes
- Wrapping up and next steps
What you need
- ● Old jars: Clean, empty glass jars with lids (mason jars, pasta sauce jars, or similar). Quantity: 4–12, depending on seed volume.
- ● Seed starting mix: Lightweight, sterile potting soil (avoid garden soil). Quantity: 1–2 bags (1–2 cubic feet).
- ● Seeds: Choose fast-growing varieties (e.g., herbs, lettuce, or flowers) for best results.
- ● Spray bottle: For gentle watering (avoids disturbing seeds).
- ● Permanent marker: To label jars with seed types and planting dates.
- ● Scissors or knife: For cutting drainage holes in jar lids (if needed).
- ○ Tray or saucer: To catch excess water (optional but helpful).
- ● Plastic wrap or dome lid: Creates a mini greenhouse for humidity.
- ● Grow lights or sunny windowsill: Ensures 12–16 hours of light daily.
- ● Heat mat: Speeds up germination for cool-season seeds.
- ● Twine or rubber bands: Secures labels to jars.
Step-by-Step instructions for using old jars to start seeds
Here's how to transform everyday glass jars into perfect seed-starting containers—no fancy equipment needed.
🪴 Step 1: Clean and Prepare Your Jars
Start by thoroughly washing your jars with hot, soapy water to remove any residue that could inhibit germination. I like to use a mix of water and white vinegar to cut through grease and sterilize the glass—just a splash in the rinse cycle works wonders. Let them dry completely before proceeding.
For drainage, use a drill to create 2-3 small holes in the bottom of each jar. If you're worried about soil spilling out, place a piece of fine mesh or a coffee filter over the holes before adding your growing medium. This ensures water drains freely while keeping the mix contained.
🌱 Step 2: Layer for Drainage and Fill with Soil
Place a 1-inch layer of perlite or coarse sand at the bottom of each jar to promote drainage. This layer prevents waterlogging, which can rot delicate seedling roots. I always use perlite because it stays loose and doesn’t compact over time like sand can.
Fill the jars about ¾ full with a high-quality seed-starting mix. Press it down lightly so the surface is firm but not packed—you want air pockets gone but the mix loose enough for tender roots to push through. Tap the jar gently on the table to settle everything evenly.
💧 Step 3: Plant and Water for Germination
Plant your seeds according to the packet instructions, usually at a depth of about ¼ inch. I like to use a toothpick to make small holes in the soil—it’s precise and avoids disturbing the mix too much. Cover the seeds lightly with additional soil, then mist the surface gently with a spray bottle until evenly moist.
Place the jars in a warm, bright spot where the soil stays consistently moist but not soggy. A seedling heat mat set to 70-75°F speeds up germination, especially for slower starters like peppers or tomatoes. Watch for condensation on the jar walls—this tells you the humidity is just right.
☀️ Step 4: Provide Light and Monitor Growth
Once seeds sprout, move the jars to a location with 12-16 hours of light daily. A south-facing window or a grow light works best. If using jars without lids, rotate them a quarter turn every few days so seedlings grow straight instead of leaning toward the light.
Water from the bottom by placing the jars in a shallow tray of water for 10-15 minutes. This method keeps the soil evenly moist without disturbing the seedlings. You’ll know it’s time to water again when the top inch of soil feels dry to the touch.
✂️ Step 5: Transplant When Ready
When seedlings have 2-3 sets of true leaves and are about 2-3 inches tall, they’re ready to transplant. Gently slide a knife around the edge of the jar to loosen the soil, then tip the jar to remove the seedling and its root ball intact.
Plant the entire jar in the ground or a larger pot, then fill any gaps with additional soil. The jar will eventually decompose, leaving no trace behind. This method reduces transplant shock because the roots stay undisturbed—just like they were in their cozy jar home.
Tips & tricks for perfect seed starting with upcycled jars
Transforming everyday jars into seed-starting containers is a game-changer for gardeners—here's how to maximize their potential.
Drainage Design: When creating those 2-3 small holes in Step 1, make them slightly larger on one side of the jar. This creates a natural slope for water drainage and prevents soil from clogging the holes over time. I use a nail and hammer for precision—just tap gently to avoid cracking the glass. For extra security, wrap the holes with fine mesh before adding soil, especially if you're using heavier seed-starting mixes.
Soil Layering Technique: The 1-inch layer of perlite in Step 2 deserves special attention—don't skip the tap-and-settle method after filling with soil. I find that gently tapping the jar on the table 3-4 times helps eliminate air pockets that could trap moisture and lead to rot. For larger jars, use a wooden spoon to press down lightly in concentric circles, working from the outside in to maintain even pressure.
Light Management: The 12-16 hours of light requirement in Step 4 is crucial, but don't overlook the importance of light quality. If using a south-facing window, rotate your jars daily to prevent seedlings from leaning toward the light source. For indoor grow lights, position them 2-3 inches above the seedlings and adjust as they grow—this prevents leggy, weak stems that struggle to support themselves later. A simple ruler taped to your setup helps track this distance easily.
Transplanting Hack: In Step 5, when your seedlings reach 2-3 sets of true leaves, I recommend scoring the jar's interior with a butter knife before transplanting. This creates a clean break line that makes removal easier and reduces root disturbance. For stubborn seedlings, run warm water around the jar's exterior for 10 seconds—this softens the soil slightly and makes extraction effortless. The jar's smooth sides also help prevent soil from clinging to roots during transfer.
Pro Tips for Seed Starting Old Jars
- Transforming everyday jars into seed-starting containers is a game-changer for gardeners—here's how to maximize their...
- Drainage Design: When creating those 2-3 small holes in Step 1, make them slightly larger on one side of the jar. Thi...
- Soil Layering Technique: The 1-inch layer of perlite in Step 2 deserves special attention—don't skip the tap-and-sett...
Frequently asked questions
Got questions about repurposing old jars for seed starting? You’re not alone! Here are some common concerns—and easy answers—to help you grow confidently.
Can I use any old jar for seed starting?
Most clean, glass jars work—just ensure they’re food-grade (no chipping or cracks). Avoid jars with dark tint (they trap heat), and skip those with metal lids (they can rust). Mason jars, pasta sauce jars, and even baby food jars are great choices if sterilized first!
How long does it take for seeds to sprout in jars?
Sprouting time varies by plant: fast growers like radishes or basil may pop up in 5–7 days, while slower ones (tomatoes, peppers) can take 10–21 days. Keep jars in a warm, bright spot (or under grow lights) and check soil moisture daily—consistency is key!
What’s the best way to reuse jars after seed starting?
After transplanting seedlings, sterilize jars by boiling lids/rinses with vinegar or baking soda. Store them in a dry place until reuse. Pro tip: Label jars with a permanent marker to track what you planted (and when!).
Why aren’t my seeds germinating in jars?
Common culprits: cold soil (use a seedling heat mat), dampness (condensation = mold risk—ventilate with a toothpick hole), or old seeds. Test viability by soaking seeds overnight—if they swell, they’re still good!
Are there alternatives to jars for seed starting?
Try plastic containers (yogurt cups, egg cartons), paper pots, or even repurposed tin cans. Just ensure drainage (poke holes in the bottom) and avoid materials that retain too much moisture (like untreated wood).
Wrapping up and next steps
Starting seeds in old jars isn’t just a budget-friendly hack—it’s a sustainable, space-saving win that gives your plants the cozy, controlled environment they crave! Whether you’re repurposing pasta sauce jars or mason canning containers, you’ve got a low-cost, high-reward method to jumpstart your garden. 🌱✨
Ready to grow your green thumb? Grab those jars, follow the steps, and watch your seedlings thrive—then transplant with confidence once they’re ready for the big outdoors!