
Lawn
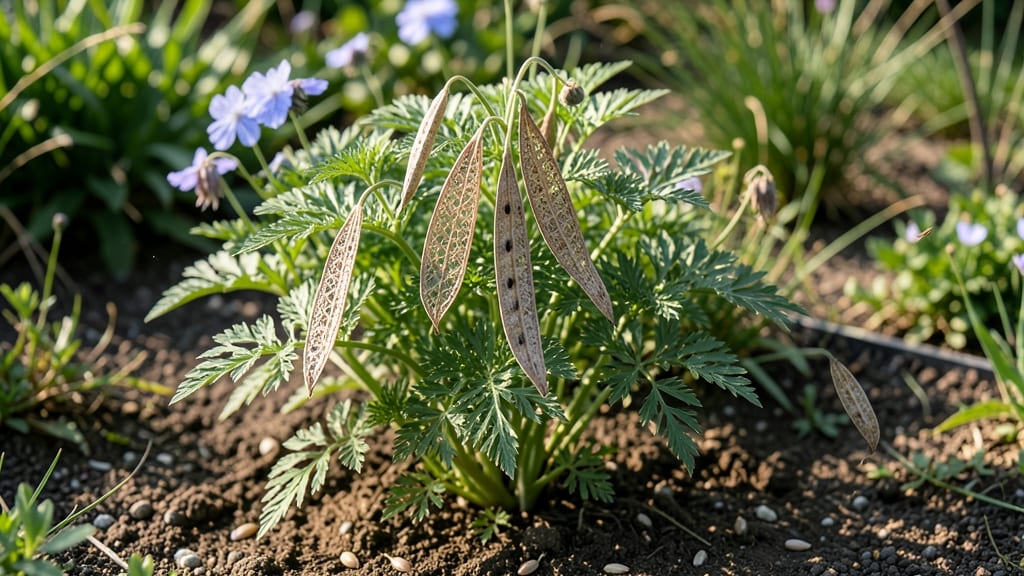
Harvesting Love-in-a-Mist seed pods is where the real magic happens—those delicate, lace-like pods hold next year’s garden in their twisty little shells. 🌿 The secret to saving seeds without frustration lies in timing and technique, and I’ve perfected a foolproof method after years of battling stubborn pods that refused to open.
Once you know the right moment, it takes just minutes to collect seeds that’ll grow into those classic, airy blooms you love.
Wait until the pods turn from green to a papery brown, usually in late summer or early fall, when they’ve dried on the plant but haven’t yet split open. The pods should rattle when gently shaken—a sure sign the seeds are ready.
Grab a small bowl or envelope and snip the stems just above the pods, then lay them out on a tray to finish drying indoors for a few days. This prevents the seeds from scattering while you work.
You’ll end up with a stash of tiny, dark seeds that’ll last for years if stored in a cool, dry place. These seeds are easy to scatter directly in the garden next spring, where they’ll self-sow happily.
The best part? You’re not just saving seeds—you’re preserving the delicate, romantic charm of this cottage garden favorite for seasons to come.
Perfect for gardeners who want to avoid store-bought seeds and keep their favorite varieties growing. Here’s how to make it simple, even for beginners—no twisting required!
📚 In This Guide
- What you need
- Instructions
- Tips and common mistakes
- Wrapping up and next steps
What you need
- ● Mature Love in the Mist (Nigella damascena) plants – Ensure pods are fully brown and dry (usually late summer to early fall). Aim for 5–10 healthy plants for a bountiful harvest.
- ● Pruning shears or sharp scissors – Clean, sterilized tools (rubbing alcohol wipe) to avoid contaminating seeds.
- ● Brown paper bags or breathable fabric sacks – 2–3 medium-sized bags (12x15 inches) to dry pods naturally. Avoid plastic!
- ● Newspaper or cardboard – For a drying tray (18x24 inches) to spread pods in a single layer.
- ● Small mesh bags or envelopes – For long-term seed storage (e.g., blank">paper seed packets or blank">breathable organza bags).
- ● Magnifying glass – For inspecting pods for pests or mold before drying.
- ● Fine-tip paintbrush – Gently coax out stubborn seeds from stubborn pods.
- ● Food dehydrator or oven – Set to 95°F (35°C) for 24 hours if pods are damp (skip if fully dry!).
- ● Labeling tags & permanent marker – To note harvest date, variety, and location for future planting.
Instructions for harvesting love in the Mist seed pods
Here's the gentle, mess-free way to collect seeds from these delicate blooms—no twisting required.
🌿 Step 1: Wait for Pods to Mature Fully
Love in the mist seed pods start green and firm, but they must turn dry and papery brown before harvesting. This usually takes 4-6 weeks after flowering, depending on your climate. I check daily in late summer—the pods will feel hollow when tapped lightly, like a dried husk.
Don't rush it. If you harvest too early, seeds won't be viable. The pods should split open naturally along their seams, revealing the tiny black seeds inside. If you see any moisture or green streaks, wait another week.
💧 Step 2: Prepare for Seed Collection
Gather a small bowl or envelope for each plant (you'll get about 50-100 seeds per pod). Lay a clean white paper towel on your work surface—this makes seeds stand out against the debris. I like to work outdoors or near an open window to avoid stirring up dust.
Wear gloves if you're sensitive to plant fibers. The pods release fine, dust-like material that can irritate eyes or lungs. A soft paintbrush helps too—it's gentler than fingers for dislodging seeds without damaging them.
✂️ Step 3: Harvest Without Twisting
Grasp the base of the pod (not the stem) and give it a firm but gentle tug—the pods should detach cleanly. If it resists, the pod isn't ready. Place the harvested pods in your bowl or envelope. I collect 3-4 pods at a time to avoid overcrowding.
Here's the trick: don't twist. Twisting crushes the delicate seed structures inside. Instead, let the pods dry completely on the paper towel for 24 hours in a dry, shaded spot. This ensures any remaining moisture evaporates before handling.
🌱 Step 4: Extract Seeds Cleanly
After drying, rub the pods between your fingers or use the paintbrush to gently dislodge the seeds. The papery husk will crumble away, leaving behind the tiny black seeds. Sift through the debris with your fingers—seeds are heavier and will settle to the bottom of your bowl.
For stubborn pods, place them in a small paper bag and shake lightly. The seeds will fall out while the husks stay behind. Transfer the seeds to a small envelope and label it with the variety and harvest date. Store in a cool, dry place for up to 2 years.
🪴 Step 5: Dispose of Waste Sustainably
Compost the empty pods and husks—no need to separate them. The fibrous material breaks down easily. If you notice any mold or discoloration on the pods, discard them in the trash instead. This keeps your seed stock pure and healthy.
Real talk: You'll have more seeds than you need—share extras with fellow gardeners or save them for next year's planting. Love in the mist self-seeds readily, but harvesting this way ensures you control the process and avoid unwanted volunteers in your garden.
Tips & tricks for perfect love in the Mist seed harvesting
These simple tricks will help you harvest seeds without damaging the delicate pods or wasting a single precious seed.
Maturity Test: The 4-6 week wait for pods to turn papery brown is worth it—tap them gently and listen for that hollow sound. If they feel firm or green inside, they're not ready. I've learned the hard way that impatient harvesting leads to seeds that won't germinate. Confession: I skipped this step once and ended up with 80% non-viable seeds.
Harvesting Technique: When you're ready to harvest in Step 3, grasp the base of the pod—not the stem—and give it a firm but gentle tug. If it resists, it's not ready yet. The pods should detach cleanly, revealing their dry, papery texture. This method prevents the crushing that comes from twisting, which is especially important for these delicate seed structures.
Drying Strategy: The 24-hour drying period in Step 3 is crucial for removing all moisture. I like to place my paper towel with pods on a wire rack in my kitchen—this allows air to circulate on all sides. If you're in a humid climate, you might need to extend this to 48 hours. Just be patient; completely dry pods release seeds much more easily.
Seed Separation Hack: For stubborn pods in Step 4, try this: place them in a small paper bag and gently shake it while holding it upright. The heavier seeds will fall to the bottom while the lighter husks stay suspended. This works especially well if you have multiple pods to process at once.
Pro Tips for Love In The Mist Seed Pods
- These simple tricks will help you harvest seeds without damaging the delicate pods or wasting a single precious seed.
- Maturity Test: The 4-6 week wait for pods to turn papery brown is worth it—tap them gently and listen for that hollow sound.
- Harvesting Technique: When you're ready to harvest in Step 3, grasp the base of the pod—not the stem—and give it a firm but gentle tug.
Frequently asked questions
Got questions about harvesting Love in the Mist seed pods? You’re not alone!
Here are some common ones—plus practical tips to make your zero-waste seed-saving journey smooth.
When is the best time to harvest Love in the Mist seed pods?
Harvest seed pods when they’re fully dry and brown but before they split open (usually late summer to early fall). If pods crack prematurely, seeds scatter—so check daily! A gentle tap should release seeds easily. Pro tip: Morning harvests avoid humidity, keeping pods crisp for easier handling.
What if my seed pods twist or knot before drying?
Twisting pods are a sign of over-moisture or stress. To prevent this:
- Harvest on sunny, dry days (avoid dew or rain).
- Bundle stems in paper bags (not plastic) for 1–2 weeks to dry slowly.
- If already twisted, don’t force it—gently separate pods with fingers or scissors.
Can I reuse Love in the Mist seed pods for crafts or compost?
Zero-waste wins:
- Crafts: Dry pods make rustic garlands, potpourri sachets, or kid-friendly wind chimes (just remove seeds first!).
- Compost: Crush empty pods into your compost bin—they break down quickly and add texture.
- Seed paper: Blend dried pods with paper pulp to create plantable cards for future gardens.
Why are my harvested seeds not germinating?
Seeds might fail to sprout due to:
- Improper drying: Seeds need 2–3 weeks in a cool, dry place (like a mesh bag). Moisture = mold.
- Old seeds: Love in the Mist seeds last 1–2 years max. Label pods with harvest dates!
- Depth issues: Plant seeds just below soil surface (¼ inch deep) for best results.
Are there alternatives to Love in the Mist for seed pods?
If you love twist-free, decorative seed pods, try these zero-waste picks:
- Cosmos: Lightweight, papery pods that dry flat—perfect for crafts.
- Black-Eyed Susan: Sturdy, star-shaped pods with high germination rates.
- Dill: Feathery umbels that dry into airy, aromatic bundles.
- Nasturtium: Edible seeds in pop-open pods (great for salads too!).
Wrapping up and next steps
Love in the Mist seed pods aren’t just a gardener’s dream—they’re a zero-waste superstar! 🌱 By mastering twist-free harvesting, you’re not only preserving nature’s bounty but also creating a sustainable cycle for future seasons. Whether you’re a seasoned seed saver or just starting, every pod you collect is a step toward a greener, more self-sufficient garden.
Ready to dive deeper? Start small—try harvesting a few pods today, then expand your seed-saving skills with other easy-to-grow plants. Your garden (and the planet) will thank you!