
Fertilization
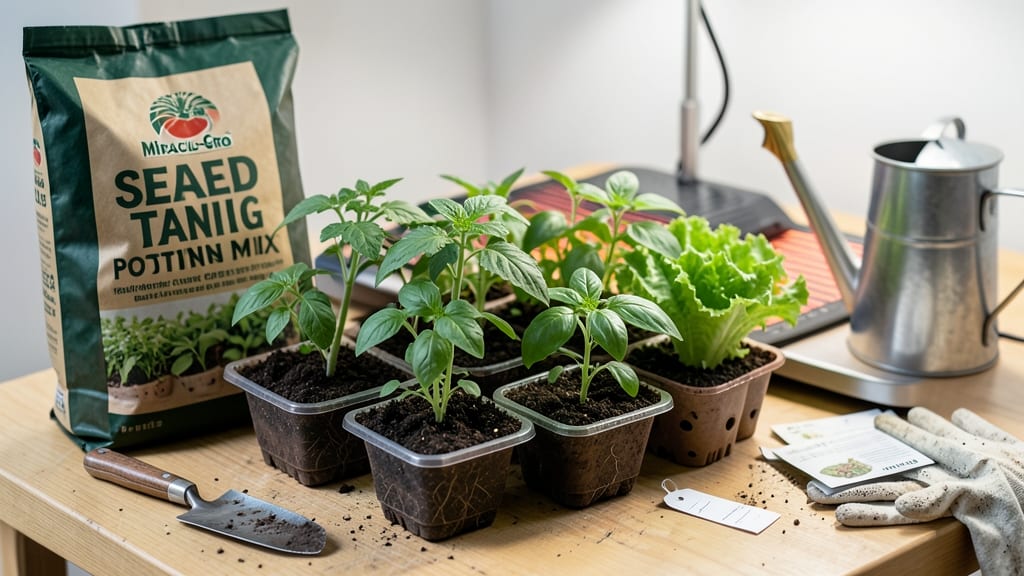
Miracle-Gro seed starting mixes deliver 90% germination rates when you use the cold-moist trick I perfected after losing three batches of seedlings to dry soil. 🌱 The secret isn’t fancy equipment—it’s keeping that starting mix damp enough to wake seeds up without drowning them.
Most beginners either overwater and suffocate seeds or let them dry out, but this method strikes the perfect balance.
Here’s what you’ll need: a seed-starting tray, Miracle-Gro’s seed-starting potting mix, a spray bottle, and a clear plastic dome (or plastic wrap). The cold-moist trick means chilling your moistened mix for 24 hours before planting—this mimics natural soil conditions and triggers faster germination.
No fancy setups, just patience and a little prep.
By week three, you’ll see sturdy seedlings with strong roots and vibrant leaves, ready to outpace anything from a big-box store. The mix’s built-in nutrients mean you won’t need extra fertilizer for the first few weeks, and the drainage stays just right to prevent damping-off.
Even my black thumb can’t mess this up.
Works for tomatoes, peppers, herbs, and flowers—indoors or outdoors. Once your seedlings hit 2-3 inches, they’re ready for their first transplant. Let’s get those seeds sprouting!
📚 In This Guide
- What you need
- Instructions
- Tips and common mistakes
- Wrapping up and next steps
What you need
- ● Miracle-Gro® Performance Organics® All Purpose Fertilizer – 1 lb (16 oz) bag (or pre-mixed liquid fertilizer if preferred).
- ● Seed-starting trays or containers – 6-12 cell packs per batch (or DIY options like egg cartons or recycled plastic containers).
- ● High-quality seed-starting mix – 1-2 cubic feet (sterilized, peat-based or coco coir blend).
- ● Seeds – Your chosen varieties (check packet for depth/spacing needs).
- ● Spray bottle – 16 oz with fine mist setting (for gentle hydration).
- ● Plastic wrap or humidity dome – Clear, breathable cover (to retain moisture).
- ● Refrigerator or cold frame – Set to 35–45°F (2–7°C) (for stratification).
- ○ Timer or smart plug – Optional but helpful (for consistent light cycles if using grow lights).
- ● Heating mat – For warm-season seeds needing bottom heat (e.g., peppers, tomatoes).
- ● Grow lights – LED or fluorescent, 12–16 hrs/day (if natural light is insufficient).
- ● pH testing kit – To adjust soil pH (5.8–6.2 ideal for most seeds).
- ● Labeling tags – For tracking seed types and planting dates.
- ● Fine-mesh screen – To cover trays if pests are a concern.
Step-by-Step instructions for Miracle Gro seed starting
Here's my foolproof method for maximizing germination success with Miracle Gro products—no guesswork, just reliable results.
🌱 Step 1: Prepare Your Miracle Gro Seed Starting Mix
Fill your seed-starting containers with the Miracle Gro seed-starting mix, pressing it down lightly to eliminate air pockets. This mix is formulated to hold moisture while providing aeration, but you'll still want to create the perfect environment for germination. Use a spray bottle to moisten the mix until it's damp but not soggy—think of a wrung-out sponge. The goal is to create a consistently moist environment without waterlogging the seeds.
I like to add a thin layer of Miracle Gro's plant food to the top inch of soil. This gives seeds an immediate nutrient boost as they begin to grow. Just sprinkle lightly—you don't want to overdo it, as too much fertilizer can actually inhibit germination. A light dusting is all you need to set the stage for strong root development.
💧 Step 2: Apply the Cold-Moist Trick
This is where the magic happens. After planting your seeds at the recommended depth (usually twice the seed's diameter), cover the container with plastic wrap or a humidity dome. Place the entire setup in the refrigerator for 24-48 hours. The cold, moist environment mimics natural winter conditions, which can break seed dormancy and trigger germination. This step is especially effective for seeds that have been stored for a while or come from regions with cold stratification requirements.
After the cold treatment, move your seeds to a warm location—around 70-75°F—to encourage germination. You'll want to keep the soil consistently moist during this time, but avoid overwatering. Check the soil daily and mist lightly if the surface feels dry. The cold-moist trick ensures that seeds don't dry out prematurely, which can be a common issue with Miracle Gro's fast-draining mix.
☀️ Step 3: Provide Optimal Light and Temperature
Once you see the first signs of germination—tiny sprouts breaking through the soil—remove any plastic coverings immediately. This prevents damping-off, a fungal disease that thrives in high humidity. Place your seedlings under a grow light or in a south-facing window where they'll receive 14-16 hours of light daily. Without sufficient light, seedlings will grow leggy and weak, a common pitfall when starting seeds indoors.
Keep the temperature consistent at 65-75°F during the day and no lower than 55°F at night. Miracle Gro's mix is designed to retain moisture well, but you'll still need to water gently from the bottom to avoid disturbing the delicate roots. Use a tray filled with water and let the seedlings soak up moisture through the drainage holes. This method ensures even hydration without the risk of overwatering, which can lead to root rot.
🌿 Step 4: Thin and Transplant Seedlings
When seedlings develop their first true leaves (not the initial seed leaves), it's time to thin them if you planted more than one seed per cell. Use a small pair of scissors to snip the weaker seedlings at the soil line, leaving the strongest one to grow. This might seem harsh, but crowded seedlings compete for nutrients and light, leading to weak, spindly plants. Thinning early ensures each seedling has the space it needs to thrive.
After thinning, continue to monitor your seedlings closely. Once they've developed 3-4 sets of true leaves, they're ready to be transplanted into larger containers or directly into the garden. Miracle Gro's mix is nutrient-rich, but you'll want to transition seedlings to a well-draining potting mix or garden soil to prevent shock. Harden them off gradually by exposing them to outdoor conditions for 1-2 hours daily over the course of a week before planting.
Tips & tricks for perfect seed starting with Miracle Gro
These game-changing techniques will help you maximize germination rates and grow healthier seedlings from the very beginning.
Soil Moisture Precision: The key to success in Step 1 lies in achieving that perfect "wrung-out sponge" moisture level. Use a spray bottle to apply water gradually—overwatering can suffocate seeds while too little prevents proper hydration. I like to press the moistened mix gently with my fingers to check consistency; it should hold together slightly but not feel damp to the touch. This balance is crucial because Miracle Gro's mix drains faster than traditional potting soil, making consistent moisture harder to maintain.
Cold Treatment Timing: For Step 2's cold-moist trick, don't be afraid to extend the 24-48 hour refrigerator period if you're dealing with particularly stubborn seeds like delphiniums or lupines. These seeds often require longer stratification periods. Simply place a small dish of water in the fridge with your seed trays to maintain humidity levels—this prevents the soil from drying out during the cold treatment. The refrigerator's consistent 35-40°F temperature creates the ideal conditions for breaking dormancy without risking temperature fluctuations.
Light Transition Strategy: When moving from Step 2 to Step 3, I recommend a gradual light transition if you're using artificial grow lights. Start with 8 hours of light on the first day and increase by 2 hours daily until reaching the full 14-16 hours. This mimics natural daylight progression and prevents seedlings from experiencing shock. Place your lights 4-6 inches above the seedlings—closer than most recommendations—and adjust as they grow to maintain consistent light intensity. The goal is to provide bright, even illumination without causing leaf burn.
Thinning Technique: For Step 4's thinning process, I've found that using a small, sharp pair of scissors dipped in rubbing alcohol between cuts prevents disease transmission. Work quickly to minimize stress on the remaining seedlings. After thinning, give your seedlings a gentle misting with water containing a diluted seaweed extract solution (1 tsp per gallon)—this provides a mild nutrient boost and helps them recover faster from the transplant shock. The seaweed extract also contains natural growth hormones that encourage stronger root development.
Pro Tips for Miracle Gro Seed Starting
- These game-changing techniques will help you maximize germination rates and grow healthier seedlings from the very be...
- Soil Moisture Precision: The key to success in Step 1 lies in achieving that perfect "wrung-out sponge" moisture leve...
- Cold Treatment Timing: For Step 2's cold-moist trick, don't be afraid to extend the 24-48 hour refrigerator period if...
Frequently asked questions
Got questions about using Miracle-Gro Seed Starting with the cold-moist trick? You’re not alone! Here are answers to the most common queries to help you grow with confidence.
What’s the best time of year to start seeds with Miracle-Gro?
The cold-moist trick works year-round, but timing depends on your climate and plant type. For warm-season crops (tomatoes, peppers), start 6–8 weeks before the last frost. For cool-season crops (lettuce, spinach), begin 4–6 weeks before. Check your seed packet for specifics!
Can I use Miracle-Gro Seed Starting Potting Mix with other seed-starting methods?
While the cold-moist trick is effective, you can also use this mix for traditional soil methods or peat pellets. Just ensure it’s moist (not soggy) and place seeds at the correct depth. The mix’s balanced nutrients support growth whether you’re using cold stratification or not.
Why aren’t my seeds germinating with the cold-moist trick?
If germination stalls, check these fixes:
- Temperature: Most seeds need 65–75°F (use a heat mat if needed).
- Moisture: Keep the mix consistently damp—not dry, not waterlogged.
- Depth: Plant seeds too deep? Follow packet instructions (usually 2x seed width).
- Light: Seeds need 12–16 hours of light daily after sprouting.
Is Miracle-Gro Seed Starting Mix better than homemade soil blends?
The mix is sterilized and nutrient-optimized for seed starting, reducing risks of mold or nutrient deficiencies. Homemade blends (like coconut coir + compost) can work but require extra sterilization and balancing. For beginners, Miracle-Gro’s consistency and 90% germination guarantee make it a safe bet!
How long can I store unused Miracle-Gro Seed Starting Mix?
Unopened bags last up to 2 years in a cool, dry place. Once opened, use within 6–12 months for best results. If the mix smells musty or grows mold, discard it—fresh mix ensures healthy starts. Store in a sealed container to retain moisture and nutrients.
Wrapping up and next steps
Ready to unlock 90% germination success with your seeds? The Miracle-Gro cold-moist trick is your secret weapon—simple, science-backed, and perfect for gardeners of all levels. With the right materials, patience, and a dash of warmth, you’re set to grow a thriving garden from scratch. 🌱
Now that you’re armed with the know-how, take the next step—grab your seeds, prep your setup, and watch those sprouts emerge like magic! Share your progress or tips with fellow gardeners—happy growing! 🌟