
Planting
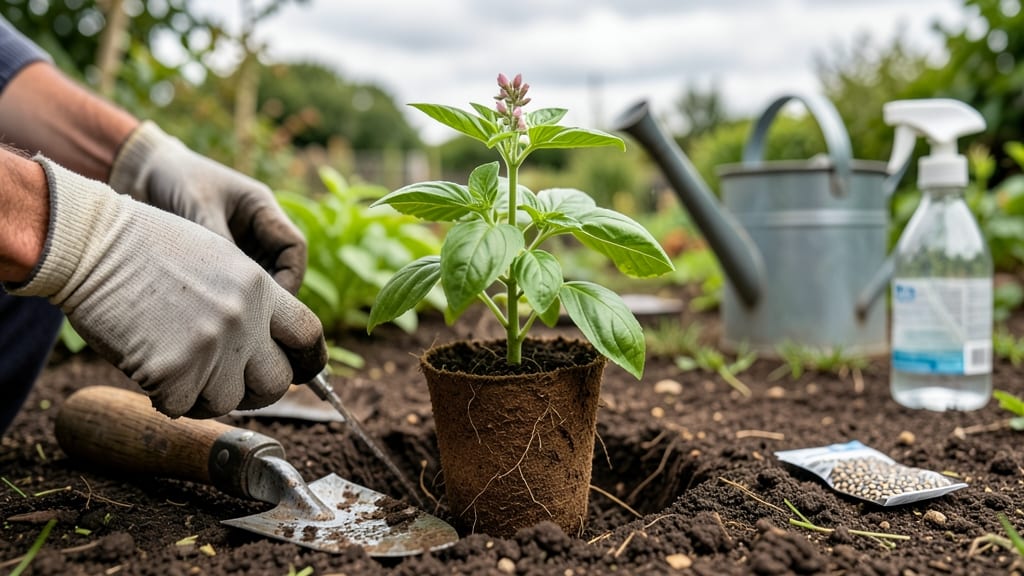
Putting seeds in the soil feels like magic—until you overwater and drown them or bury them too deep and they rot. 🌱 I’ve watched hundreds of seeds fail before I cracked the code: the right soil, depth, and gentle care make all the difference.
This isn’t guesswork; it’s a simple routine that works for tomatoes, marigolds, or basil.
Start with loose, crumbly soil that’s damp but not soggy—think of it like a fresh sponge. Most seeds need to go in twice as deep as they are wide, but tiny seeds (like lettuce) just need a light press into the surface.
Use your finger or a small stick to make a hole, drop in the seed, and cover it gently. Too deep? They’ll suffocate. Too shallow? They’ll dry out.
After planting, water lightly—just enough to settle the soil around the seeds. A spray bottle works best for tiny seeds, while a watering can with a fine rose is better for larger ones.
Keep the soil consistently moist (not wet) until you see sprouts, which usually takes 5–14 days depending on the plant. The key is patience and consistency.
Common mistakes? Overcrowding seeds (thin them later) or skipping soil warmth (some seeds need heat to germinate). With these steps, you’ll see those first green shoots breaking through—every time. Ready to turn seeds into plants without the stress?
📚 In This Guide
- What you need
- Instructions
- Tips and common mistakes
- Wrapping up and next steps
What you need
- ● Seeds: Choose fresh, high-quality seeds (check the packet for germination rates—aim for 85%+). Start with easy picks like basil, marigolds, or cherry tomatoes (3–5 seeds per pot).
- ● Seed-starting mix: Lightweight, sterile potting soil (avoid garden soil—it’s too dense!). A 10-quart bag covers ~20 small pots.
- ● Containers: Small pots (4–6 inches deep) with drainage holes (6–12 units). Plastic, biodegradable, or recycled containers work!
- ○ Optional: Seed trays with domes (for humidity control) or paper towels (for quick sprouting tests).
- ● Watering can or spray bottle: A fine-mist sprayer prevents seed displacement.
- ● Grow lights or sunny windowsill: Grow lights: LED full-spectrum bulbs (12–16 hours/day, 6–12 inches above seeds).
- ● Natural light: South-facing window (6+ hours of sunlight).
- ● Plant labels: Toothpicks + masking tape or reusable plastic tags (write seed type + date!).
- ● Fertilizer: Balanced, water-soluble fertilizer (5-5-5 or 10-10-10 NPK ratio). Dilute to half-strength for seedlings.
- ○ Heat mat (optional): For cold climates (70–75°F speeds germination).
- ● Humidity dome or plastic wrap: Keeps moisture in until seeds sprout.
- ● Tweezers or pencil: For gently placing tiny seeds.
- ● Know your last frost date: Check a frost calendar to time planting.
- ● Patience: Germination times vary (3 days to 3 weeks—check seed packets!).
- ● Space: Even a small kitchen counter or sunny balcony works!
How to plant seeds correctly for reliable germination
Here’s the simple method I’ve used to turn nervous beginners into confident gardeners.
🌱 Step 1: Prepare the Soil for Perfect Seed Beds
Loosen the top 2-3 inches of soil with a fork or trowel—this creates air pockets that roots need to establish quickly. If working with potting mix, moisten it until it feels like a damp sponge (squeeze a handful: water should drip, not puddle). I like to make small furrows or hills with my finger, about ½ inch deep—this keeps seeds from washing away during watering.
Real talk: Don’t skip this step. Compacted soil smothers seeds and slows germination by 30-50%. For containers, use a mix designed for seed starting—it’s lighter and drains better than garden soil.
🌱 Step 2: Plant Seeds at the Right Depth
Most seeds need to be buried twice their diameter deep. Tiny seeds like lettuce go in ¼ inch of soil, while larger ones like beans need 1 inch. I tap the seed packet gently to release one seed at a time—planting too many in one hole leads to weak, crowded seedlings that compete for light.
Cover seeds lightly with soil or mix, then pat gently to ensure good seed-to-soil contact. This prevents air gaps that trap moisture and cause rot. If your seeds are tiny (like marigolds), I sprinkle a pinch of sand over them first to mark the row.
💧 Step 3: Water Gently and Maintain Moisture
Use a spray bottle or fine-mesh watering can to mist the soil until it’s evenly damp 1 inch deep. Avoid soaking the surface—you’ll see the top layer glisten, but the soil below should stay dry to the touch. I water in the morning so excess moisture evaporates by evening, reducing the risk of fungal diseases.
After watering, I place a clear plastic dome or sheet over the seeds to trap warmth and humidity. Check daily: lift the cover to see if the soil feels dry ½ inch down. If it does, mist again lightly—never drown the seeds.
☀️ Step 4: Provide Warmth and Light for Germination
Most seeds germinate best at 70-80°F. If your space runs cooler, place the container on a seedling heat mat or near a sunny window. I keep mine on the top shelf of my fridge (yes, the warm one) until sprouts appear—that’s about 5-10 days for fast germinators like radishes.
Once the first green tips peek through, remove any cover immediately. Seeds need light to grow, but too much humidity after germination invites damping-off. Place the container under grow lights or bright indirect light (south-facing windows work). You’ll see true leaves—those are the second set—within 7-14 days.
⏰ Step 5: Monitor and Thin as Needed
Watch for seedlings to develop 2-3 true leaves before thinning. Use scissors to snip unwanted seedlings at soil level—this prevents disturbing the roots of the ones you’re keeping. I label my pots with the variety and date so I don’t accidentally pull out the wrong plant.
Thinning might seem harsh, but crowded seedlings grow weak and leggy, competing for nutrients. After thinning, water deeply again to help the remaining plants settle into their new space. You’ll notice stronger stems and richer green color within a week—that’s your signal everything’s on track.
Tips & tricks for perfect seed germination
Here's what nobody tells you about getting seeds to sprout reliably every time.
Soil Prep Secret: For Step 1, I like to add a thin layer of coarse sand or perlite to the bottom of containers before filling with soil. This improves drainage and prevents the dreaded "soggy bottom" that causes rot. The 2-3 inch loosening depth is crucial—think of it like fluffing a pillow for your seeds to nestle into comfortably.
Depth Matters: In Step 2, when planting larger seeds like beans at 1 inch deep, I use a toothpick to create individual holes—this keeps spacing consistent and prevents overcrowding. For tiny seeds like lettuce, I make a shallow furrow with my fingernail instead of scattering them randomly. The twice-your-diameter rule is your best friend for avoiding germination guesswork.
Temperature Troubleshooting: The 70-80°F range in Step 4 is ideal, but if your home runs cooler, try placing containers on top of your refrigerator (not inside!) or use a seedling heat mat. I've seen germination rates drop by 40% when seeds sit below 65°F. Pro tip: Check your thermostat—many homes dip below 70°F at night, which can stall sprouting.
Light Transition: When those first green tips appear in Step 4, remove the cover immediately—even a day too long can cause damping-off disease. I place containers under grow lights on a 14-hour cycle to simulate natural daylight. If using windows, rotate containers daily so seedlings don't lean toward the light source and grow lopsided.
Pro Tips for Put The Seed In The Soil
- Here's what nobody tells you about getting seeds to sprout reliably every time.
- Soil Prep Secret: For Step 1, I like to add a thin layer of coarse sand or perlite to the bottom of containers before...
- Depth Matters: In Step 2, when planting larger seeds like beans at 1 inch deep, I use a toothpick to create individua...
Frequently asked questions
Got questions? You’re not alone—germination can feel like a mystery, even for seasoned gardeners! Here are answers to the most common questions to help you put the seed in the soil with confidence.
What’s the best time of year to start seeds?
The ideal timing depends on your climate and plant type. For cool-season crops like lettuce or peas, start seeds 6-8 weeks before the last frost. Warm-season plants (tomatoes, peppers) need to go in after the frost date. Check your local frost dates or use a seed packet’s recommended planting window for guidance.
How do I know if my seeds need light to germinate?
Most seeds (like beans, peas, or tomatoes) germinate better in darkness—they need moisture and warmth, not light. Others (e.g., basil, lettuce, or petunias) require light to sprout. Always check the seed packet! If unsure, plant them just below the soil surface (¼ inch deep) and keep them moist until sprouts appear.
Why aren’t my seeds sprouting? Troubleshooting tips!
Seeds need the right conditions: warmth (65–85°F), moisture, and oxygen. If they’re not sprouting:
Too cold? Move to a warmer spot (like a seedling heat mat).
Too dry? Mist the soil daily or use a humidity dome.
Too deep? Some seeds (like chives) need light—plant them shallowly.
Old seeds? Test viability by soaking a few in water; if they sink, they’re likely good.
If all else fails, try fresh seeds or a different germination method (like paper towels).Can I reuse seed-starting soil from last year?
It’s not recommended unless you’ve sterilized it. Old soil can harbor fungi, bacteria, or pests that may kill new seeds. For best results, use fresh, sterile seed-starting mix (or repurpose potting soil by baking it at 200°F for 30 minutes to kill pathogens). Mix in a little perlite for drainage!
What’s a good alternative to seed-starting trays?
If you don’t have trays, get creative!
- Egg cartons (poke drainage holes!)
- Yogurt cups or plastic containers with lids (for humidity)
- Paper towels (for quick germination tests)
- Peat pots or coconut coir (biodegradable and easy to transplant)
Wrapping up and next steps
You’ve got everything you need to put the seed in the soil with confidence—no stress, no guesswork! 🌱 The key takeaway? Patience, preparation, and proper care turn tiny seeds into thriving plants. Whether you’re growing herbs, veggies, or flowers, trust the process and celebrate small wins along the way.
Ready to watch your garden bloom? Start small—pick one seed type, follow the steps, and let nature do the rest. Before you know it, you’ll be a germination pro! 🌟 Happy planting!