
Lawn
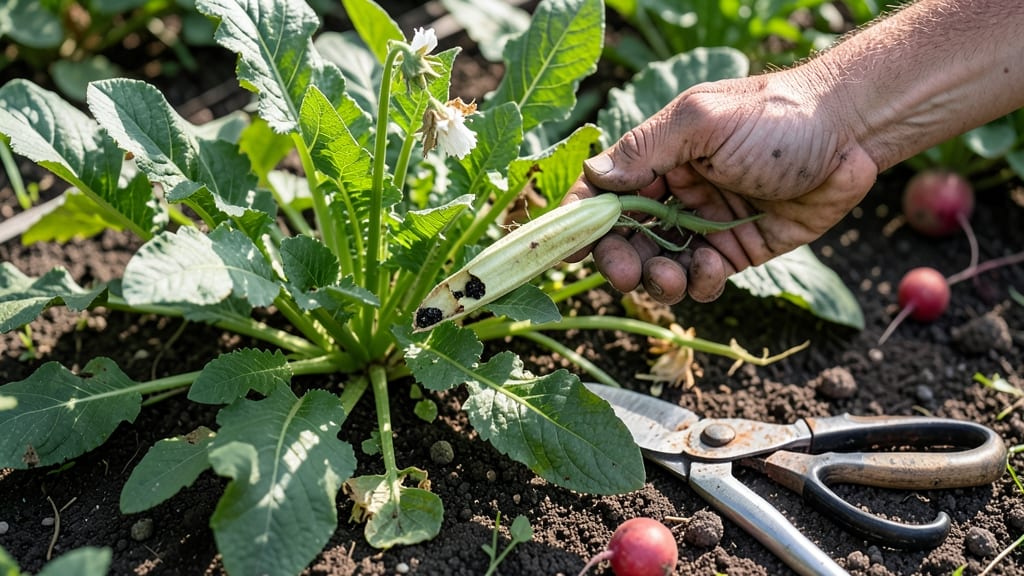
Twisting off radish seed pods at the right moment means saving seeds that grow true to type—and skipping the frustration of brittle stems. 🌱 I’ve learned the hard way that harvesting too early means puny seeds, while waiting too long risks losing the whole pod to pests or rot.
The key is timing those pods when they’re fully mature but still firm, before the seeds inside start shriveling.
You’ll need just a few simple tools: clean scissors or pruners, a paper bag for drying, and a warm, dry spot with good airflow.
The pods should be dry to the touch but not yet splitting open—think of them like overripe tomatoes, but with a papery texture instead of soft flesh. Once you’ve got them, the drying process is where most people mess up by rushing it.
Properly dried seeds stay viable for years, so take your time—spread them out on a screen or paper towel in a dark, dry place for 2-3 weeks. Test their readiness by crushing a few: good seeds feel hard and plump, while old ones crumble like dust.
Store them in a sealed container in the fridge for long-term keeping.
This method works for any heirloom radish variety, and the payoff is seeds that grow into plants just like their parents—no weak, leggy seedlings or bitter surprises.
The first time you save your own seeds, you’ll never buy radish plants again. Here’s how to do it right from start to finish.
📚 In This Guide
- What you need
- Instructions
- Tips and common mistakes
- Wrapping up and next steps
What you need
- ● Gearing up to harvest radish seed pods for twist-resistant viability? Here’s what you’ll need to tackle the job like a pro!
- ● Pro tip: 💡 Work on a dry, sunny day—humidity can ruin seed viability faster! If pods crack while drying, seal them in a paper bag with a rubber band to prevent moisture loss.
How to harvest radish seed pods without breaking them
Here’s my foolproof method for saving radish seeds—no more snapping stems or wasted pods.
🌱 Step 1: Wait for Pods to Fully Mature
Radish seed pods should turn from green to a dry, papery brown before harvesting. This usually takes 30-45 days after flowering, depending on your variety. You’ll know they’re ready when the pods rattle slightly when shaken—this means the seeds inside are fully developed.
If you harvest too early, the seeds won’t germinate properly. I always check a few pods first by cutting one open to confirm the seeds are plump and dark. Once you see that, the rest are ready.
🌿 Step 2: Cut Pods Gently at the Base
Use clean, sharp scissors or pruning shears to snip the pods just above the first set of leaves. Twisting or pulling can damage the stems and reduce future seed production. I like to work on a dry, sunny morning when the pods are firm and less likely to break.
Place the harvested pods in a paper bag or breathable mesh sack to air-dry. Avoid plastic—it traps moisture and encourages mold. Hang the bag in a dry, well-ventilated spot like a garage or shed, away from direct sunlight.
⏰ Step 3: Dry Pods for 2-3 Weeks
The drying process is critical—pods need 2-3 weeks to fully dry until they’re brittle and the seeds rattle inside. Check weekly by gently squeezing a pod. If it crumbles easily, it’s ready. If it’s still pliable, give it more time.
I usually spread them out on a tray lined with newspaper to catch any seeds that might fall out. A fan on low speed helps speed up drying without damaging the pods. Never rush this step—wet seeds won’t store well.
🪴 Step 4: Remove Seeds and Store Properly
Once fully dry, open the pods by gently crushing them with your fingers or a rolling pin. The seeds will spill out easily. I sift them through a fine mesh strainer to remove any chaff or debris. For best results, store seeds in a cool, dark place in a sealed envelope or small jar.
Label the jar with the variety and harvest date—radish seeds stay viable for 2-3 years if kept dry. I always test a few seeds after storing for a year to confirm they still germinate before using the whole batch.
Tips & tricks for perfect radish seed pod harvesting
Avoid common mistakes that ruin your seed harvest—these tricks ensure healthy, viable seeds every time.
Timing Secret: The 30-45 day window after flowering is non-negotiable for viable seeds. I learned this the hard way after harvesting too early and getting seeds that refused to germinate. Watch for that telltale rattle when you shake the pods—it’s your green light to harvest. If you’re unsure, cut open one pod to check for plump, dark seeds before committing to the whole batch.
Tool Tip: Sharp scissors are your best friend in Step 2—dull blades crush pods and waste seeds. I keep a pair dedicated just for seed harvesting and sharpen them annually. Cut just above the first set of leaves to avoid damaging the plant’s future production. A dry morning is ideal because dew makes pods slippery and more prone to breaking when you handle them.
Drying Strategy: Those 2-3 weeks of drying might feel long, but patience pays off. I’ve tried speeding it up with heaters, but that risks overheating the seeds. Instead, spread pods on newspaper-lined trays near a fan on low—the gentle airflow helps without damaging them. Check weekly by squeezing: if they crumble easily, they’re ready. If they’re still pliable, give them more time—wet seeds won’t store properly.
Storage Wisdom: The cool, dark spot for storage isn’t just about preventing mold—it’s about preserving viability. I store my seeds in small jars with the harvest date clearly labeled. Test a few seeds after a year to confirm they still germinate before using the whole batch. A simple germination test saves you from wasting a whole jar of old seeds that might not work.
Pro Tips for Radish Seed Pod
- Avoid common mistakes that ruin your seed harvest—these tricks ensure healthy, viable seeds every time.
- Timing Secret: The 30-45 day window after flowering is non-negotiable for viable seeds. I learned this the hard way a...
- Tool Tip: Sharp scissors are your best friend in Step 2—dull blades crush pods and waste seeds. I keep a pair dedicat...
Frequently asked questions
Got questions about harvesting radish seed pods? You’re not alone! Here are some of the most common queries—plus straightforward answers to help you master the process.
Why do radish seed pods twist and how can I prevent it?
Radish pods twist to force seeds out for natural dispersal. To preserve them, harvest pods when they’re just starting to twist but still firm—usually 5–7 days after flowering. Cut the entire pod (not individual seeds) and dry them indoors on paper towels for 1–2 weeks. Pro tip: Use a pair of clean scissors to avoid crushing the pods!
How long does it take for radish seed pods to mature?
Timing varies by variety, but most radish seed pods mature in 30–60 days after planting. Watch for pods to turn brown and split slightly at the seam—this signals readiness. Overripe pods scatter seeds easily, so act fast! For consistency, plant radishes in small batches every 2 weeks.
Can I save seeds from store-bought radishes?
Unfortunately, no! Store-bought radishes are often hybrid varieties, meaning their seeds won’t grow true to type. For viable seeds, grow open-pollinated heirloom radishes like ‘Cherry Belle’ or ‘French Breakfast.’ Save seeds from these, and you’ll get reliable, flavorful radishes year after year.
What’s the best way to store radish seeds?
Store dried radish seeds in a cool, dark, and dry place (like a sealed jar in the fridge) for up to 3 years. For longer shelf life, add a silica gel packet to absorb moisture. Label your seeds with the variety and harvest date to stay organized!
My radish pods are moldy—what went wrong?
Mold on pods usually means high humidity during drying. Fix this by:
- Drying pods in a well-ventilated area (like a mesh bag).
- Avoiding plastic bags (they trap moisture).
- Discarding any moldy pods immediately.
Wrapping up and next steps
Harvesting radish seed pods with care ensures you’ll enjoy a bountiful, twist-resistant yield of viable seeds for next season’s garden. By following the right techniques—like waiting for pods to dry, twisting gently, and storing seeds properly—you’ll turn your harvest into a rewarding, sustainable gardening cycle. 🌱
Now that you’re equipped with the know-how, why not put it into action? Grab your gloves, head to the garden, and start collecting those seeds—your future crops will thank you!