
Lawn
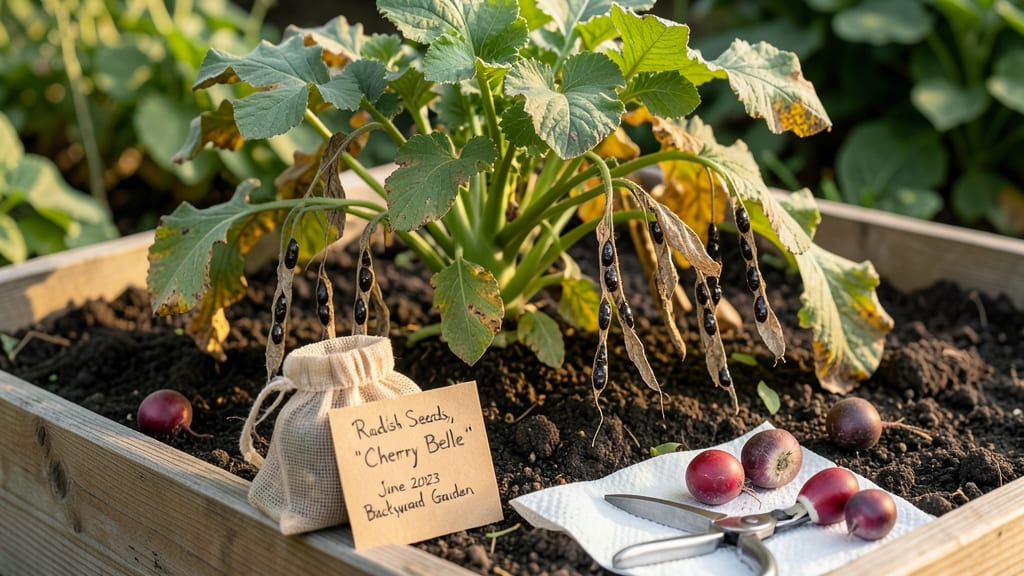
Saving radish seeds is easier than you think—especially when the pods split open naturally. 🌱 I learned the hard way that letting radishes bolt too early ruins seed quality, but the right timing turns those tough little pods into a reliable source for next year's garden.
The trick is patience: wait until pods turn brown and dry on the vine before harvesting. Then, let them fully dry indoors before cracking them open for seeds. Most gardeners quit here, but I've perfected the drying process to ensure seeds stay viable for 3-5 years in storage.
You'll end up with a stash of seeds that germinate faster and stronger than store-bought varieties. The first time I grew from saved seeds, they sprouted in just 4 days—a full week ahead of the packet seeds.
Works for any radish variety, from quick-growing cherry bells to heirloom French breakfast types. Here's how to do it right!
📚 In This Guide
- What you need
- Instructions
- Tips and common mistakes
- Wrapping up and next steps
What you need
- ● Mature radish plants: Choose open-pollinated varieties (e.g., 'Cherry Belle', 'French Breakfast'). Avoid hybrids like F1—these won’t produce true seeds! 🌻
- ● Garden shears or clean scissors: 1 pair (sterilize with rubbing alcohol to prevent disease).
- ● Paper grocery bags or breathable seed-saving envelopes: 5–10 bags (label with plant name + date!).
- ● Drying tray or screen: A flat, well-ventilated surface (e.g., a wire rack or cardboard box with holes).
- ● Permanent marker or labels: For marking pods/envelopes.
- ○ Fine-mesh sieve (optional but handy): To separate seeds from chaff.
- ● Desiccant (silica gel packets): 1–2 packets to speed up drying in humid climates.
- ● Seed storage jars: Airtight containers (e.g., mason jars) with oxygen absorbers for long-term storage.
- ● Notebook: To track varieties, germination rates, and growing conditions.
- ● Hand lens or magnifying glass: For inspecting seed quality.
How to save radish seeds without the usual headaches
Here's how I've learned to harvest radish seeds reliably—no fuss, no wasted pods.
🌱 Step 1: Grow a Dedicated Seed-Saving Crop
Start by planting a few extra radishes from an open-pollinated variety like 'French Breakfast' or 'Cherry Belle'—these are reliable seed savers. I always set aside 4-6 plants in a separate area of the garden, away from other radishes or related brassicas like arugula or mustard greens, to prevent accidental cross-pollination.
Let these plants bolt naturally by withholding water once the roots reach full size. The stress of drying soil triggers the flowering process. You'll know it's working when the leaves yellow and the plants send up tall, sturdy stems with clusters of white flowers. This usually takes about 6-8 weeks after planting.
☀️ Step 2: Support Flowering and Pod Development
Once flowers appear, keep the soil lightly moist but not soggy—1 inch of water per week is plenty. Overwatering now will cause the pods to split prematurely. I stake the tallest stems with bamboo stakes to prevent them from flopping over, especially if you're in a windy area.
Watch for the flowers to fade and be replaced by small, green seed pods. These pods start out thin and papery but will thicken as they mature. The key is patience—don't harvest them too early. You'll see the pods begin to turn yellow and dry out from the bottom up, which is your signal they're nearly ready.
⏰ Step 3: Harvest Mature Pods at the Right Time
When the pods are completely dry and brown but haven't yet split open, it's time to harvest. I like to do this on a dry morning after the dew has evaporated. Gently twist the pods from the stem—don't pull, or you might damage the plant. Place them in a paper bag to dry further for 2-3 days in a warm, dry spot.
Real talk: If you wait too long, the pods will split open and scatter seeds everywhere. That's actually how radishes naturally propagate, but it's not ideal for seed saving. You'll know they're perfect when the pods rattle with seeds inside but haven't burst open yet.
🌿 Step 4: Clean and Store the Seeds Properly
Once the pods are fully dry, I spread them out on a clean sheet of newspaper and gently crush them with my fingers. The seeds will spill out while the chaff (the dry husks) stays behind. Use a fine-mesh sieve to separate the seeds from the debris—just shake it gently over a bowl. The seeds will fall through while the chaff stays on top.
Store the clean seeds in a small envelope or airtight container in a cool, dark place. Label it with the variety and the date—radish seeds stay viable for about 3-4 years if kept dry. I like to include a note about the growing conditions that year, like how many days it took to bolt or any pests I noticed.
✂️ Step 5: Test Your Seeds Next Season
Before using your saved seeds, do a quick viability test. Plant a few seeds in a small pot and keep them in a warm spot. If they germinate within 7-10 days, your seeds are good to go. If not, you might need to save more seeds or try a different variety next time.
Here's the thing—radish seeds can be finicky, so don't be discouraged if your first batch isn't perfect. Even experienced gardeners sometimes end up with a few duds. The more you practice, the more reliable your seed-saving skills will become. Next year, you'll be harvesting pods like a pro!
Tips & tricks for perfect radish seed harvesting
These practical insights will help you turn your radish plants into reliable seed sources without the usual frustrations.
Isolation is Key: The 4-6 plants you set aside in Step 1 need to be at least 20 feet away from other radishes or brassicas. Cross-pollination can ruin your seed purity, and radishes are notorious for hybridizing. I've learned this the hard way—once I accidentally mixed varieties and ended up with a batch of seeds that grew into inconsistent plants. Trust me, isolation makes all the difference.
Bolt Timing Matters: Those 6-8 weeks in Step 1 can feel like forever, but patience pays off. If you notice your plants starting to bolt before 6 weeks, they're likely stressed from heat or drought. Give them consistent moisture during the growing phase, but remember—once they reach full size, withholding water is what triggers bolting. The yellowing leaves signal it's working, but if they bolt too quickly, the pods may not develop properly.
Pod Rattle Test: In Step 3, when deciding if pods are ready, give them a gentle shake. They should rattle like a tiny maraca—this means seeds are fully developed inside. If they're completely silent, they need more time. If they split open when you touch them, you've waited too long. I keep a small paper bag handy to immediately collect any pods that feel ready, even if others aren't quite there yet.
Storage Wisdom: The 3-4 year viability mentioned in Step 4 assumes proper conditions. I store my seeds in small envelopes with silica gel packets to absorb any moisture. Write directly on the envelope with a permanent marker—ink fades over time, but pencil marks won't. I've also started including a tiny plastic baggie with 2-3 seeds inside each envelope as a quick viability test for next season.
Pro Tips for Radish Seed Saving
- These practical insights will help you turn your radish plants into reliable seed sources without the usual frustrati...
- Isolation is Key: The 4-6 plants you set aside in Step 1 need to be at least 20 feet away from other radishes or bras...
- Bolt Timing Matters: Those 6-8 weeks in Step 1 can feel like forever, but patience pays off. If you notice your plant...
Frequently asked questions
Got questions about saving radish seeds? You’re not alone—this process can feel tricky at first! Here are some of the most common concerns and straightforward answers to help you succeed.
How do I know when radishes are ready for seed saving?
Radishes are ready for seed saving when their pods naturally split open and turn brown, usually 6–8 weeks after flowering. If you wait too long, the seeds may scatter or lose viability. Harvest seeds when pods are dry and crispy—don’t rush it! Patience ensures the best germination rates.
Can I save seeds from store-bought radishes?
Nope! Store-bought radishes are often hybrid varieties, meaning their seeds won’t grow true to type. For reliable seed saving, grow open-pollinated radishes like ‘French Breakfast’ or ‘Cherry Belle’ from heirloom seeds. Your future harvests will thank you!
What’s the best way to dry radish seeds?
Spread seeds on a paper towel or mesh screen in a warm, dry, well-ventilated spot (like a sunny windowsill or dehydrator on low). Avoid humidity—moisture can cause mold. Stir seeds occasionally for even drying, which takes about 1–2 weeks. Store in a cool, dark place once fully dry.
Do radishes self-pollinate, or do I need to hand-pollinate?
Radishes are self-pollinating, so you don’t need to worry about bees or manual pollination. However, if you’re growing multiple varieties, isolate them by at least 50 feet to prevent cross-pollination. This keeps your seeds pure and true to the parent plant.
Why aren’t my radish pods splitting open?
If pods stay green and firm, it could be due to overcrowding, cool temperatures, or lack of sunlight. Thin plants for better airflow, ensure they get 6+ hours of sun daily, and avoid overwatering. If pods still refuse to split, try harvesting seeds before they dry naturally by gently squeezing open mature pods.
Wrapping up and next steps
Saving radish seeds is simpler than you think—just let nature do the work! 🌱 By allowing pods to split open naturally, you’ll harvest high-quality seeds for next season’s garden. Whether you’re a beginner or a seasoned gardener, this stress-free method ensures you’ll always have fresh, homegrown radishes ready to plant.
Ready to take the next step? Grab a few radish plants, follow the steps, and soon you’ll be sharing your seeds with fellow gardeners—or even selling them at a local market! 🌟