
Lawn
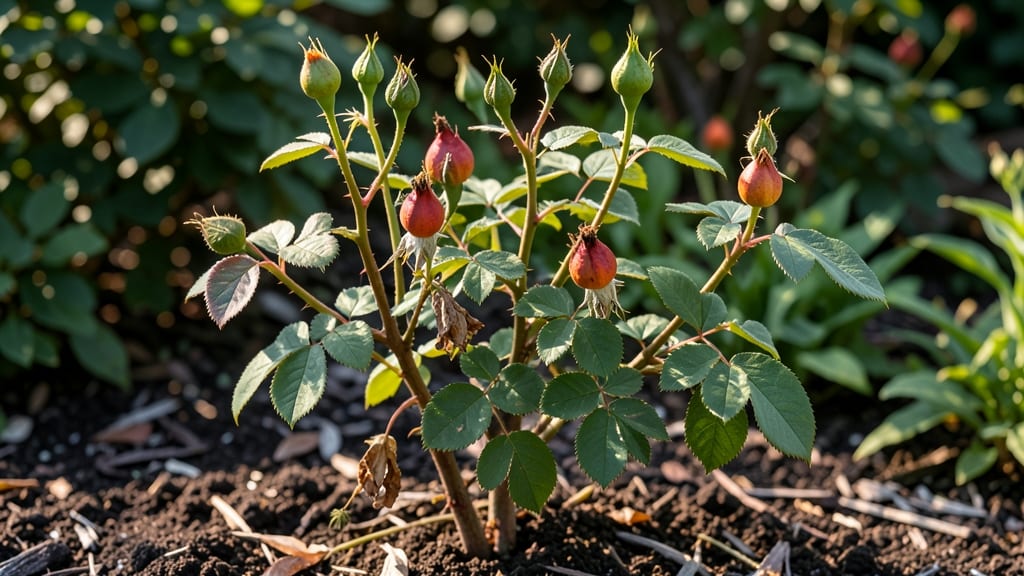
Harvesting rose bush seed pods lets you grow new plants from your own roses—no nursery tags needed. 🌹 The trick is knowing when those pods are ready and how to coax the seeds to sprout, because not all rose varieties play nice with seed propagation.
I’ve collected hundreds of pods over the years, and only a few batches actually produced seedlings, but when it works, it’s magical watching those first green shoots appear.
You’ll need patience and a few simple supplies: gloves for handling the prickly pods, a bowl for collecting seeds, and a damp paper towel for stratification if your climate demands it.
Most seed pods ripen in late summer or early fall, turning from green to brown and splitting open on their own—though some varieties like heirloom roses or wild species are more reliable than hybrid teas. The real secret? Timing your harvest just as the pods start to crack open.
Once you’ve got your seeds, germination takes 3-6 weeks of warmth and moisture, with some varieties needing a cold period to break dormancy. You’ll end up with tiny seedlings that grow into full bushes—though expect only about 10% of seeds to actually sprout.
The payoff? Unique roses that might bloom in colors or forms you’ve never seen before, straight from your own garden.
This method works best for species roses and old garden roses, while hybrid teas and floribundas rarely produce viable seeds.
If you’re growing roses from seed, be prepared for a waiting game—these plants take 2-3 years to bloom—but the reward of watching something entirely new emerge from your own garden is worth every twist and turn.
📚 In This Guide
- What you need
- Instructions
- Tips and common mistakes
- Wrapping up and next steps
What you need
- ● Pruning shears or sharp scissors – Must be clean and sanitized to avoid disease transfer (sterilize with 70% isopropyl alcohol).
- ● Brown paper bags or breathable seed envelopes – 2-3 bags (labeled with rose variety and date).
- ○ Plastic gloves – Optional but recommended for hygiene (nitrile gloves work great).
- ● Small paintbrush or cotton swabs – For gently extracting seeds from pods.
- ● Fine-mesh strainer or sieve – To separate seeds from pulp (1-2 mm mesh size ideal).
- ● Paper towels or coffee filters – For drying seeds (absorbent but not sticky).
- ● Air-tight container (e.g., mason jar) – For long-term seed storage (add a silica gel packet to prevent moisture).
- ● Mature rose hips – Harvest only fully ripe pods (deep red, orange, or brown; usually late fall/winter).
- ● Sunny, dry day – Critical for preventing mold (avoid damp or rainy conditions).
- ● Patience – Seeds need 4-6 weeks to dry post-harvest before planting.
- ● 🔥 Label everything! Rose varieties vary—note the parent plant’s name to track hybrids.
- ● ✨ Skip the soap—never use dish soap to clean seeds; it can inhibit germination.
- ● 🌡️ Store seeds in the fridge (35–40°F) if planting isn’t imminent (extends viability by years!).
Step-by-Step instructions for harvesting rose seeds
Here’s how to collect viable rose seeds without the frustrating twist-and-pull struggle.
🌱 Step 1: Identify and Wait for Ripe Seed Pods
Look for rose seed pods that turn from green to a deep brown or black color—this signals full ripeness. A ripe pod will feel dry and papery when gently squeezed. I always check my roses in late fall or early winter, as pods mature after blooms fade. Avoid harvesting green pods; they won’t yield viable seeds.
Use a small knife or pruning shears to snip the pods from the stem, leaving a clean cut. Place them in a paper bag (not plastic) to allow airflow and prevent mold. If pods are still attached but ready, twist them gently until they release—don’t force it, or you’ll crush the seeds inside.
🪴 Step 2: Extract Seeds from the Pods
Once pods are dry, split them open carefully. I like to place a pod on a flat surface and press it between my fingers until it cracks. The seeds inside will look like tiny, wrinkled brown beans. Remove any debris or empty husks—only the plump, firm seeds are viable.
Spread the seeds on a clean towel or paper plate to dry for another 24 hours in a warm, dry place. This extra step ensures they’re ready for storage and prevents mold during germination. If you’re impatient, you can skip drying and plant them immediately—but fresh seeds germinate better when fully dried.
⏰ Step 3: Store Seeds Properly for Germination
Place the dried seeds in an airtight container, like a small glass jar or envelope, and store them in a cool, dark place. A refrigerator works well for long-term storage. Label the container with the rose variety and date—seeds stay viable for 1-2 years if kept dry and cool.
When you’re ready to plant, soak the seeds in warm water for 12-24 hours before sowing. This softens the seed coat and encourages faster germination. I like to use a small bowl of water and let the seeds sit until they look slightly plump. Drain and plant them within 24 hours to avoid mold.
🌿 Step 4: Sow Seeds for Germination
Fill small pots or seed trays with sterile seed-starting mix (not garden soil) and moisten it lightly. Plant the seeds ¼ inch deep, spacing them 1 inch apart to avoid overcrowding. Press the soil gently around them to ensure good contact.
Cover the pots with plastic wrap or a humidity dome to retain moisture and warmth. Place them in a bright, indirect light spot—65-75°F is ideal for germination. Check daily for moisture; mist the soil if it feels dry to the touch. Germination can take 2-4 weeks, so be patient.
☀️ Step 5: Transplant Seedlings Carefully
Once seedlings develop 2-3 true leaves (not just the initial seed leaves), they’re ready to move. Harden them off by placing them outdoors in a shaded spot for 1-2 hours the first day, gradually increasing time over 7-10 days. This helps them adjust to outdoor conditions.
Transplant to individual pots or the garden after hardening off. Choose a spot with full sun and well-draining soil. Space seedlings 12-18 inches apart to give them room to grow. Keep the soil consistently moist but not soggy—young roses are sensitive to overwatering.
Tips & tricks for perfect rose seed harvesting
These little tricks will save you time and frustration when collecting rose seeds—trust me, I’ve learned them the hard way!
The Ripeness Test: When checking for ripe pods, give them a gentle squeeze—if they feel dry and papery like crumpled paper, they’re ready. Green pods are still too tough and won’t yield viable seeds. I’ve wasted hours trying to extract seeds from unripe pods, so don’t make my mistake! The color change from green to deep brown or black is your best indicator.
Pod Handling Technique: In Step 1, when pods are still attached but ready, twist them gently rather than pulling. This prevents crushing the seeds inside. If you’re struggling, use a small knife to make a tiny cut along the seam before twisting—this gives the pod a clean break point.
Seed Drying Strategy: The extra 24-hour drying period in Step 2 is worth it for preventing mold during storage. If you’re short on time, you can plant immediately, but germination rates improve with proper drying. I like to spread seeds on a clean kitchen towel in a warm, sunny spot—just avoid direct sunlight to prevent overheating.
Storage Wisdom: For long-term storage, place seeds in a small glass jar with a tight-sealing lid. Add a silica gel packet (the kind that comes in shoe boxes) to absorb any moisture. Label the jar with the rose variety and date—this helps track viability, since seeds stay good for 1-2 years when stored properly.
Pro Tips for Rose Bush Seed Pods
- These little tricks will save you time and frustration when collecting rose seeds—trust me, I’ve learned them the hard way!
- The Ripeness Test: When checking for ripe pods, give them a gentle squeeze—if they feel dry and papery like crumpled paper, they’re ready.
- Pod Handling Technique: In Step 1, when pods are still attached but ready, twist them gently rather than pulling.
Frequently asked questions
Got questions about harvesting rose bush seed pods? You’re in the right place! Here are some of the most common queries—plus clear, no-fuss answers to help you grow those seeds like a pro.
When is the best time to harvest rose bush seed pods?
Harvest rose bush seed pods in late fall or early winter (after the first frost) when they turn brown and dry. If you pick them too early (green or soft), the seeds won’t be viable. Wait until they’re crispy—like a brittle husk—to ensure maximum germination success. Pro tip: Use a sharp knife or pruners to avoid damaging the stem.
How long does it take for rose seeds to germinate?
Patience is key! Rose seeds can take anywhere from 2 weeks to 6 months to sprout, depending on the variety and conditions. Start them indoors in a warm, moist environment (like a seedling tray with a heat mat) to speed things up. Hot tip: Some gardeners soak seeds in water for 24 hours before planting to kickstart germination.
Can I use store-bought rose seeds instead of harvesting my own?
While harvesting your own pods is rewarding, store-bought seeds (especially hybrid roses) are a great alternative. They’re often treated for faster germination and come with growing guarantees. Just check the packet for specific care instructions—some may need stratification (cold treatment) to mimic natural conditions. Bonus: Hybrid seeds might not grow true to the parent plant, so research varieties if you want predictable blooms.
Why aren’t my rose seeds sprouting? Troubleshooting tips.
If your seeds aren’t germinating, try these fixes:
- Check viability: Test a few seeds in warm water—if they sink, they’re likely viable. Floaters? Toss ‘em.
- Stratification: Roses often need a cold period (like 4–6 weeks in the fridge). Mix seeds with damp sand and refrigerate before planting.
- Light vs. dark: Some roses need darkness to germinate; others prefer light. Experiment with shallow planting (¼ inch deep) or covering seeds lightly.
- Moisture matters: Keep soil consistently moist but not soggy—rose seeds rot in waterlogged conditions.
What can I do with rose seed pods if I don’t want to grow seeds?
Don’t let those pods go to waste! Try these creative uses:
- Dried decor: Hang pods upside down in a dry, dark place to create rustic centerpieces or potpourri fillers.
- Natural dye: Simmer pods in water to make a soft pink or brown dye for fabric or Easter eggs.
- Compost: Chop them up and add to your compost pile—they’ll break down into nutrient-rich soil.
- Art projects: Kids (or crafty adults!) can paint or glue pods onto cards, wreaths, or mobiles.
Wrapping up and next steps
Harvesting rose bush seed pods may seem tricky, but with the right tools and patience, you can unlock a world of free, organic roses for your garden! 🌹 Whether you're a seasoned gardener or just starting out, these pods hold the potential for beautiful blooms—just give them the care they deserve.
Now that you’re armed with tips on timing, tools, and techniques, why not take the next step?
🌱 Your Next Move: Plant & Grow!
Start by planting those seeds in well-draining soil and watch as your garden transforms. Need more inspiration? Explore our guide on nurturing rose seedlings or join a local gardening group to share your progress. Happy growing—your future roses are waiting! 🌿