
Planting
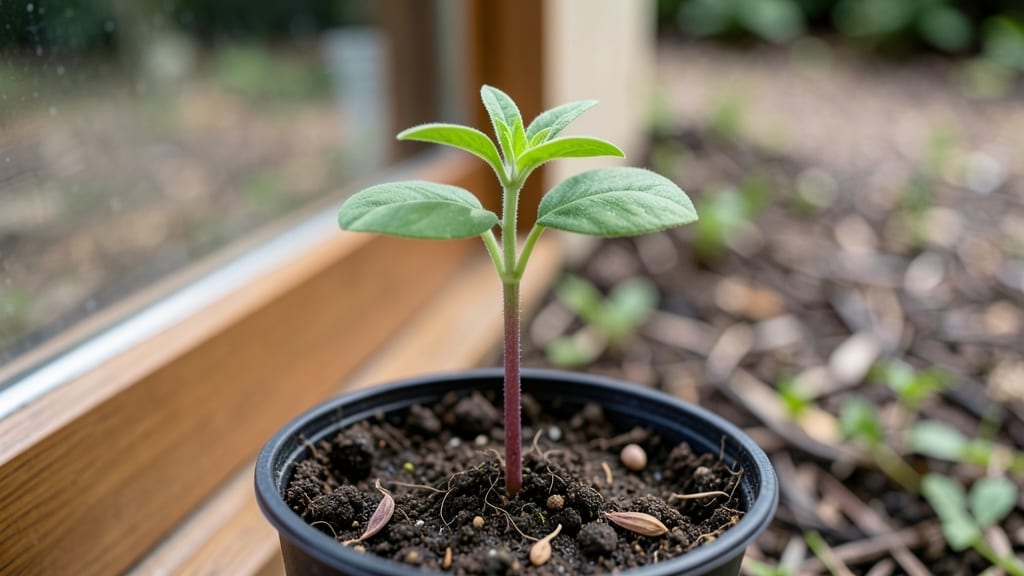
Watching a seed grow into a plant is like witnessing nature’s quiet miracle—right in your hands. 🌱 I’ve seen seeds I planted last spring transform into towering sunflowers, their journey from tiny specks to vibrant life always leaving me amazed.
The process isn’t just science; it’s a hands-on lesson in patience and care that every gardener should experience.
First, the seed breaks open, sending down a root and up a shoot, all while it needs just the right balance of moisture, warmth, and darkness to start. Then come the leaves, stronger each day, as the plant learns to reach for sunlight and pull nutrients from the soil.
What feels magical is how much control you have over this transformation—with the right conditions, even a beginner can coax life from a seed.
By the time you’re pinching back leggy seedlings or harvesting your first homegrown tomato, you’ll understand why gardeners fall in love with this process. The stages—germination, leafing out, flowering—each bring its own rewards, and the whole cycle teaches you to read your garden like a story unfolding before you.
Whether you’re growing herbs on a windowsill or dreaming of a backyard vegetable patch, this journey starts with a single seed. Let’s break down how to give it the best possible chance to thrive—because every gardener’s story begins with that first sprout.
📚 In This Guide
- What you need
- Instructions
- Tips and common mistakes
- Wrapping up and next steps
What you need
- ● Seeds: Choose fast-growing varieties like radish, bean, or marigold (5–10 seeds per experiment). Opt for organic, non-GMO seeds for best results.
- ● Containers: Small pots (4–6 inches wide) – 2–4 containers per seed type.
- ● OR a seed tray with individual cells (10+ cells for group projects).
- ● Potting Soil: High-quality, well-draining seed-starting mix (1–2 bags, ~1–2 cubic feet). Avoid garden soil—it’s too dense!
- ● Watering Can or Spray Bottle: A fine-mist sprayer (to avoid disturbing seeds) or a small watering can with a gentle nozzle.
- ● Plant Labels: Popsicle sticks or small tags + a marker (to track seed types and planting dates).
- ● Grow Lights or Sunny Windowsill: A LED grow light (12–16 hours/day) if natural light is <12 hours/day.
- ● Humidity Dome or Plastic Wrap: To retain moisture while seeds germinate (cut plastic wrap to fit containers).
- ● Thermometer: A small soil thermometer (ideal germination temps: 65–85°F, depending on seed type).
- ● Fertilizer: A balanced, water-soluble fertilizer (5-10-5 ratio) for seedlings after sprouting.
- ● Notebook: To record observations (date planted, germination day, growth milestones).
How to watch a seed transform into a thriving plant
Every gardener’s journey starts here—where tiny seeds become lush, leafy plants.
🌱 Step 1: Choose the Right Seed and Prepare the Soil
Pick seeds suited for your climate and growing conditions. Fast-growing varieties like radishes or lettuce are perfect for beginners—they sprout quickly, so you’ll see results fast. I always check the seed packet for light and temperature needs, like whether the plant prefers full sun or partial shade.
Use a well-draining potting mix (never garden soil) to give roots room to spread. Fill your container to about 1 inch below the rim and press it down lightly—just enough to remove air pockets. Moisten the soil until it feels like a damp sponge, not soggy. This ensures seeds stay hydrated without drowning.
🌱 Step 2: Plant the Seed at the Correct Depth
Plant seeds at a depth of about twice their diameter. Tiny seeds like marigolds go in just ¼ inch deep, while larger ones like beans need 1 inch. Pressing them too deep slows germination because the seedling struggles to reach light. I use my finger to make a small hole, drop the seed in, and cover it lightly with soil.
Label your container with the seed type and planting date—you’ll forget which is which once those first green shoots appear! Water gently with a spray bottle to avoid displacing seeds. The soil should feel damp but not wet. This step is all about patience; some seeds take 3-5 days to sprout, while others wait 2-3 weeks.
💧 Step 3: Provide Warmth, Moisture, and Light
Seeds need warmth to germinate—most thrive at 65-75°F. Place your container in a warm spot, like on top of the fridge or near a sunny window. Cover it with plastic wrap or a humidity dome to trap moisture, but remove it once sprouts appear to prevent mold. Check the soil daily—it should stay consistently moist but never waterlogged.
As soon as the first true leaves (not the initial seed leaves) emerge, move the plant to a bright spot with 6+ hours of indirect light daily. Leggy seedlings reaching for the light mean it’s too far away—adjust within 4 inches of the plant. You’ll see strong, stocky growth when light is just right.
🌿 Step 4: Care for the Seedling as It Grows
Once seedlings have 2-3 sets of true leaves, thin them if crowded. Use scissors to snip weak stems at soil level—this prevents competition for nutrients. Keep the soil moist but not soggy; overwatering causes roots to rot. I water from the bottom by placing the pot in a shallow tray of water for 10-15 minutes, letting the roots drink up what they need.
Fertilize lightly with a diluted liquid fertilizer when the first true leaves appear. Too much too soon burns tender roots. Watch for pests like aphids—spray with soapy water if you spot them. This is where the magic happens: your seedling grows taller, develops stronger stems, and soon becomes a plant ready for the garden or a larger pot.
⏰ Step 5: Transplant or Harvest When Ready
Transplant outdoors after the last frost when nighttime temperatures stay above 50°F. Harden off seedlings by placing them outside for 1-2 hours daily, gradually increasing time over 7-10 days. You’ll know they’re ready when they don’t wilt in full sun.
For container plants, repot when roots outgrow the pot—gentle tugging should reveal roots circling the edges. Harvest leafy greens like lettuce by cutting outer leaves, leaving the center to regrow. With patience and care, your seed’s journey from tiny speck to thriving plant is complete!
Tips & tricks for nurturing seedlings to maturity
Watch your tiny speck grow into a thriving plant with these gardening game-changers.
The Warmth Factor: For seeds that need that 65-75°F sweet spot, place your seed tray on top of your refrigerator—it's the perfect warm spot without risking oven heat. I've also had success using a heating mat set to low, which creates consistent warmth. Just remember, too much heat can actually slow germination, so keep it steady and gentle.
Light Positioning: That 4-inch rule for light distance is critical—any closer and you risk scorching tender seedlings, any farther and they'll stretch painfully toward the light. I use a small clip-on LED grow light for my windowsill plants, which gives that perfect 6+ hours of indirect light without the risk of overheating. And if you notice your seedlings leaning, it's time to rotate the pot a quarter turn daily for even growth.
Thinning Technique: When you reach the 2-3 sets of true leaves stage and need to thin, don't pull—snip! Using clean scissors just above soil level prevents disturbing the roots of your keepers. I've found that thinning in the morning gives plants time to recover before evening temperatures drop. Also, save those snipped seedlings—they make great microgreens if you compost the roots first.
Harden Off Like a Pro: The gradual 7-10 day hardening process is your secret weapon against transplant shock. Start with those 1-2 hours daily in partial shade, then slowly increase exposure. I like to use a small shade cloth on windy days to protect delicate leaves. Watch for any wilting—if it happens, they're not ready for that next step yet. This slow acclimation builds their resilience for the big move outdoors.
Pro Tips for Seed Grows Into A Plant
- Watch your tiny speck grow into a thriving plant with these gardening game-changers.
- The Warmth Factor: For seeds that need that 65-75°F sweet spot, place your seed tray on top of your refrigerator—it's...
- Light Positioning: That 4-inch rule for light distance is critical—any closer and you risk scorching tender seedlings...
Frequently asked questions
Got questions about watching a seed transform into a thriving plant? You’re not alone—every gardener starts somewhere! Here are answers to the most common queries to help you grow with confidence.
How long does it take for a seed to grow into a plant?
The timeline varies by plant type, but most seeds sprout within 7–30 days. Fast growers like radishes or lettuce may appear in 5–10 days, while slow starters like tomatoes or beans can take 2–4 weeks. Check the seed packet for specifics—patience is key!
What if my seed won’t sprout? What’s the fix?
Don’t panic! First, ensure proper moisture, warmth, and light (or lack of it for some seeds). Try these troubleshooting steps:
- Test viability: Soak seeds in water—sinkers are likely good; floaters may be dead.
- Adjust conditions: Move to a warmer spot (like a seedling heat mat) or use a spray bottle for gentle watering.
- Scarify hard shells: Lightly sandpaper or nick seeds (e.g., beans, peas) to help water penetrate.
Can I grow a plant from any seed I find?
Not all seeds are garden-ready! Avoid seeds from hybrid plants (marked “F1”), store-bought produce (often treated to prevent sprouting), or wild seeds unless you’re certain they’re non-invasive. Stick to seeds labeled for home gardening or collect from heirloom varieties for best results.
Is there a best time of year to start seeds indoors?
Timing depends on your climate and plant type. Generally:
- Cool-season crops (lettuce, peas): Start 6–8 weeks before the last frost (early spring or late summer).
- Warm-season crops (tomatoes, peppers): Wait until 4–6 weeks before frost (late winter/early spring).
What’s the easiest seed to grow for beginners?
Start with these foolproof picks:
- Fast & fun: Radishes (sprout in 3–5 days), beans, or sunflowers.
- Low-maintenance: Lettuce, herbs (basil, chives), or marigolds.
- Kid-friendly: Pumpkin seeds or fast-growing grass for a mini “lawn.”
Still stumped? Drop your seed-growing dilemma in the comments—we’re happy to help you dig deeper!
Wrapping up and next steps
The journey of a seed growing into a plant is a testament to nature’s resilience—and your green thumb! 🌱 From selecting the right soil to nurturing growth with patience and care, every step builds a stronger, healthier plant. Remember, even the tiniest seed holds incredible potential.
Now that you’re armed with knowledge, it’s time to take action. Start small: plant that first seed, observe the magic unfold, and let your confidence grow alongside your garden. Happy planting—your future harvest (or blooms!) awaits! 🌟