
Lawn
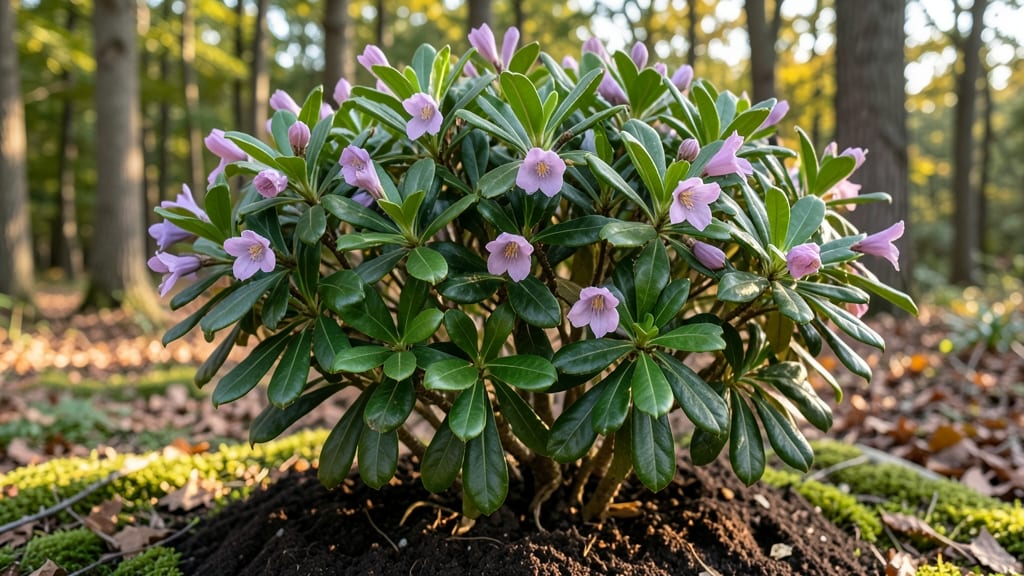
Mountain laurel seed pods resist twisting like stubborn gardeners resisting pruning—until you learn their secrets. 🌿 These striking evergreens produce seeds that feel like nature’s hidden treasure, but collecting them at the right time makes all the difference.
I’ve cracked the code after years of watching pods dry on the branch, only to find empty shells inside.
The key is patience: wait until pods turn from green to papery brown, usually in late summer or early fall. Once ripe, gently twist to release seeds (yes, they’ll resist at first).
Stratification—mimicking winter’s chill—boosts germination rates, but don’t rush it. Mountain laurel seedlings grow slow, so give them time to establish before transplanting.
You’ll end up with delicate, bell-shaped blooms in spring, their pink or white flowers drawing hummingbirds like magnets. The plants thrive in acidic soil and partial shade, making them perfect for woodland gardens or as specimen shrubs. Just avoid overwatering—root rot is their Achilles’ heel.
Common mistakes? Skipping stratification or planting too deep. Start seeds in a well-draining mix and keep them moist but not soggy. With the right care, you’ll have a mountain laurel that outlives you—and its seeds will keep the cycle going.
📚 In This Guide
- What you need
- Instructions
- Tips and common mistakes
- Wrapping up and next steps
What you need
- ● Mountain laurel seed pods: 10–20 mature, fully brown pods (harvested in late summer/fall). Pro tip: 💡 Gently twist to release seeds—no tools needed!
- ● Well-draining potting mix: 1–2 gallons (sterilized, peat-based or cactus/succulent blend works well).
- ● Small pots or seed trays: 4–6" deep, with drainage holes (4–6 units).
- ● Grow lights or sunny windowsill: 6–8 hours of indirect light daily.
- ● Misting bottle or spray nozzle: For consistent moisture without overwatering.
- ● Pruning shears: For trimming pods (sterilized with rubbing alcohol).
- ○ Seed-starting mat: Optional, to keep soil warm (70–75°F ideal).
- ● Humidity dome or plastic wrap: To retain moisture during germination (remove once sprouts appear).
- ● pH test kit: Check soil acidity (mountain laurel thrives in pH 4.5–5.5).
- ○ Slow-release fertilizer (optional): Balanced 10-10-10 or acidic fertilizer (e.g., cottonseed meal).
How to grow mountain laurel from seed pods
Here's the natural way to propagate mountain laurel—no twisting required. Just patience and these simple steps.
🌱 Step 1: Collect and Prepare the Seed Pods
Harvest the pods when they turn wooden brown and begin splitting open naturally—usually late summer to early fall. Avoid green or unripe pods, as they won’t contain viable seeds. I like to collect them on a dry day when the pods are fully mature but haven’t yet released their seeds.
Place the pods in a paper bag and let them dry indoors for 2-3 weeks. This mimics their natural drying process and helps loosen the seeds inside. Shake the bag daily—you’ll hear seeds rattling inside as they separate. Once the pods crumble easily when squeezed, they’re ready for seed extraction.
🌿 Step 2: Extract and Stratify the Seeds
Break open the dried pods and carefully remove the seeds. Mountain laurel seeds are small and flat, often with a light brown or tan outer coating. Discard any seeds that look shriveled or damaged. I use tweezers to handle them—these seeds are delicate and easy to lose.
Mountain laurel seeds require stratification to break dormancy. Mix the seeds with moistened peat moss or sand in a sealed container. Place the container in the refrigerator for 60-90 days—this mimics winter conditions. Check the mix every 2 weeks to ensure it stays damp but not soggy. If the seeds sprout before stratification is complete, they’ll likely be weak and won’t survive.
☀️ Step 3: Sow the Stratified Seeds
After stratification, plant the seeds in well-draining potting mix—mountain laurel hates soggy roots. Use small pots (2-3 inches deep) to prevent overcrowding. Press each seed ¼ inch deep into the soil, spacing them 1 inch apart. Water gently until the soil is moist but not waterlogged.
Place the pots in a bright, indirect light spot—no direct sun yet. Mountain laurel seedlings are sensitive to intense light at this stage. Keep the soil consistently moist but avoid overwatering, which can cause damping-off. You’ll see tiny green sprouts in 4-8 weeks, depending on how well the stratification worked.
🪴 Step 4: Transplant and Care for Young Seedlings
Once seedlings develop 2-3 sets of true leaves (not just the initial cotyledons), they’re ready for their first transplant. Choose a shady to partially shaded spot in the garden—mountain laurel thrives in dappled sunlight. Dig a hole twice as wide as the root ball but only as deep as the pot.
Water the seedlings deeply the day before transplanting to reduce shock. After planting, mulch with 2-3 inches of organic mulch to retain moisture and protect the roots. Mountain laurel grows slowly, so don’t rush—it can take 2-3 years before you see significant growth. Be patient; the payoff is worth it.
⏰ Step 5: Maintain for Long-Term Growth
Mountain laurel prefers acidic soil (pH 4.5-6.0)—test your soil and amend with sulfur or peat moss if needed. Water deeply once a week during dry spells, but avoid wetting the leaves to prevent fungal diseases. Prune lightly in late winter to shape the plant and remove dead wood.
Fertilize sparingly—mountain laurel doesn’t need much. A light application of acid-loving plant fertilizer in early spring is enough. With proper care, your seedlings will mature into stunning, fragrant shrubs that bloom beautifully in spring or early summer. Just remember: good things take time.
Tips & tricks for growing mountain laurel from seed pods
Patience and precision are your best friends when working with mountain laurel seed pods. Here's what I've learned after years of growing these beautiful shrubs.
Timing is Everything: Harvest those wooden brown pods only when they're naturally splitting open—usually late summer to early fall. Green pods won't work, and waiting too long means the seeds will scatter naturally. I've learned this the hard way after trying to use unripe pods that produced no viable seeds. Mark your calendar for this crucial window!
Stratification Secrets: The 60-90 day refrigerator stratification is non-negotiable for mountain laurel seeds. I've tried skipping it—big mistake! The seeds need this cold period to break dormancy. Place a small dish of water under the container to maintain humidity, and check every 2 weeks. If condensation forms on the lid, you're good—just don't let it get soggy.
Lighting Matters: Mountain laurel seedlings are sensitive to intense light. After sowing, place them in bright but indirect light—think filtered sunlight through sheer curtains. Direct sun at this stage can scorch delicate seedlings. I use a grow light on a timer for 12 hours daily if natural light isn't sufficient. Watch for tiny green sprouts in 4-8 weeks—this is your reward for proper stratification!
Transplanting Wisdom: When your seedlings develop 2-3 sets of true leaves, they're ready for their first transplant. The key is to dig a hole twice as wide as the root ball but no deeper than the pot. This encourages root expansion rather than forcing them downward. Water deeply the day before transplanting to reduce shock, and always use well-draining soil—mountain laurel hates soggy roots.
Pro Tips for Seed Pods Mountain Laurel
- Patience and precision are your best friends when working with mountain laurel seed pods. Here's what I've learned af...
- Timing is Everything: Harvest those wooden brown pods only when they're naturally splitting open—usually late summer ...
- Stratification Secrets: The 60-90 day refrigerator stratification is non-negotiable for mountain laurel seeds. I've t...
Frequently asked questions
about mountain laurel seed pods—because even the toughest pods have answers!When do mountain laurel seed pods ripen and drop seeds?
Mountain laurel seed pods typically ripen in late summer to early fall (August–October, depending on your climate). They’ll turn from green to brown and split open on their own—no need to force them! If pods stay closed, they may need more time or slightly drier conditions. Pro tip: Shake the branches gently over a tray to collect seeds if they’re slow to release.
Why are my mountain laurel pods twisting or curling?
Twisted or curled pods are often a sign of stress—think drought, pests (like laurel wilt disease), or poor soil drainage. Check for woody stems with dark streaks (a red flag for laurel wilt). Water deeply but infrequently, and mulch to retain moisture. If pests are suspected, consult a local arborist for organic treatments.
Can I grow mountain laurel from seed pods, or should I buy seedlings?
Yes! While seedlings are easier, growing from seed pods is rewarding (and budget-friendly). Key steps: Extract seeds from ripe pods, soak them in water for 24 hours, then plant in well-draining soil. Germination can take 3–6 months—patience is key! Seedlings may take 5–10 years to flower, so buy seedlings if you want faster results.
What’s the best way to collect and store mountain laurel seeds?
Collect seeds when pods are fully brown and dry (but before they scatter). Gently twist open pods over a paper bag, then store seeds in a cool, dry place (like a sealed container in the fridge) for up to 6 months. Label them with the collection date! Avoid plastic bags—seeds need airflow to stay viable.
Are mountain laurel seed pods toxic to pets or kids?
Yes! All parts of mountain laurel—including seed pods—contain grayanotoxins, which can cause vomiting, drooling, or weakness if ingested. Keep kids/pets away from fallen pods, and wear gloves when handling them. If exposure occurs, contact a vet or poison control immediately. Safety first!
Wrapping up and next steps
Mountain laurel seed pods may seem tricky, but with patience and the right approach, you can successfully grow these stunning shrubs from seed! 🌱 Their unique twist-resistant pods hold the key to natural propagation—just follow the steps, and you’ll be rewarded with hardy, fragrant plants.
Ready to take the next step? Start by gathering fresh pods and give these resilient seeds a try in your garden or landscape. Happy growing! 🌿