
Lawn
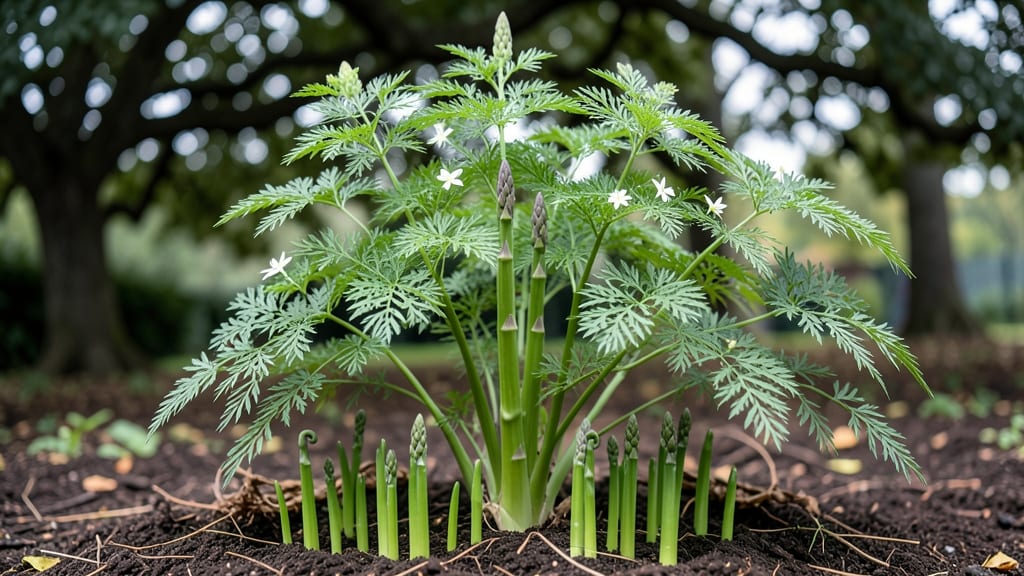
Mastering the seed stages of growing asparagus isn't about seeds—it's about patience and the right first steps. 🌱 The first year is all about root establishment, not harvests.
You'll plant crowns in early spring when soil reaches 50°F, then wait as those fibrous roots spread like a hidden network beneath your garden. The magic happens in year two when ferns emerge—tall, feathery, and hungry for nutrients.
This is when you'll need to water deeply once a week (more in drought) and avoid disturbing the soil. Those ferns are the plant's way of storing energy for the big payoff: year three, when spears finally punch through the soil.
By harvest time, you'll have 10-15 spears per plant if you've been diligent. The secret? Mulching heavily in fall to protect crowns and avoiding early harvests that weaken the roots. First-year plants need no spears—just strong growth to set up next year's bounty.
Here's what separates successful asparagus growers: they treat the first two years like an investment, not a harvest. Soil prep matters most—amend with compost before planting, and keep the bed weed-free. Overwatering is the biggest mistake; asparagus roots need moisture but hate soggy soil.
The payoff comes in year three when spears emerge 2-3 weeks earlier than store-bought plants. You'll know you've done it right when your garden becomes the talk of the neighborhood—everyone wants to know how you grew asparagus that tastes like childhood memories.
This method works for both backyard plots and raised beds. Just adjust spacing: 12-18 inches apart in rows 3 feet apart. The key is consistency—same watering schedule, same mulch depth, same patience.
No shortcuts in the first two years, and you'll be rewarded with harvests that last 6-8 weeks every spring.
📚 In This Guide
- What you need
- Instructions
- Tips and common mistakes
- Wrapping up and next steps
What you need
- ● Asparagus Crowns: 1-pound bag (about 10-12 crowns) – Choose disease-resistant varieties like Jersey Knight or Mary Washington.
- ● Well-draining soil: Amend with compost (2-3 inches mixed into the top 12 inches of soil) and sand or perlite (if clay-heavy). Aim for a pH of 6.5-7.5.
- ● Fertilizer: 10-10-10 balanced fertilizer (apply 2 lbs per 100 sq ft at planting).
- ● Organic mulch: Straw or wood chips (2-3 inches thick) to retain moisture and suppress weeds.
- ● Garden shovel and trowel (for digging trenches and planting).
- ● Garden gloves (to protect hands from thorns and soil).
- ● Watering hose or drip irrigation system (asparagus needs consistent moisture).
- ● Measuring tape or ruler (for spacing crowns 12-18 inches apart in rows 3-4 feet apart).
- ○ Optional: Soil test kit (to check pH and nutrient levels before planting).
- ● Full sun exposure (6-8 hours daily).
- ● Well-drained, raised beds or mounded soil (asparagus hates soggy roots!).
- ● 3-year commitment – Asparagus crowns take time to establish before harvest!
Understanding the three-year journey of asparagus growth
Asparagus doesn’t rush—it builds a hidden network of roots before ever sending up a spear. Here’s how to navigate each critical stage from planting to harvest.
🌱 Step 1: Planting Crowns and Establishing Roots (Year 1)
Start with 1-year-old asparagus crowns (not seeds—they’re too slow). Plant them 6-8 inches deep in loose, well-drained soil with a pH of 6.5-7.5. The crown’s buds will form roots first, so bury the crowns 2-3 inches below soil level—deeper encourages more root growth. Space crowns 12-18 inches apart in rows 3-4 feet apart to prevent overcrowding later.
Water immediately after planting to settle the soil, then keep the area consistently moist but not soggy for the first 4-6 weeks. You’ll see no visible growth above ground—this is normal. The plant is focusing all energy on developing a dense root system that can support future spears. Mulch with 2-3 inches of organic mulch (like straw) to retain moisture and suppress weeds, but keep it 6 inches away from crowns to prevent rot.
🌿 Step 2: First Foliage Growth and Root Maturation (Year 2)
In late spring of Year 2, you’ll finally see fern-like foliage emerge—this is the plant’s way of photosynthesizing to fuel root expansion. Do not harvest any spears this year, even if they appear. The plant needs to double its root mass before producing edible shoots. You’ll notice the foliage growing taller and bushier than in Year 1, which means the roots are now well-established and storing energy for next year’s harvest.
Fertilize lightly in early spring with a balanced 10-10-10 fertilizer (about 1 pound per 100 square feet) to support foliage growth. Water deeply once a week if rainfall is insufficient, aiming for 1-1.5 inches of water per week. By late summer, the foliage will yellow and die back—this signals the plant is preparing for dormancy and storing nutrients in its roots for next year’s spears.
⏰ Step 3: First Harvest and Spear Production (Year 3)
Now comes the payoff: early spring of Year 3, when soil temperatures reach 50°F, you’ll see thin, bright green spears pushing through the soil. These are ready to harvest when they’re 6-8 inches tall and still tightly closed. Cut them at ground level with a sharp knife—never pull them, or you’ll damage the crown. Harvest only the thickest spears first, leaving thinner ones to mature. This selective harvesting encourages future production.
After the spear harvest season (typically 6-8 weeks), let the foliage grow freely until late summer. This ensures the plant replenishes its energy reserves for next year. In Year 4, you’ll get a full harvest, but the real reward is the decades-long productivity of a well-established asparagus bed. The key? Patience. Each year builds on the last, turning a dormant crown into a spear-producing powerhouse.
Tips & tricks for perfect asparagus growth
Patience is the key to asparagus success—here’s how to navigate each stage like a seasoned gardener.
Soil Preparation Matters: Before planting those 1-year-old crowns, test your soil’s pH—aim for that 6.5-7.5 range critical for nutrient uptake. Amend heavy clay soil with compost to improve drainage, and avoid sandy soil that dries out too quickly. I’ve learned the hard way that asparagus roots need loose, well-aerated soil to spread properly.
Root Development Secret: Those first 4-6 weeks after planting are all about root growth, not visible shoots. Keep the soil consistently moist (not soggy) during this period—think of it like watering a newborn baby. The crowns need this steady moisture to establish a strong network before any foliage appears. Too little water now means weak roots later.
Year 2 Foliage Strategy: When those fern-like leaves emerge in Year 2, resist the urge to harvest any spears—no matter how tempting! The plant is doubling its root mass, and those leaves are its energy factories. Let them grow tall and bushy; this is when you’re building the foundation for future harvests. I’ve seen gardeners impatiently harvest Year 2 spears only to get disappointing yields in Year 3.
Harvest Timing Precision: Wait until soil temperatures hit 50°F in early spring of Year 3 before harvesting spears. Use a sharp knife to cut them at ground level when they’re 6-8 inches tall and still tightly closed—this prevents woody fibers from developing. Harvest only the thickest spears first, leaving thinner ones to mature. This selective approach ensures your asparagus bed keeps producing year after year.
Pro Tips for Seed Stages Of Growing Asparagus
- Patience is the key to asparagus success—here’s how to navigate each stage like a seasoned gardener.
- Soil Preparation Matters: Before planting those 1-year-old crowns, test your soil’s pH—aim for that 6.5-7.5 range critical for nutrient uptake.
- Root Development Secret: Those first 4-6 weeks after planting are all about root growth, not visible shoots.
Frequently asked questions
Got questions about kickstarting your asparagus patch? Here are answers to the most common ones—so you can grow confidently from seed to spear!
How long does it take for asparagus to grow from seed?
Patience is key! Asparagus grown from seeds (not crowns) takes 3–4 years to reach full harvest potential. The first year focuses on root and crown development, while years 2–3 yield tiny spears. Crown-planted asparagus speeds this up to 2–3 years—so many gardeners start with pre-grown crowns for faster results.
When is the best time to plant asparagus seeds?
Plant seeds in early spring (as soon as soil reaches 50°F/10°C) or late summer/early fall (6–8 weeks before frost). Avoid planting in hot summer months, as seeds need consistent moisture and cooler temps to germinate. If using crowns, plant them in early spring for the best harvest window.
What are the most common problems when growing asparagus from seed?
Watch for:
- Slow germination: Seeds can take 2–4 weeks to sprout—keep soil moist but not soggy.
- Fungal diseases (like Fusarium): Improve drainage and avoid overhead watering.
- Rodent damage: Use wire mesh or repellents if squirrels or rabbits nibble seedlings.
- Overcrowding: Thin seedlings to 6–8 inches apart to prevent competition.
If seedlings look weak or yellow, check for root rot—adjust watering habits immediately.
Can I harvest asparagus the first year?
Nope! First-year plants should never be harvested—let them grow freely (up to 5 feet tall) to build strong roots. In year 2, harvest sparingly (just a few spears) to encourage root development. Full harvest begins in year 3, once crowns are established.
What’s an easier alternative to growing asparagus from seed?
If seeds feel too slow, start with 1-year-old crowns instead! Crowns (bare-root plants) give you a 1-year head start and produce harvestable spears in 2–3 years. Look for Martha Washington or Jersey Knight varieties—they’re beginner-friendly and high-yielding. Just plant them 6–12 inches deep in loose, well-drained soil!
Wrapping up and next steps
Growing asparagus from seed stages is a rewarding journey that demands patience and care—but the payoff is delicious, homegrown spears for years! Remember, the first year is all about establishing roots, the second focuses on crown growth, and by year three, you’ll be harvesting fresh, tender spears 🌱✨.
Now that you’re armed with the right knowledge, it’s time to roll up your sleeves and get planting—your future harvest awaits!
Ready to take the next step? Start by selecting your crowns or seeds today, prep your soil, and mark your calendar for those early spring plantings. Happy gardening!