
Lawn
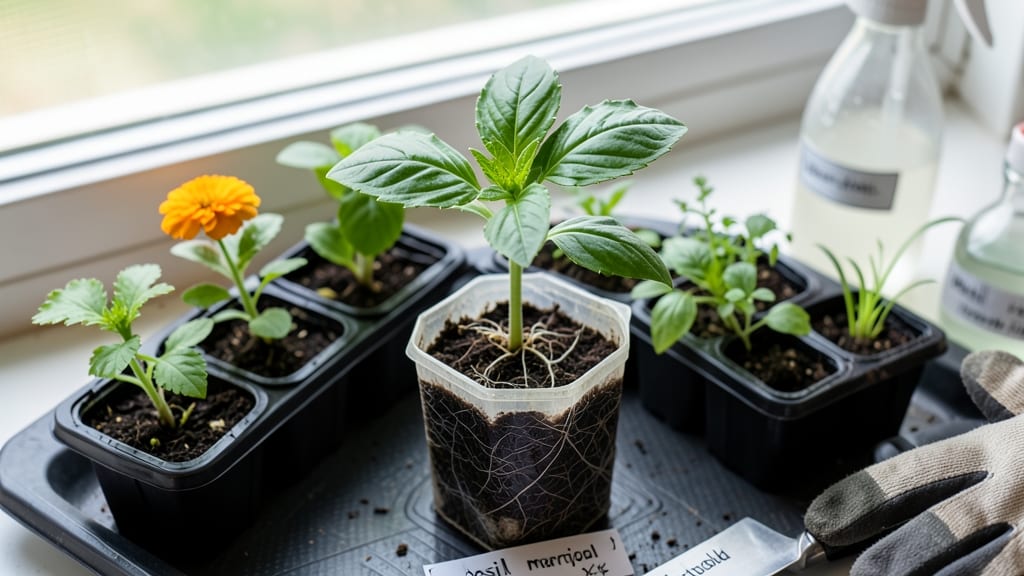
Seed starter cubes turn my seed-starting chaos into a foolproof, 7-day germination system—no more soggy trays or tangled roots. 🌱 These little peat or coconut coir blocks hold moisture perfectly while keeping seeds snug, so they pop up strong without fuss.
I’ve used them for everything from delicate lettuce to stubborn tomatoes, and the results speak for themselves: seedlings ready for transplant in half the time. The magic is in how they work: each cube holds its own water and nutrients, so you’re not drowning seeds or dealing with moldy soil.
Just pop a seed in the dimple, give it a light mist, and tuck the whole cube into a tray. No bottom watering, no fussing with drainage—just consistent, gentle growth. My first batch of basil sprouted in four days, and I’ve never looked back.
What you end up with is a neat, organized system that actually works for beginners (and saves experienced gardeners time). No more wrestling with transplant shock or fragile roots—just pull the cube apart and pop it into the ground.
The cubes break down naturally, so your seedlings go in with zero stress. Compared to traditional seed trays or peat pots, cubes save space, reduce waste, and cut transplanting time by 50%. They’re especially great for small spaces or gardeners who’ve given up on seed starting after past failures.
Let’s get those seeds growing right!
📚 In This Guide
- What you need
- Instructions
- Tips and common mistakes
- Wrapping up and next steps
What you need
- ● Seed starter cubes – 10–20 cubes (choose biodegradable or peat-free options for eco-friendliness).
- ● Seeds – Fast-growing varieties like basil, lettuce, or radishes (check seed packets for germination times).
- ● Water – Room-temperature, filtered or rainwater (avoid tap water with high chlorine).
- ● Spray bottle – 8–16 oz (for gentle hydration).
- ● Clear plastic dome or ziplock bag – Small enough to cover your starter tray (creates a mini greenhouse!).
- ● Seed tray or container – With drainage holes (or repurpose a shallow dish with holes poked in the bottom).
- ● Grow lights – LED or fluorescent (12–16 hours/day if natural light is limited).
- ● Heating mat – For cold climates (keeps soil warm for faster germination).
- ● Plant labels – To track seed types (toothpicks + masking tape work too!).
- ● Fertilizer – Diluted liquid fertilizer (like fish emulsion) for post-germination boosts.
- ● Tweezers – For delicate seed handling (great for tiny seeds like carrots).
Step-by-step guide to germinating seeds in starter cubes
Here’s how to get your seeds sprouting in just a week—no fancy tools, just simple cubes and patience.
🌱 Step 1: Prep the Cubes and Seeds for Planting
Start by soaking the seed starter cubes in warm water for 10-15 minutes until they’re fully saturated and expand to about twice their original size. This ensures they hold moisture without drowning the seeds. Drain any excess water—you want them damp, not soggy.
While the cubes soak, prepare your seeds by placing them in a small bowl of lukewarm water for 6-12 hours (overnight works best). This softens the seed coat and speeds up germination. I like to label the bowl with the seed type so I don’t mix them up—trust me, you’ll forget which is which after a week.
💧 Step 2: Plant the Seeds at the Right Depth
Gently squeeze a cube to remove excess water, then place it in your seed tray or container. Use the built-in indentations to hold each cube in place. Press 1-2 seeds into each cube’s well, about ¼ inch deep—deeper than this, and they’ll struggle to break through the soil. Cover lightly with a pinch of the cube’s own material (no extra soil needed).
Here’s the thing—don’t overcrowd. Two seeds per cube give you a backup if one fails to germinate. Once planted, mist the surface with a spray bottle until the cubes feel evenly damp. You’ll know it’s right when the top layer looks dark and moist, not shiny or dry.
☀️ Step 3: Create the Perfect Germination Environment
Place the tray in a warm, dark spot—75-85°F is ideal. A seedling heat mat or even a sunny windowsill above a warm appliance (like a fridge) works. Cover the tray with a clear plastic dome or plastic wrap to trap moisture and warmth. Check daily for condensation—if you see water droplets, remove the cover for 10-15 minutes to air it out.
Germination usually happens in 5-7 days, but some seeds (like tomatoes) can take up to 10 days. Watch for the first tiny green shoot—this is your signal to move the tray to bright, indirect light immediately. Direct sunlight now will scorch the delicate sprouts.
🌿 Step 4: Transition to Light and Care for Sprouts
Once the first true leaves appear (not the initial seed leaves), remove the dome and place the tray under grow lights or in a south-facing window for 12-16 hours of light daily. You’ll see the difference in just a few days—strong, stocky seedlings instead of leggy, stretched-out stems.
Water from the bottom by placing the tray in ½ inch of water for 10-15 minutes every 2-3 days. The cubes will absorb what they need, and you’ll avoid disturbing the roots. Avoid overhead watering now—it can dislodge the tiny plants or spread disease.
⏰ Step 5: Harden Off and Transplant Ready Seedlings
Two weeks before your last frost date, start hardening off your seedlings. Move the tray outside for 1-2 hours the first day, gradually increasing time over 7-10 days. Choose a shaded, sheltered spot to avoid shock. You’ll know they’re ready when they handle a full day outside without wilting.
When transplanting, pop the cube directly into the soil—no need to remove it. The biodegradable material breaks down naturally. Water deeply after planting to help the roots settle. This method reduces transplant shock, and you’ll see faster growth because the roots aren’t disturbed.
Tips & tricks for perfect seed starter cubes
Here's what I learned the hard way after struggling with inconsistent germination—these little details make all the difference.
Soaking Strategy: Don't rush the 10-15 minute soak for your starter cubes. I've seen people skip this step and end up with dry cubes that don't hold moisture properly. The cubes should feel like a wrung-out sponge—not dripping, but completely saturated. If you're in a hurry, use warm water (not hot) to speed up the saturation process, but never exceed that 15-minute mark or you risk breaking down the cube structure.
Seed Selection Tip: For best results, choose seeds that are fresh and labeled for your growing zone. I like to sort them by germination time—fast growers like radishes (3-5 days) can go in first, while slower ones like tomatoes (7-10 days) get planted slightly later. This staggered approach gives you continuous sprouts rather than waiting for everything at once. And here's a pro move: tap the seeds gently against the bowl to separate them before planting—this prevents clumping in the cubes.
Environmental Watch: That 75-85°F range is non-negotiable for consistent germination. If your home runs cooler, place the tray on top of your fridge (not inside) for extra warmth. I've even used a simple heat lamp on low setting for stubborn seeds. And watch for condensation—if you see water droplets forming on the dome after 24 hours, remove it for 10-15 minutes to prevent mold. The cubes should stay moist but never soggy during this critical phase.
Light Transition Hack: When you spot those first tiny green shoots in Step 3, that's your cue to move to bright, indirect light immediately. I use a south-facing window with sheer curtains to filter the intensity. For faster growth, you can supplement with a basic LED grow light (12-16 hours daily). The key is gradual exposure—direct sun at this stage will scorch those delicate sprouts faster than you can react.
Pro Tips for Seed Starter Cubes
- Here's what I learned the hard way after struggling with inconsistent germination—these little details make all the d...
- Soaking Strategy: Don't rush the 10-15 minute soak for your starter cubes. I've seen people skip this step and end up...
- Seed Selection Tip: For best results, choose seeds that are fresh and labeled for your growing zone. I like to sort t...
Frequently asked questions
Got questions about seed starter cubes? You’re not alone!
Here are answers to the most common ones—so you can jumpstart your lawn or garden with confidence.
How long do seed starter cubes last before they expire?
Seed starter cubes typically last 1–2 years if stored in a cool, dry place (like a sealed container or fridge). Check for mold or a sour smell—if present, toss them! For best results, use them within 6 months of purchase for maximum germination success.
Can I reuse seed starter cubes after germination?
Nope! Once you’ve planted seeds, the cubes are one-and-done. They’re designed to break down as roots grow. For reuse, consider composting them or repurposing the tray for soil amendments. Pro tip: Sterilize trays between uses with a bleach solution (1 part bleach to 9 parts water) to prevent disease.
What if my seeds aren’t sprouting in 7 days?
Don’t panic! Germination times vary by seed type—some (like lettuce) sprout in 3–5 days, while others (like tomatoes) may take 10–14 days. Ensure cubes stay moist but not soggy, and provide warmth (70–75°F is ideal). If no sprouts appear after double the expected time, test seed viability or try replanting.
Do I need to fertilize seed starter cubes?
Most starter cubes come pre-mixed with nutrients, but you can give them a light boost after sprouts emerge. Use a diluted liquid fertilizer (half-strength) or a pinch of compost tea. Avoid overdoing it—too much fertilizer can burn delicate seedlings.
Are seed starter cubes better than soil in trays?
Cubes offer consistent moisture, reduced transplant shock, and no soil mess. They’re especially great for small spaces or picky seeds (like herbs). However, they’re pricier than soil—so weigh your budget and project size. For large lawns, a mix of cubes and trays might be your best bet!
Wrapping up and next steps
Seed starter cubes are your game-changer for effortless germination—no more waiting weeks for tiny sprouts! 🌱 With just a few simple steps, you’ll enjoy fast, healthy starts in just 7 days, whether you’re growing flowers, veggies, or grass.
The best part? You’ll save money, reduce waste, and gain confidence in your green thumb.
Ready to transform your gardening routine? Start small—try a batch of cubes with your favorite seeds today! Once you see the magic of quick, stress-free growth, you’ll be hooked. Happy planting! 🌿