
Lawn
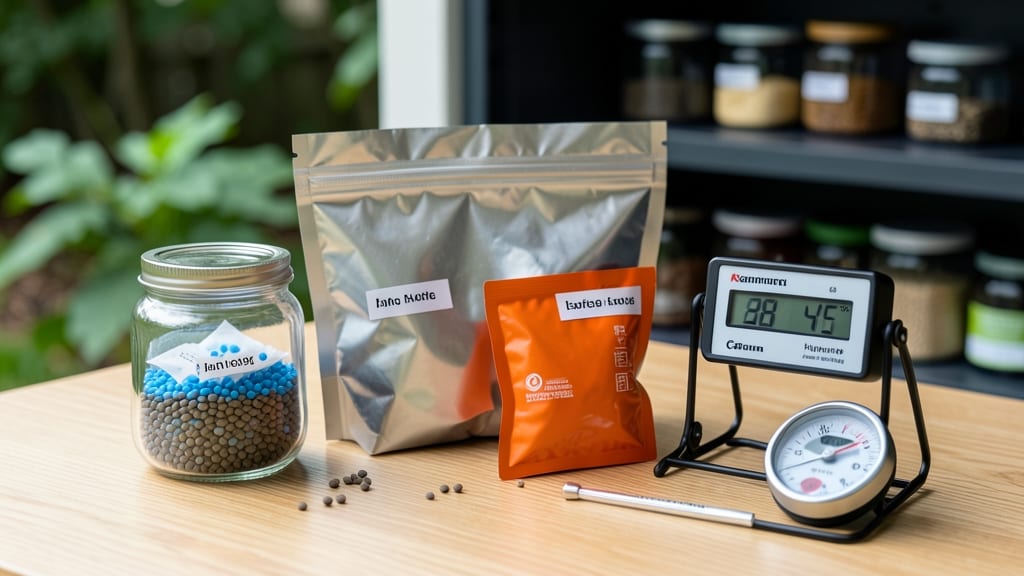
Mastering the seed storage conditions means the difference between next year's thriving garden and a packet of seeds that never quite live up to their potential. 🌱 I've learned that even the hardiest seeds—like my prized heirloom tomatoes—can lose viability in just months if stored wrong.
The secret lies in keeping them cool, dry, and dark, with humidity levels that preserve their inner life force.
You'll need airtight containers (mason jars or mylar bags work best), silica gel packets for moisture control, and a spot where temperatures stay between 32-41°F. Label everything with the variety name and storage date—trust me, you won't remember "Grandma's Green" from "Early Girl" after a year.
Hybrid seeds last about 2-3 years, while heirlooms can stay viable for 5-10 years with perfect conditions.
What you'll end up with is a seed stash that germinates reliably year after year, saving you money and keeping rare varieties alive. The first time you watch a seed sprout that you stored yourself is incredibly satisfying—like unlocking a time capsule of your garden's future.
Just avoid common mistakes like storing seeds in the fridge door (temperature swings) or leaving them in plastic bags (moisture buildup).
This system works for any seed type, whether you're saving tomatoes, beans, or flowers. The key is consistency—once you set up your storage space, check it once a year to make sure nothing's gone wrong.
Your future self will thank you when those seeds still spring to life after three winters in storage.
📚 In This Guide
- What you need
- Instructions
- Tips and common mistakes
- Wrapping up and next steps
What you need
- ● Air-tight containers: Mylar bags (5-mil thickness) or sealed glass jars (16 oz or larger) – quantity depends on seed volume.
- ● Desiccant packets: Silica gel (non-clumping, food-grade) – 1-2 packets per container.
- ○ Humidity indicator cards: For monitoring moisture levels (optional but recommended).
- ● Thermometer/hygrometer: Digital or analog, with ±2°F temperature and ±3% humidity accuracy.
- ● Permanent marker or labels: For labeling seed types, dates, and storage conditions.
- ● Seed varieties: Dry, clean seeds (preferably stored in paper envelopes before transfer).
- ● Vacuum sealer: For ultra-low-oxygen environments (extends shelf life further).
- ● Refrigerator/freezer: If storing for decades (ideal temp: 32–41°F).
- ● Dehumidifier: For climate-controlled environments (target 30–50% humidity).
- ● Seed storage vault: Pre-built units with climate control (for serious gardeners!).
Step-by-Step guide to storing seeds for maximum longevity
Here’s how I keep my seeds viable for years—no fancy equipment, just smart science.
🌱 Step 1: Dry Seeds Thoroughly Before Storage
Spread seeds in a single layer on a clean, dry surface—paper towels or a mesh screen work best. Let them air-dry for 3-5 days in a cool, dark place with good airflow. You’ll know they’re ready when they feel brittle to the touch and no moisture remains. Damp seeds rot in storage, so don’t rush this step.
For extra insurance, I place a small packet of silica gel (the kind that comes in shoe boxes) in the container. It absorbs lingering moisture and keeps humidity at bay. Just don’t let the seeds touch the gel directly—wrap it in a breathable cloth first.
💧 Step 2: Choose the Right Containers for Airtight Sealing
Use glass jars with tight-sealing lids or Mylar bags for the best results. Glass is reusable and lets you monitor seed condition, while Mylar creates a nearly airtight seal. Avoid plastic—it can degrade over time and trap moisture. Label each container with the seed type and date to track viability.
I like to add a desiccant packet (like those in vitamin bottles) inside the container before sealing. This ensures any residual moisture gets absorbed. For bulk storage, divide seeds into smaller containers—no more than 1 pound per jar—to prevent uneven drying if moisture ever creeps in.
☀️ Step 3: Store in a Cool, Dark, Stable Environment
Seeds thrive in 32–41°F conditions—think refrigerator crisper drawer or a root cellar. The cooler, the better, but avoid freezing temperatures, which can damage seed coats. I store mine in a dedicated seed bin inside my fridge, separated from food to prevent contamination.
Light and temperature fluctuations speed up seed aging, so consistency is key. If your home runs warm, consider a seed vault (a small insulated box) or a cool basement corner. Check containers every 6 months—if you see condensation or mold, start over with freshly dried seeds.
⏰ Step 4: Monitor and Rotate Seed Stock Regularly
Most seeds last 1–5 years depending on type, but test viability every 2 years. The paper towel test works perfectly: dampen a paper towel, place 10 seeds between two, seal in a bag, and check for sprouts in 7–10 days. If fewer than 80% germinate, replace the batch.
I rotate seeds by planting the oldest first—this way, I never lose a batch to expired viability. For heirloom or rare seeds, I split them into two containers: one for short-term use and one for long-term storage. That way, I always have a backup if something goes wrong.
Tips & tricks for perfect seed storage conditions
Real talk: The difference between seeds that last years and seeds that fail within months often comes down to these small details.
The Humidity Factor: In Step 1, when drying seeds for 3-5 days, place a small fan nearby to create gentle airflow. This speeds up drying without damaging delicate seed coats. I’ve ruined batches by skipping this—humidity is the silent killer of seed viability.
Container Selection: For Step 2, if you don’t have Mylar bags, vacuum-sealed bags work almost as well. The key is removing all air before sealing—use a straw to suck out air through the bag opening before twisting it closed. I keep a roll of these in my seed storage area for emergencies.
Temperature Stability: In Step 3, the 32-41°F range is non-negotiable, but here’s the secret: Place your seed containers on a shelf above the crisper drawer in your fridge. This avoids temperature swings from produce gases and keeps seeds consistently cool without risking frost damage.
Labeling System: I use a combination of masking tape and a fine-tip marker to label containers with seed type, date, and germination percentage. For heirloom seeds, I add a small color-coded sticker for quick visual reference. This prevents mix-ups when you’re ready to plant in a hurry.
Pro Tips for Seed Storage Conditions
- Real talk: The difference between seeds that last years and seeds that fail within months often comes down to these s...
- The Humidity Factor: In Step 1, when drying seeds for 3-5 days, place a small fan nearby to create gentle airflow. Th...
- Container Selection: For Step 2, if you don’t have Mylar bags, vacuum-sealed bags work almost as well. The key is rem...
Frequently asked questions
Got questions about keeping your seeds fresh and ready for planting?
You’re not alone! Here are some of the most common queries—and practical answers—to help you master seed storage like a pro.
What’s the ideal humidity level for storing seeds long-term?
Seeds thrive in 30-50% relative humidity—any higher risks mold, and lower can dry them out. Use silica gel packets or dehumidifiers in airtight containers to maintain balance. For extra safety, store seeds in vacuum-sealed bags or Mylar pouches with oxygen absorbers.
Can I store seeds in the fridge or freezer instead of a cool, dark pantry?
Yes! Freezing (0°F/-18°C) is the gold standard for ultra-long-term storage (20+ years). Fridge temps (35-40°F/2-4°C) work too but may shorten viability to 5-10 years. Just label containers clearly—freezer burn or condensation can sneak up!
How do I know if my stored seeds are still good to plant?
Test viability with the “paper towel method”:
- Moisten a paper towel, place seeds between two, and fold.
- Store in a warm, dark spot (70°F/21°C) for 3-5 days.
- Count germinated seeds—80%+ success = plantable; below 50%? Start fresh!
What’s the best container for seed storage—glass, metal, or plastic?
Glass jars with tight lids (like mason jars) are top-tier—they’re inert, reusable, and block light. Avoid metal (rust risk) and thin plastics (can degrade over time). For bulk storage, Mylar bags + oxygen absorbers are a close second.
Why do some seeds last longer than others? How can I adjust?
Seed lifespan varies by type—tomato seeds last 4 years, while corn lasts just 1-2. Adjust storage by:
- Dry seeds thoroughly before storing (aim for <5% moisture).
- Use desiccant packets in containers for extra dryness.
- Store small batches by seed type to avoid mixing humidity-sensitive varieties.
Pro Tip:
Label everything with the harvest date and seed type—even if you’re organized today, you’ll thank future-you!
Wrapping up and next steps
Mastering seed storage conditions is your secret weapon for keeping your lawn thriving year after year! By controlling humidity and temperature—think cool, dry spaces—you’ll ensure your seeds stay viable and ready to grow. Whether you’re a seasoned gardener or just starting out, these simple steps make all the difference.
Now that you’re armed with the know-how, take action! Audit your storage setup today, adjust as needed, and watch your seeds stay fresh for planting. Happy growing—your future lawn will thank you! 🌱✨