
Lawn
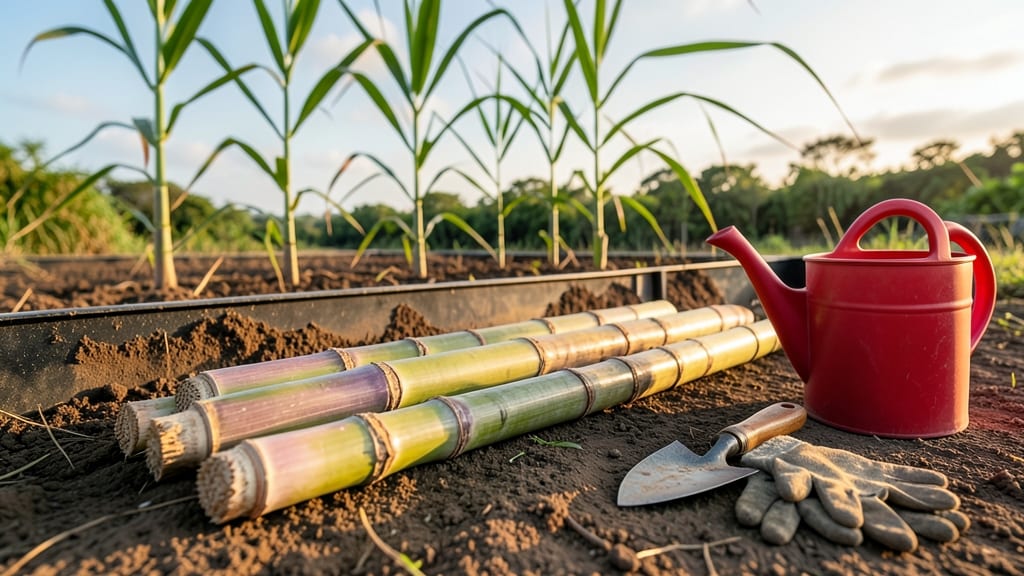
Growing sugar cane from seed cane means golden stalks and year-round harvests—if you avoid the twisty, unusable pods that ruin the harvest. 🌱 I learned the hard way that sourcing quality seed cane and preparing it right makes all the difference between a thriving patch and a wasted season.
The key is in the prep: selecting healthy stalks, cutting them properly, and storing them just right so they don’t rot or sprout too early.
You’ll need warm soil (at least 70°F), full sun, and well-draining earth rich in organic matter—think compost mixed into the top 12 inches of soil. The best seed cane comes from mature plants (2+ years old) or reputable suppliers, never grocery store stalks.
Plant the cuttings 4-6 inches deep, spacing them 2 feet apart to give roots room to spread. In warmer climates, you can plant year-round; cooler zones need to wait until spring after the last frost.
Within 3-4 months, you’ll see rapid growth—tall, sturdy stalks that can reach 12-15 feet if conditions are right. The trick to avoiding twisty, unusable pods is consistent watering (keep soil moist but not soggy) and fertilizing lightly every 6-8 weeks with a balanced 10-10-10 mix.
Harvest before the first frost in cooler climates or when the stalks are fully mature but still tender.
Common early-stage issues? Seed cane rotting before sprouting (fix with proper storage) or slow growth (check soil moisture and sunlight). For year-round harvesting, stagger plantings every 2 months in warm climates.
The payoff? Fresh, sweet stalks for juice, syrup, or even cocktails—no store-bought substitutes needed. Let’s get those cuttings in the ground!
📚 In This Guide
- What you need
- Instructions
- Tips and common mistakes
- Wrapping up and next steps
What you need
- ● Seed Cane: 1-2 healthy, disease-free sugar cane stalks (preferably with 3-5 buds per stalk). Look for certified seed cane if available for better viability.
- ● Well-Draining Soil: 10-20 lbs of a mix of sandy loam (60% topsoil, 30% sand, 10% compost). Sugar cane hates soggy roots!
- ● Fertilizer: 1 lb of balanced 10-10-10 fertilizer (for planting).
- ● 1 lb of high-potassium fertilizer (0-0-50) (for budding/growth stage).
- ● Watering Supplies: A hose with a gentle spray nozzle or a watering can (avoid overhead watering to prevent fungal risks).
- ● Pruning Shears or Sharp Knife: For trimming seed cane to 12-18 inches in length (keep 2-3 buds per cut piece).
- ● Garden Trowel or Shovel: For digging planting holes (6 inches deep, 4 inches wide).
- ○ Stakes & Twine (Optional): 4-6 ft wooden stakes and twine to support taller stalks (prevents snapping in wind).
- ○ Mulch (Optional): Straw or wood chips (2-3 inches thick) to retain moisture and suppress weeds.
- ○ pH Test Kit (Optional): To check soil pH (ideal range: 5.5-7.0; amend with lime or sulfur if needed).
- ● 🌞 Sunlight: A location with full sun (6+ hours/day). Sugar cane is a sun-worshipper!
- ● 🌡️ Warmth: Plant in spring after the last frost (soil temp should be 60°F+).
- ● 🚫 Avoid Frost: Sugar cane is tender perennials—protect from frost with row covers if in cooler climates.
Step-by-step guide to growing sugar cane from seed cane
Here's how to cultivate vigorous, twist-free sugar cane stalks that yield sweet harvests year-round.
🌱 Step 1: Select and Prepare Healthy Seed Cane
Choose mature, disease-free stalks with at least 3-4 nodes—these are the growth points where roots and shoots emerge. Cut sections 12-18 inches long using clean, sharp pruners, ensuring each piece has 2-3 nodes per section. I always soak the cuttings in warm water for 24 hours before planting to stimulate root growth and remove any residual pesticides.
Inspect each piece closely for signs of rot, pests, or discoloration—discard any questionable sections immediately. Healthy seed cane should have firm, white nodes and a crisp, greenish-yellow stalk. This preparation step is critical because weak or diseased cuttings will fail to establish strong roots, leading to stunted growth or complete crop loss.
🪴 Step 2: Plant in Well-Draining, Nutrient-Rich Soil
Sugar cane thrives in loose, sandy loam with a pH between 6.0-7.5. Mix 3 inches of compost into the top 6 inches of soil to provide organic matter and improve drainage. Plant the cuttings at a 45-degree angle, burying 1-2 nodes below soil level—this encourages both root and shoot development. Space plants 2-3 feet apart in rows 3 feet apart to allow for full growth and air circulation.
Water immediately after planting to settle the soil around the nodes, then maintain consistent moisture—never let the soil dry out completely. Sugar cane is drought-tolerant once established, but young plants need 1 inch of water per week during the first 6-8 weeks. I use a soaker hose to deliver water directly to the base, avoiding wetting the leaves to prevent fungal diseases like leaf scorch.
☀️ Step 3: Provide Full Sun and Protect from Wind
Sugar cane requires full sun (6-8 hours daily) for optimal growth and sugar development. Plant in a location sheltered from strong winds, which can damage tender stalks—especially in the early stages. If growing in containers, place them where they receive morning sun and afternoon shade during hot summer months to prevent heat stress.
Watch for signs of stress like yellowing leaves or stunted growth—these indicate either insufficient light or poor drainage. Mulch around the base with 2-3 inches of straw or wood chips to retain moisture, suppress weeds, and regulate soil temperature. This step is non-negotiable in hot climates, where soil can bake and roots dry out quickly.
✂️ Step 4: Fertilize and Prune for Strong Stalks
Apply a balanced 10-10-10 fertilizer at planting, then again after 6 weeks and 12 weeks to encourage robust growth. I avoid high-nitrogen fertilizers, which promote leafy growth at the expense of stalk development. Instead, focus on phosphorus and potassium to strengthen the roots and stems. Side-dress with compost every 3 months to maintain soil fertility.
Remove any weak or diseased stalks immediately to prevent the spread of pathogens. When the stalks reach 6-8 feet tall, trim the top 1-2 inches to encourage bushier growth and prevent lodging (falling over). This pruning also redirects energy toward thickening the stalks, which is where the sugar accumulates. Harvest when stalks are 12-18 months old and have developed a thick, fibrous texture.
🌿 Step 5: Harvest and Prepare for Year-Round Production
Cut stalks at the base with a sharp knife, leaving 2-3 inches of stubble to allow for regrowth. The best time to harvest is in the fall or early winter, when sugar content is highest. Process the stalks immediately by crushing them to extract the juice, or store the cut stalks in a cool, dark place for up to 2 weeks before processing.
After harvest, trim the remaining stubble back to 6 inches and fertilize lightly to encourage a second flush of growth. In warm climates, sugar cane can produce multiple harvests per year. This method ensures a continuous supply of sweet stalks without the need for replanting every season—a game-changer for home growers.
Tips & tricks for growing healthy sugar cane from seed cane
Here's what nobody tells you about avoiding those frustrating twists and maximizing your harvest.
Seed Cane Selection: The 24-hour soak isn't just about stimulating roots—it's also a great time to inspect your cuttings one final time. Place them in a bowl of warm water and discard any pieces that float (they're hollow or diseased). Healthy cuttings will sink and show no signs of soft spots or discoloration. I've found that selecting only the firmest, brightest green stalks with the most pronounced nodes makes all the difference in establishing strong plants.
Planting Angle Matters: That 45-degree angle in Step 2 isn't arbitrary—it creates the perfect balance for root and shoot development. When planting, imagine you're creating a triangle with the cutting: the bottom node should be at the deepest point, and the top node should be just above soil level. This positioning encourages both downward root growth and upward shoot emergence simultaneously. If you plant vertically, you'll often get weak, spindly stalks that twist easily.
Watering Wisdom: The first 6-8 weeks are critical for root establishment, and that 1 inch of water per week needs to go directly to the roots. I've learned the hard way that overhead watering leads to fungal issues—especially leaf scorch. Use a soaker hose or drip irrigation system positioned at the base of each plant. In hot climates, you might need to water twice weekly during this period, but always check soil moisture before watering. Stick your finger about 2 inches into the soil; if it's dry at that depth, it's time to water.
Fertilizer Timing: Those 6-week and 12-week fertilizer applications are non-negotiable for strong stalk development. I've noticed that many growers skip the second application, which leads to thinner stalks with lower sugar content. Use a balanced 10-10-10 fertilizer, but don't overdo it—too much nitrogen will give you lush leaves but weak stalks. After the 12-week mark, switch to a lower-nitrogen fertilizer like 5-10-10 to encourage more stalk thickening rather than leaf growth.
Pro Tips for Sugar Cane Seed Cane
- Here's what nobody tells you about avoiding those frustrating twists and maximizing your harvest.
- Seed Cane Selection: The 24-hour soak isn't just about stimulating roots—it's also a great time to inspect your cutti...
- Planting Angle Matters: That 45-degree angle in Step 2 isn't arbitrary—it creates the perfect balance for root and sh...
Frequently asked questions
Got questions about sugar cane seed cane? You’re not alone!
Here are some of the most common queries—plus clear, actionable answers—to help you grow healthy, twist-free seed cane for year-round harvesting.
What’s the difference between seed cane and mature sugar cane?
Seed cane is a juvenile stalk (1–3 years old) cut from mature plants, specifically grown for propagation. It’s thinner, more flexible, and free of twists or disease—unlike mature cane, which is thicker, fibrous, and used for sugar extraction. Always plant seed cane horizontally for best rooting!
How long does it take for seed cane to root and grow into mature stalks?
Seed cane typically takes 4–6 months to root in warm climates (70–90°F) and 6–8 months in cooler areas. Mature stalks (ready for harvest) appear in 12–18 months, depending on variety and growing conditions. Pro tip: Mulch with straw to retain moisture and speed up growth!
Can I reuse seed cane from last year’s harvest?
No—never reuse seed cane from mature stalks! Reused cane is prone to disease, pests, and poor viability. Always source fresh, twist-free seed cane from certified suppliers or grow your own from healthy parent plants. Twisted or woody stalks? Toss them—they won’t regenerate properly.
What’s the best climate for growing sugar cane seed cane?
Sugar cane thrives in tropical/subtropical climates (USDA Zones 10–12) with high heat (75–95°F), humidity, and 40+ inches of rain/year. In cooler zones, grow in containers and bring indoors during winter. Avoid frost—it kills seedlings! Alternative: Try dwarf varieties like ‘Maya Blue’ for smaller spaces.
Why is my seed cane twisting or dying? Troubleshooting tips!
Twisting or death usually stems from:
- Poor cutting technique: Use sharp, sterilized tools and cut at a 45° angle.
- Fungal/bacterial rot: Disinfect soil with hydrogen peroxide (3%) before planting.
- Nutrient deficiency: Amend soil with compost + potassium-rich fertilizer (e.g., banana peels!).
- Overcrowding: Space stalks 12–18 inches apart for airflow.
Wrapping up and next steps
Growing sugar cane seed cane with twist-free pods is a rewarding way to ensure a consistent, year-round harvest—whether for sweet treats or sustainable landscaping.
By selecting the right varieties, preparing the soil, and mastering propagation techniques, you’re setting yourself up for success. Don’t let challenges like pests or climate deter you—with patience and the right care, your sugar cane will thrive!
Ready to take the next step? Start small—plant a few twist-free pods this season, monitor their growth, and refine your approach. Soon, you’ll be enjoying fresh sugar cane and the satisfaction of a homegrown harvest! 🌱🍃