
Lawn
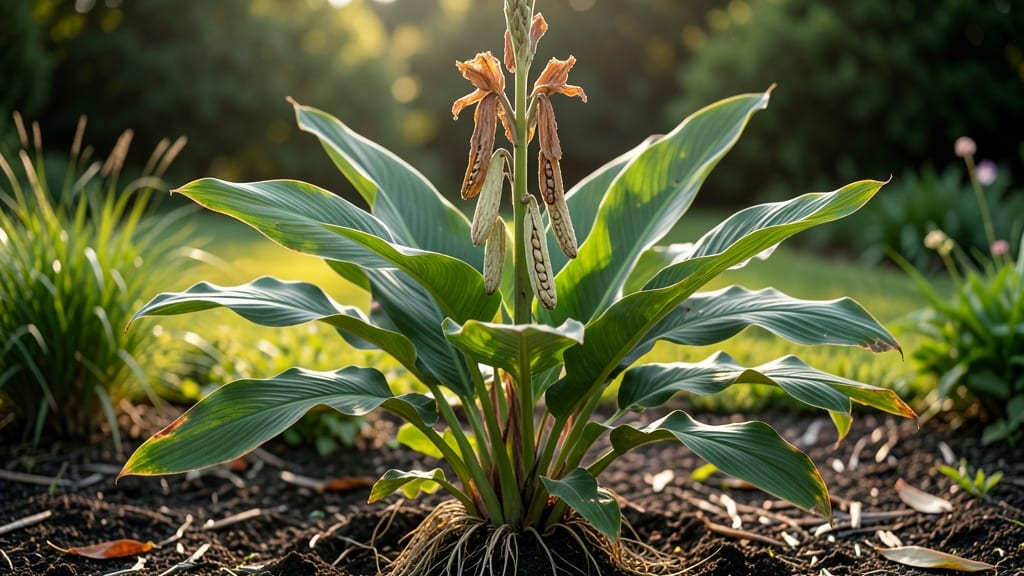
Those dramatic splits in canna lily seed pods aren't accidents—they're nature's way of making seed collection effortless. 🌿 I've watched them open like tiny treasure chests every fall, and once you understand the process, you'll never buy plants again.
The pods burst open when fully ripe, revealing glossy black seeds that stay viable for years if stored properly.
Timing is everything: wait until the pods split naturally, usually in late summer or early fall, when they turn brown and begin cracking open. A gentle twist releases the seeds inside—no tools needed.
This method gives you free, disease-free plants that mature faster than store-bought tubers, and you can grow rare varieties your neighbors will envy.
Germination is shockingly simple: soak seeds overnight, then plant them just below the soil surface. Within 2-4 weeks, you'll see those first bright green leaves pushing through.
The trade-off? Seed-grown plants take a year to bloom, while dividing rhizomes gives instant color—but the satisfaction of growing from seed makes it worth the wait.
For best results, store seeds in a cool, dry place until spring planting. If you're impatient, try sprouting a few early—just don't expect blooms until next summer.
The real magic happens when you share these easy-to-grow plants with fellow gardeners, who'll thank you for the free, thriving additions to their gardens.
📚 In This Guide
- What you need
- Instructions
- Tips and common mistakes
- Wrapping up and next steps
What you need
- ● Mature canna lily plants (with fully developed seed pods—look for brown, papery, or split-open pods 🌿)
- ● Pruning shears or sharp scissors (sterilized to prevent disease spread)
- ● Paper towels or newspaper (for drying and handling seeds)
- ● Small containers or trays (with drainage holes, for seed storage or germination)
- ○ Gloves (optional but recommended)—some canna lilies have irritating sap 🧤
- ● Labeling tags or markers (to track seed varieties)
- ● Well-draining potting mix (if propagating new plants)
- ● Spray bottle with water (for misting seeds or soil)
- ● Magnifying glass (for inspecting seed viability up close 🔍)
- ● Seed germination kit (with humidity domes for faster sprouting)
- ● Disinfectant spray (to clean tools between uses)
- ● Notebook or app (to log growth stages and observations)
- ○ Heat mat (optional for indoor propagation)—speeds up germination in cooler climates 🌡️
How to extract canna lily seeds naturally
Watch as nature does the work for you—these tropical beauties reveal their seeds when ready.
🌱 Step 1: Identify and Harvest Ripe Seed Pods
Canna lily seed pods mature in late summer to early fall, turning from green to a papery brown when fully ripe. Wait until the pods feel dry to the touch and split open on their own—this ensures maximum seed viability. Harvest pods by gently twisting them from the stem or cutting with clean pruners, leaving a small portion of the stem attached to prevent damage.
If pods remain closed, they’re not ready. Forcing them open too early results in shriveled, non-viable seeds. Place harvested pods in a dry, shaded location (like a paper bag) to complete their natural drying process over 7-10 days. This mimics their tropical origin and prevents mold.
🌿 Step 2: Let Pods Split Open Naturally
The magic happens here—canna lily pods split open along their seams when fully dry, revealing glossy black seeds inside. Place pods in a warm, dry spot (around 70-75°F) where they can open undisturbed. Avoid refrigeration or damp areas, as excess moisture triggers rot before seeds are exposed.
Once pods split, remove the seeds carefully with your fingers or a small spoon. Discard the empty pod husks—they serve no further purpose. You’ll typically find 4-8 seeds per pod, depending on the variety. Store extracted seeds in a paper envelope in a cool, dark place until planting season.
⏰ Step 3: Test Seed Viability Before Planting
Not all seeds will sprout, so test viability first. Fill a small container with moistened paper towels, place 10 seeds evenly spaced, and cover with another damp towel. Seal in a plastic bag to retain humidity. Store in a warm spot (75-80°F) and check daily for sprouts, which should appear in 7-14 days. Healthy seeds germinate within this window.
Discard any seeds that remain dormant after 21 days—they’ve likely lost viability. Viable seeds will sprout with a small white root first, followed by a tiny shoot. Once you confirm germination success, proceed with planting in well-draining soil after the last frost date.
💧 Step 4: Plant Germinated Seeds Correctly
Sow viable seeds ½ inch deep in warm soil (70°F+) after all frost risk has passed. Use a seed-starting mix (not garden soil) to prevent rot. Space seeds 6 inches apart in rows 12 inches apart—cannas grow large and need room. Water lightly after planting to settle soil but avoid soggy conditions.
Keep soil consistently moist (not waterlogged) until seedlings emerge, which takes 10-21 days. Once sprouts appear, reduce watering slightly—cannas are drought-tolerant once established. Thin seedlings to the strongest 3-4 per cluster, snipping weaker stems at the base with clean scissors.
Tips & tricks for perfect canna lily seed extraction
Working with nature's timing is half the battle—here's how to maximize your success with these tropical seed pods.
Pod Maturity Check: The 7-10 day drying period in Step 1 is non-negotiable. I've learned the hard way that rushing this process leads to shriveled seeds. Test readiness by gently squeezing the pod—it should feel completely dry and papery, like crumpled tissue paper. If it still feels slightly moist, extend the drying time by another 2-3 days in a warm, dry spot (around 70°F). This mimics their tropical drying conditions perfectly.
Environmental Control: Maintaining that 70-75°F range during both the drying and germination stages makes all the difference. I keep my pods on top of my refrigerator (not inside) where it stays consistently warm. For the germination test in Step 3, I use a seedling heat mat set to 75°F—this cuts germination time from 14 days to just 7-10 days. Avoid kitchen counters near windows where temperatures fluctuate wildly.
Seed Handling Technique: When removing seeds from split pods in Step 2, I find a small spoon works better than fingers for delicate varieties. The seeds are surprisingly fragile—handle them with the same care you'd use for removing chocolate from a truffle. Store them in paper envelopes rather than plastic bags to prevent condensation buildup, which can trigger mold before planting season.
Viability Testing Shortcut: For the germination test in Step 3, I use clear plastic containers instead of opaque ones so I can monitor progress without disturbing the seeds. Place a piece of dark construction paper under the moist paper towels to block light—this helps prevent premature sprouting. If you notice any fuzzy growth after the 21-day mark, it's a sign of mold contamination and you should discard those seeds immediately.
Pro Tips for Canna Lily Seed Pods
- Working with nature's timing is half the battle—here's how to maximize your success with these tropical seed pods.
- Pod Maturity Check: The 7-10 day drying period in Step 1 is non-negotiable. I've learned the hard way that rushing th...
- Environmental Control: Maintaining that 70-75°F range during both the drying and germination stages makes all the dif...
Frequently asked questions
Got questions about canna lily seed pods? You’re not alone! Here are some of the most common inquiries—and their answers—to help you navigate these fascinating, self-opening pods with ease.
How do canna lily seed pods open naturally?
Canna lily seed pods split open on their own when fully mature, thanks to a natural drying process. As the pod dries, its tough outer shell cracks along built-in seams, releasing seeds effortlessly—no tools required! This happens in late summer or early fall, depending on your climate. Pro tip: If pods aren’t opening, they may need more time to dry or could be in a humid environment.
When is the best time to harvest canna lily seeds?
Harvest seeds right after the pods split open but before they scatter or attract pests. Aim for late summer to early fall (August–October in most regions). Check pods daily—they’ll turn brown and brittle when ready. Quick tip: Wear gloves to avoid sticky sap, and collect seeds on a clean tray for easy transfer.
What if my canna lily seed pods won’t open?
If pods stay closed, they might be underripe or too moist. Try these fixes:
- Patience: Wait 1–2 weeks longer for full maturity.
- Drying trick: Place pods in a dry, well-ventilated spot (like a sunny windowsill).
- Gentle help: If pods are almost open, carefully twist them to encourage splitting.
Can I save seeds from canna lilies for next year?
Canna lily seeds are easy to save and often grow true to the parent plant. After harvesting, let seeds dry for 1–2 days, then store them in a paper envelope (not plastic) in a cool, dark place. They’ll stay viable for 1–2 years. Bonus: Label seeds by color or variety to avoid surprises!
What should I do with empty canna lily seed pods?
Once pods are empty, you can:
- Compost them for nutrient-rich soil.
- Use them decoratively in dried arrangements (they add texture!).
- Remove them to tidy up your garden—just pull or snip at the base.
Wrapping up and next steps
Exploring canna lily seed pods reveals nature’s brilliant design for effortless seed dispersal—no tools needed! These pods split open naturally, making extraction simple and rewarding. Whether you’re a gardener or a curious plant lover, understanding this process can elevate your gardening game and inspire sustainable practices.
Ready to dive deeper? Try harvesting your own canna lily seeds this season and watch your garden thrive with minimal effort! 🌱✨