
Lawn
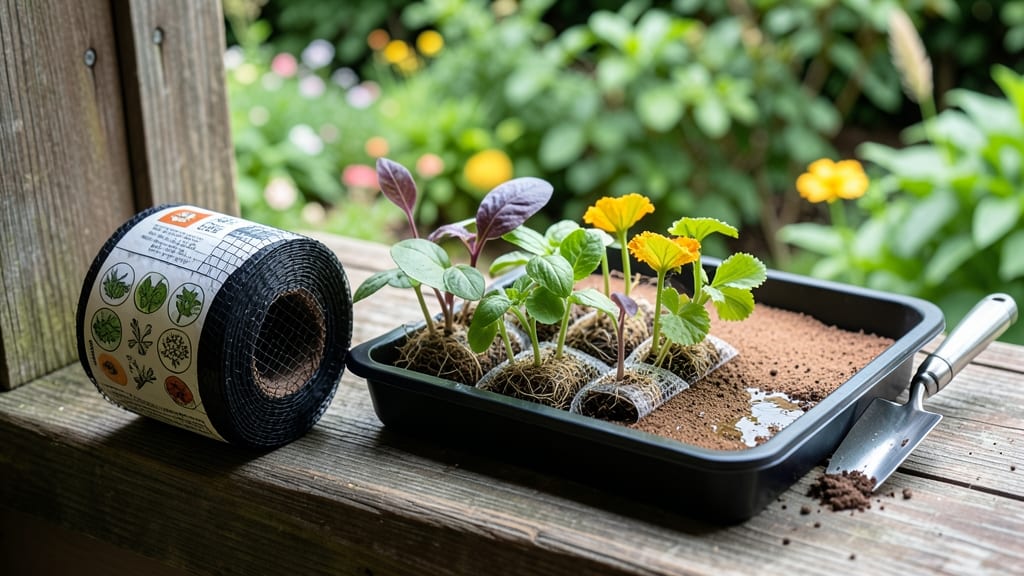
My garden seed tape transformed my spring planting from a messy guessing game to perfectly spaced rows in minutes. 🌱 No more overcrowded seedlings or uneven growth—just straight, consistent plants that thrive from day one.
The pre-measured seeds embedded in biodegradable tape save time, reduce waste, and guarantee the right spacing for every variety. Planting becomes as simple as unrolling the tape into furrows, covering it lightly, and watering—no more counting seeds or dealing with tiny, fast-falling granules.
I’ve used it for marigolds, cosmos, and even snapdragons, and the results are always neater and more reliable than hand-seeding. Even my black thumb can’t mess this up. What you’ll end up with is a garden that looks professionally planted, with evenly spaced blooms that mature together.
The tape dissolves naturally, so there’s no cleanup, and you avoid the common pitfalls of traditional seeding like overcrowding or uneven germination. Works for flowers, herbs, and even some vegetables—just check the seed packet for spacing requirements. Here’s how to make it work for your garden this season!
📚 In This Guide
- What you need
- Instructions
- Tips and common mistakes
- Wrapping up and next steps
What you need
- ● Seeds: Choose your favorite flower, herb, or vegetable seeds (e.g., marigolds, basil, or lettuce). Aim for 1–2 seeds per inch of tape, depending on spacing needs.
- ● Paper towels or coffee filters: Cut into 1–2 inch wide strips (length depends on your garden rows). Use unbleached, seed-safe paper only.
- ● Water: Distilled or dechlorinated (let tap water sit for 24 hours if chlorinated).
- ● Scissors or a craft knife: For precise cutting.
- ● Ruler or measuring tape: To mark seed spacing (¼–1 inch apart, depending on plant type).
- ○ Pencil or marker: For labeling (optional but helpful!).
- ○ Spray bottle: For gentle watering (optional but convenient).
- ○ Plastic wrap or ziplock bag: To keep seeds moist while prepping (optional).
- ○ Garden twine or string: For hanging seed tape to dry (optional).
- ● Glue or flour paste (1:1 ratio): To secure seeds if they won’t stick naturally (e.g., tiny seeds like carrots).
- ● Notebook or seed packet: To track varieties and planting dates.
- ● A well-draining soil mix or seed-starting tray if pre-germinating.
- ● A sunny planting spot (check seed packet for light requirements).
- ● Patience! Some seeds need 1–3 days to adhere to the tape.
Step-by-Step guide to using garden seed tape
Here's how I transform messy seed scattering into perfectly aligned, thriving rows every time.
🌱 Step 1: Prepare Your Planting Area
Clear the soil of debris and loosen the top 4 inches with a rake or hoe. I like to work in 12-inch wide sections for easy management—this keeps the seed tape from getting tangled as you work. Mark your rows with a stick or string if you're planting multiple varieties side by side, as seed tape makes it easy to mix up spacing between different plants.
Moisten the soil lightly before planting—just damp enough to hold the tape in place when laid down. Overly dry soil will make the tape stick awkwardly, while soggy soil can cause the seeds to shift position. Think of it like damp sand at the beach: firm enough to hold your footprint, but not dripping wet.
🌿 Step 2: Unroll and Position the Seed Tape
Carefully unroll the seed tape along your marked row, keeping it taut but not stretched. The seeds are embedded at precise 12-18 inch intervals (depending on your plant type), so maintaining even tension ensures proper spacing. I start at one end of the row and gently press the tape into the soil with my thumb, working slowly to avoid bunching.
For small gardens, I use my fingers to tuck the tape into the soil at each seed location. For larger areas, a small hand rake works better—just drag it lightly along the tape to create a shallow furrow without disturbing the seeds. The goal is to create a snug fit so the tape stays in place while seeds germinate.
💧 Step 3: Cover and Water Gently
Lightly cover the seed tape with ¼ inch of soil using a fine-mesh rake or your fingers. Press down just enough to secure the tape but don't compact the soil—you want roots to penetrate easily. I like to run my hand along the row afterward to smooth any uneven spots that might create water pockets.
Water gently with a fine spray nozzle or watering can—never a forceful stream. You're aiming for even moisture without displacing the tape. I use the "sponge test": if the soil feels damp but not saturated when squeezed, you've got the right amount. Avoid overhead watering if possible, as it can wash away the tape before seeds germinate.
☀️ Step 4: Monitor and Maintain
Keep the soil consistently moist until germination, which typically occurs in 7-21 days depending on your plant variety. Seed tape eliminates the need for thinning, so you won't have to worry about overcrowding as seedlings emerge. Watch for the first true leaves to appear—they'll be small but distinct from the initial seed leaves.
Once seedlings reach 2-3 inches tall**, you can gently pull the tape out of the soil. The roots will have established enough to stand on their own, and the tape will dissolve harmlessly. I always remove the tape before it becomes a nuisance—waiting too long can lead to tangling as plants grow taller. After removal, water normally and watch your plants grow in perfect alignment.
Tips & tricks for perfect garden seed tape planting
Common pitfalls—and how to sidestep every one—when working with seed tape for flawless, straight rows.
Soil Prep Precision: The 4-inch soil loosening in Step 1 is non-negotiable for seed tape success. Use a broadfork to aerate without disturbing the root zone deeper down—this creates ideal conditions while preserving soil structure. For clay-heavy soils, add a thin layer of compost to the loosened area to improve drainage and seed contact. I've learned the hard way that compacted soil can trap moisture against the tape, leading to rot before germination.
Tape Tension Technique: When unrolling in Step 2, think of the tape like a taut guitar string—not too tight (which can stress the seeds), but not loose enough to bunch. For long rows, I anchor the starting end with a small rock or stake before unrolling to maintain consistent tension. The 12-18 inch spacing is your guide—if you see the tape sagging between seeds, gently tug it straight without stretching the entire length.
Watering Wisdom: That ¼ inch soil coverage in Step 3 is your moisture barrier—too little exposes seeds to drying out, too much suffocates them. I use a fine-mesh sieve to distribute the covering soil evenly, then run my thumb along the row to create tiny channels for water penetration. The "sponge test" is my go-to: if water beads up on the surface, you've overdone it; if it disappears instantly, you need more moisture. For sandy soils, consider adding a thin layer of mulch after planting to help retain that delicate moisture balance.
Germination Timing: The 7-21 day window in Step 4 can feel like an eternity, but patience pays off. I mark my seed tape rows with small flags or colored stakes to track progress. If germination seems slow, check for consistent moisture—seed tape works best when soil stays uniformly damp, not soggy. Once those first true leaves appear (they'll look different from the initial seed leaves), you're on the right track. The tape will dissolve naturally as roots establish, but don't wait until plants are 2-3 inches to remove it—earlier removal prevents tangling as stems grow.
Pro Tips for Garden Seed Tape
- Common pitfalls—and how to sidestep every one—when working with seed tape for flawless, straight rows.
- Soil Prep Precision: The 4-inch soil loosening in Step 1 is non-negotiable for seed tape success. Use a broadfork to ...
- Tape Tension Technique: When unrolling in Step 2, think of the tape like a taut guitar string—not too tight (which ca...
Frequently asked questions
Got questions about garden seed tape? You’re not alone! Here are some of the most common queries—and their straightforward answers—to help you get the most out of this hassle-free planting tool.
What’s the best time to plant seed tape?
Seed tape thrives when planted after the last frost and before extreme heat (typically spring or early fall). Check your seed packet for specific timing—some varieties (like lettuce) prefer cooler soil, while others (like marigolds) can handle warmth. For best results, aim for early morning or late afternoon to avoid stressing seedlings.
Can I reuse seed tape from last year?
Nope! Seed tape is designed for one-time use—storing it longer than a season risks seed viability loss or mold. If you’re tempted to save it, opt for organic seed storage in a cool, dry place (like a jar with silica packets) instead. Pro tip: Label your tape with the planting year to avoid confusion!
What if my seed tape won’t stay in the soil?
If your tape keeps popping up, the soil might be too dry or loose. Moisten the area first with water, then gently press the tape into the ground at the recommended depth (usually ¼–½ inch). For sandy soil, mix in a bit of compost to improve grip. If it’s still stubborn, try pinning it down with small rocks or a lightweight mulch layer until roots establish.
Are there alternatives to seed tape?
If seed tape isn’t your style, try:
- Pre-germinated seed pellets (like those for herbs or flowers)
- Hand-spaced seeds with a ruler for precision
- Seedling trays for transplanting later
- DIY seed starter strips (soak paper towels with seeds and plant directly)
What do I do if my plants look sick or stunted?
Common culprits include overwatering, poor drainage, or pests. Check for:
- Yellowing leaves? Too much water or nutrient deficiency.
- Leggy stems? Needs more sunlight or thinning.
- Holes in foliage? Handpick pests or use neem oil.
Wrapping up and next steps
Garden seed tape is your secret weapon for effortless, professional-looking gardens—no more guessing spacing or struggling with uneven rows! Whether you're a seasoned gardener or just starting out, this simple tool transforms planting into a breeze, ensuring straight, lush blooms with minimal fuss. 🌱✨
Ready to elevate your gardening game? Grab your seed tape, hit the soil, and watch your vision come to life! For even more tips, explore our full planting guide or share your progress with the gardening community—happy planting!