
Lawn
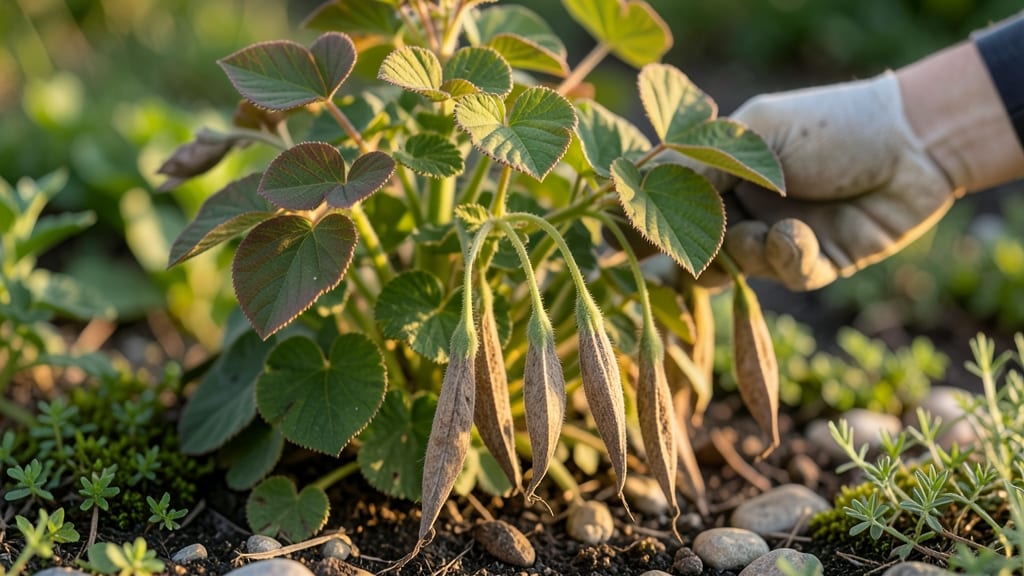
Geranium seed pods hold the key to next year’s blooms—if you handle them right. 🌱 The secret to reliable germination isn’t just planting; it’s mimicking winter’s chill with cold stratification, a trick that doubles your success rate.
I’ve saved seeds from my hardy geraniums for years, and this method ensures I’ll have fresh plants ready by spring without buying expensive nursery starts.
Start by harvesting mature pods when they turn brown and papery—usually late summer or early fall. Let them dry completely in a paper bag for a week, then crack them open to collect the tiny, wrinkled seeds inside.
These seeds need a 6-8 week cold treatment to break dormancy, which you can do by mixing them with slightly damp sand in a sealed container and refrigerating it.
Once stratification is complete, sow seeds in well-draining potting mix at a depth of just 1/8 inch, keeping them moist but never soggy. Place the tray in a bright spot with temperatures around 65°F, and you’ll see sprouts in 2-4 weeks.
The payoff? Healthy seedlings that’ll outperform store-bought plants, with blooms arriving 2-3 weeks earlier than expected.
This method works for both hardy and tender geraniums, whether you’re growing in containers or garden beds. The only requirement? Patience—those first seedlings are worth the wait. Here’s how to make it foolproof, step by step.
📚 In This Guide
- What you need
- Instructions
- Tips and common mistakes
- Wrapping up and next steps
What you need
- ● Mature geranium seed pods: Collect fully dried pods (brown, papery texture) from healthy plants. Aim for 10–20 pods per batch, depending on your desired yield.
- ● Paper towels or coffee filters: 2–3 sheets per batch (for moisture control). Opt for unbleached to avoid chemicals.
- ● Ziploc bags or airtight containers: Small, resealable bags (8x10 inches) or glass jars with lids. Ensure they’re clean and dry.
- ● Water spray bottle: A fine-mist sprayer (like a plant mister) to avoid over-saturating seeds.
- ● Labeling materials: Masking tape + marker (to track seed types/dates).
- ● Refrigerator space: A cold but not freezing section (34–40°F / 1–4°C). Avoid the freezer!
- ● Gel seed starter: 1–2 packets (for faster germination if skipping stratification).
- ● Planting trays + potting mix: Small trays (2–3 inches deep) and well-draining seed-starting mix for post-stratification planting.
- ● Humidity dome: A clear plastic lid or mini greenhouse to retain moisture during germination.
- ● Grow lights: LED bulbs (12–16 hours/day) for indoor seedling growth after stratification.
How to cold-stratify geranium seed pods for guaranteed spring growth
This method ensures your geranium seeds break dormancy naturally—no guesswork, just reliable germination.
🌱 Step 1: Harvest and Dry the Seed Pods
Collect fully mature geranium seed pods when they turn brown and begin cracking open. I like to harvest them in late fall before the first hard frost, as the seeds will be fully developed but still protected from winter moisture. Place the pods in a single layer on a paper towel-lined tray in a dry, well-ventilated area.
Let them dry for 7-10 days until they feel crisp and brittle. You'll know they're ready when a gentle squeeze releases seeds easily. Avoid using a fan or heat source—natural air circulation is enough to prevent mold while maintaining seed viability. Store the dried pods in a paper bag in a cool, dark place until you're ready to stratify.
❄️ Step 2: Prepare the Stratification Medium
Fill a shallow container with 2-3 inches of moistened perlite or coarse sand. The medium should feel damp to the touch but not soggy—think of a wrung-out sponge. I use perlite because it drains excess moisture while still retaining enough humidity to simulate winter soil conditions. Mix the seeds gently into the top inch of the medium, spacing them about 1 inch apart.
Cover the container loosely with plastic wrap or a breathable cloth to maintain humidity without trapping too much heat. Place it in a sealed plastic bag with a few ice cubes to create a 35-45°F environment. Check weekly and mist the medium if it feels dry—this mimics the slow moisture loss of winter soil.
⏰ Step 3: Cold-Treat for 6-8 Weeks
Store the container in your refrigerator's crisper drawer, where temperatures stay consistently 35-45°F. This cold period breaks seed dormancy by mimicking natural winter conditions. After 6-8 weeks, remove the container and place it in a warm, bright spot—you'll see the first signs of germination within 7-14 days.
Watch for tiny green sprouts pushing through the medium. If you notice mold, remove the plastic wrap immediately and let the container air out for a few hours. Geranium seeds are sensitive to over-moisture during this phase, so resist the urge to water heavily—just keep the medium lightly damp.
☀️ Step 4: Transplant Germinated Seeds
Once seedlings develop 2-3 true leaves, carefully transplant them into individual 2-3 inch pots filled with seed-starting mix. Gently tease apart any tangled roots and bury the seedlings to the same depth they were growing before. I use small plastic pots because they’re lightweight and easy to move under grow lights.
Place the pots under a grow light for 14-16 hours daily to prevent leggy growth. Keep the soil consistently moist but not waterlogged—geraniums hate soggy roots. After 4-6 weeks, when seedlings are sturdy with 4-5 leaves, they’re ready to harden off and move outdoors after the last frost.
Tips & tricks for perfect geranium seed stratification
Mastering cold stratification transforms finicky geranium seeds into reliable starters—here's how to avoid the pitfalls that trip up even experienced gardeners.
Timing Secret: The 7-10 day drying period in Step 1 is your first critical checkpoint. If you rush this stage, seeds won't release properly from their pods, and you'll end up with uneven germination. I've found that placing pods on a mesh screen instead of paper towels improves airflow while still preventing mold. This helps maintain that delicate balance between moisture control and seed viability.
Medium Selection: While perlite works beautifully, don't overlook vermiculite as an alternative—it holds moisture slightly better while still providing excellent drainage. The key is maintaining that "wrung-out sponge" consistency in Step 2. I like to mix equal parts perlite and vermiculite for a buffer against moisture fluctuations. Just remember to adjust your misting schedule accordingly if you use this blend.
Cold-Treatment Precision: That 6-8 week refrigeration period in Step 3 is non-negotiable for breaking dormancy, but the 35-45°F range is where things get interesting. I've noticed that the crisper drawer's lower shelf consistently stays at the cooler end of this spectrum—around 38°F—which actually works better for our purposes. If your fridge runs warmer, consider adding a few more ice cubes to that sealed bag to maintain the optimal temperature range.
Transplanting Technique: When handling those delicate seedlings in Step 4, I've developed a habit of using a toothpick to gently loosen tangled roots before transplanting. This prevents damage to the root systems while still maintaining that 1-inch spacing. The 2-3 inch pots are perfect for this stage, but I've had success with even smaller 1.5-inch pots when using a high-quality seed-starting mix—just be prepared to transplant again after 3-4 weeks if you choose this route.
Pro Tips for Geranium Seed Pods
- Mastering cold stratification transforms finicky geranium seeds into reliable starters—here's how to avoid the pitfalls that trip up even experienced gardeners.
- Timing Secret: The 7-10 day drying period in Step 1 is your first critical checkpoint.
- Medium Selection: While perlite works beautifully, don't overlook vermiculite as an alternative—it holds moisture slightly better while still providing excellent drainage.
Frequently asked questions
Got questions about geranium seed pods and their cold stratification process?
Here are some of the most common ones—plus straightforward answers to help you prep for next year’s garden!
Why do geranium seeds need cold stratification?
Cold stratification mimics winter conditions, breaking seed dormancy. Geranium seeds often require this step to germinate reliably. Without it, they may stay dormant for months—or never sprout at all! Think of it as a natural "wake-up call" for seeds.
How long should I stratify geranium seed pods?
Most geranium seeds need 6–8 weeks of cold stratification in moist, refrigerated conditions (34–40°F). Check your seed packet for specifics—some varieties may need slightly longer. Patience pays off for higher germination rates!
Can I skip stratification and still grow geraniums?
You can, but germination will likely be slow, uneven, or poor. Stratification boosts success rates dramatically. If you’re impatient, try soaking seeds in warm water for 24 hours first—though results may still be hit-or-miss.
What if my seed pods won’t open naturally?
If pods stay closed, gently nick the seam with scissors or soak them in warm water for a few hours. Avoid forcing them open—just enough to expose the seeds. Some geraniums release seeds slowly; others need a little help!
How do I know when stratification is working?
You won’t see visible changes until germination starts (usually 2–4 weeks after removing seeds from cold). Look for plump, firm seeds post-stratification—that’s a good sign! If they’re still shriveled, extend the cold treatment by 2 more weeks.
Wrapping up and next steps
Geranium seed pods may seem delicate, but with the right cold stratification technique, you’ll unlock a world of vibrant blooms next season! 🌱 Whether you’re a seasoned gardener or just starting, these steps ensure higher germination rates and healthier plants.
Now that you’re armed with the knowledge, grab those pods, follow the blueprint, and get planting—your future garden will thank you!
💡 Next step: Mark your calendar for stratification start dates and prep your growing space. Happy gardening!