
Lawn
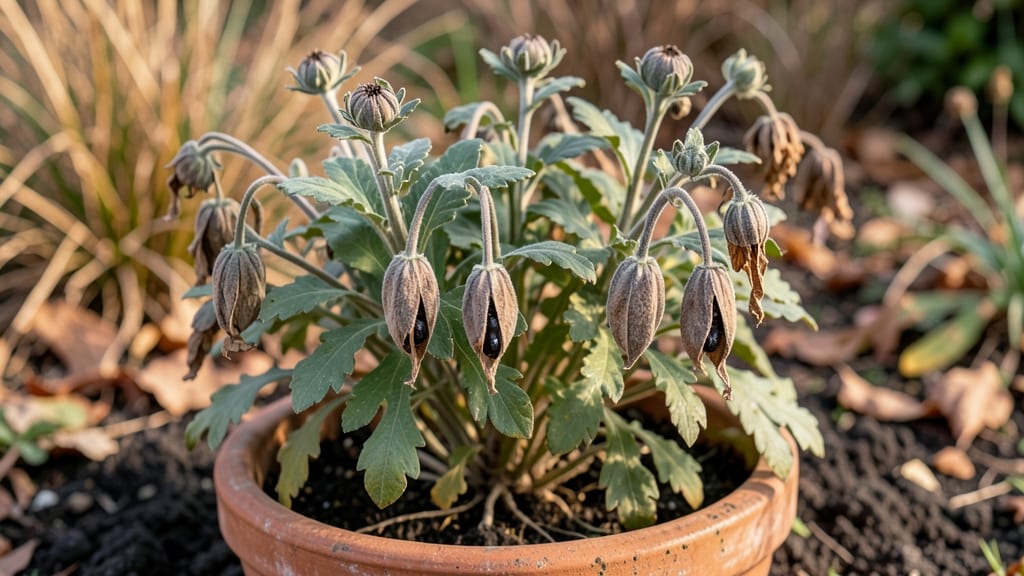
Saving mum seed pods means next year’s garden could burst with vibrant blooms you’ll never find in stores. 🌼 The cold-moist trick is how I’ve doubled my chrysanthemum varieties—no expensive plants, just free seeds from your own garden.
Most gardeners toss these pods, but they hold the potential for next season’s showstoppers. Start by harvesting brown, papery seed pods in late fall after the first frost. Let them dry completely indoors for a week before gently squeezing out the tiny seeds.
Store them in an envelope with a moist paper towel in a sealed bag—this mimics nature’s winter conditions and boosts germination rates. When spring arrives, scatter the seeds on damp soil in shallow trays. Keep them moist but not soggy under plastic wrap until sprouts appear in 2-3 weeks.
Patience is key—these seeds often take longer than store-bought starts, but the payoff is worth it. This method works for any chrysanthemum variety, from fluffy pom-poms to bold dinnerplate blooms. Just avoid overwatering once they sprout, and you’ll have sturdy seedlings ready for transplanting by late May.
Here’s how to make it foolproof!
📚 In This Guide
- What you need
- Instructions
- Tips and common mistakes
- Wrapping up and next steps
What you need
- ● Mature mum (chrysanthemum) plants – Choose healthy, disease-free plants with fully formed seed pods (usually late fall or early winter).
- ● Sharp pruning shears or scissors – For cleanly harvesting pods without damaging the plant.
- ● Paper bags or breathable mesh sacks – 3–5 per plant, labeled with the mum variety (e.g., "Pink Pompon" or "Yellow Cushion").
- ● Plastic zip-top bags or airtight containers – For long-term cold-moist storage (quart-sized or larger).
- ● Moistened paper towels or damp sphagnum moss – To maintain humidity inside storage bags.
- ● Permanent marker or labels – To tag pods with the date and variety.
- ● Refrigerator or cold storage space – Set to 35–40°F (2–4°C) for stratification.
- ● Desiccant packets – To absorb excess moisture and prevent mold in storage.
- ● Garden journal or spreadsheet – Track varieties, harvest dates, and germination progress.
- ● Heat mat or seedling tray – For faster germination in spring (if you’re eager to start early!).
- ● Gloves – If handling thorny or prickly mum varieties.
Step-by-step instructions for harvesting and stratifying mum seed pods
Here’s how to turn this year’s spent blooms into next season’s vibrant garden stars.
🌱 Step 1: Harvest Mature Seed Pods at the Right Time
Wait until the seed pods on your chrysanthemums turn a deep brown and begin to split open naturally. This usually happens in late fall or early winter, after the first frost. The pods should feel dry and papery to the touch—if they’re still green or moist, they’re not ready. I like to harvest them on a dry day when the pods are fully mature but haven’t yet released their seeds onto the soil.
Use clean, sharp scissors or pruning shears to snip the pods from the stems, leaving about ½ inch of stem attached. Place the pods in a paper bag or envelope to collect any seeds that might drop during transport. Label the bag with the variety name and harvest date—this helps track which mums you’re working with, especially if you grow multiple types.
💧 Step 2: Prepare the Cold-Moist Stratification Process
Stratification mimics the natural winter conditions that break seed dormancy. Start by placing the harvested seed pods in a sealed plastic bag with a moistened paper towel at the bottom. The paper towel should be damp but not dripping—squeeze it gently to remove excess water. This creates a humid environment that mimics the moisture seeds would encounter in a cold, wet winter.
Place the sealed bag in a refrigerator (not the freezer) where temperatures stay between 35-45°F. This range simulates the chilling period seeds experience outdoors. Store the bag in a crisper drawer or on a shelf where it won’t be disturbed. Check the bag every 2-3 weeks to ensure the paper towel remains moist. If it dries out, lightly mist it with water and reseal the bag.
⏰ Step 3: Monitor for Germination Readiness
After about 8-12 weeks of stratification, the seeds inside the pods should begin to soften and swell slightly. This is your signal that dormancy has been broken and germination is imminent. You’ll notice the pods may also start to split open on their own—this is normal and indicates the seeds are ready to sprout.
Remove the pods from the refrigerator and place them in a small container with moistened potting mix (not garden soil). Press the pods lightly into the soil so they’re partially covered, but don’t bury them deeply. Keep the container in a warm, bright location (around 65-70°F) with indirect light. Water the soil gently to keep it consistently moist, but avoid soaking it—mums dislike soggy conditions.
☀️ Step 4: Transplant Seedlings When Ready
Once the seedlings emerge—usually within 2-4 weeks after removing them from stratification—they’ll develop their first true leaves. These will look different from the initial cotyledons (the tiny seed leaves) and will be more elongated and vibrant. When the seedlings reach about 2-3 inches tall and have 3-4 true leaves, they’re ready to be transplanted into individual pots.
Use 3-inch pots filled with well-draining potting mix. Gently remove the seedlings from their container, being careful not to damage the roots, and plant them at the same depth they were growing before. Place the pots in a sunny window or under grow lights for 14-16 hours of light daily. Keep the soil moist but not waterlogged, and avoid fertilizing until the seedlings have established themselves for about 4 weeks. This gives them time to adjust before they need extra nutrients.
Tips & tricks for perfect mum seed pod stratification
This cold-moist process transforms fall's spent blooms into next season's showstoppers—here's how to optimize every step.
Pod Selection: Harvest only pods that have turned completely brown and are beginning to split naturally. Green or moist pods won't produce viable seeds—this is the most critical step for successful germination. I've learned the hard way that even slightly green pods often fail to sprout, so patience during harvest pays off later.
Temperature Matters: The refrigerator's 35-45°F range is non-negotiable for proper stratification. If your fridge runs cooler, place the bag on a shelf near the back where temperatures are most stable. I've seen germination rates drop significantly when pods experience temperature fluctuations during this critical 8-12 week period.
Moisture Management: The paper towel should be damp enough to create humidity but never dripping—excess moisture can cause mold. I recommend using a spray bottle to mist the towel every 2-3 weeks rather than soaking it, as this maintains the perfect balance without risking waterlogging. This attention to moisture is what makes the "cold-moist" trick work so effectively.
Transplant Timing: Wait until seedlings develop 3-4 true leaves before transplanting—this ensures they're strong enough to handle the move. I've found that seedlings with fewer leaves often struggle to establish themselves in their new pots. The 2-3 inch height guideline gives you a clear visual cue that they're ready for their next growth phase.
Pro Tips for Mum Seed Pods
- This cold-moist process transforms fall's spent blooms into next season's showstoppers—here's how to optimize every step.
- Pod Selection: Harvest only pods that have turned completely brown and are beginning to split naturally.
- Temperature Matters: The refrigerator's 35-45°F range is non-negotiable for proper stratification.
Frequently asked questions
Got questions about saving mum seed pods for next year’s garden? You’re in the right place! Here are answers to the most common concerns—so you can harvest, store, and grow with confidence.
When is the best time to collect mum seed pods?
Harvest seed pods after they’ve fully matured but before they split open—usually late fall to early winter. Look for brown, dry pods that still feel slightly crisp. If left too long, seeds scatter, and you’ll miss the chance to save them for spring!
Why do I need to use the cold-moist trick?
The cold-moist stratification mimics winter conditions, breaking seed dormancy. Without it, many mum seeds won’t germinate. Simply place pods in a sealed bag with damp paper towels and refrigerate for 6–8 weeks—nature’s way of jumpstarting growth!
How should I store mum seed pods long-term?
Once collected, store pods in a paper envelope (not plastic!) in a cool, dry place (like a seed catalog or fridge). Keep them dry—moisture can cause mold. Label with the variety and date for easy spring planting. Pro tip: Add a silica gel packet for extra dryness!
What if my seed pods won’t open or stay green?
Pods that stay green or sealed may need more time on the plant. Wait until they’re completely brown and papery before harvesting. If they’re still stubborn, gently crack them open with a clean knife—just avoid damaging the tiny seeds inside. Patience is key!
Can I use store-bought mums for seeds?
Not ideal! Many commercial mums are hybrids and may not produce true-to-type seeds. For reliable blooms, save seeds from heirloom or open-pollinated varieties. Check seed packets or ask local nurseries for seed-saving-friendly mums. Your future garden will thank you!
What’s the fastest way to germinate mum seeds?
After stratification, plant seeds shallowly (¼ inch deep) in warm, moist soil. Keep them in bright, indirect light and maintain consistent warmth (70–75°F). Germination can take 2–4 weeks—stay patient! For faster results, use a heat mat.
Wrapping up and next steps
Harvesting and storing mum seed pods with the cold-moist trick is your secret weapon for a showstopping garden next spring! 🌱 By following these simple steps, you’ll give your blooms a head start, ensuring vibrant colors and healthier plants.
Now that you’re armed with the know-how, grab those pods and get planting—your future garden will thank you!
Ready to take it further? Experiment with different moisture levels or try storing seeds in the fridge for shorter periods to see what works best for your climate. Happy gardening! 🌸