
Planting
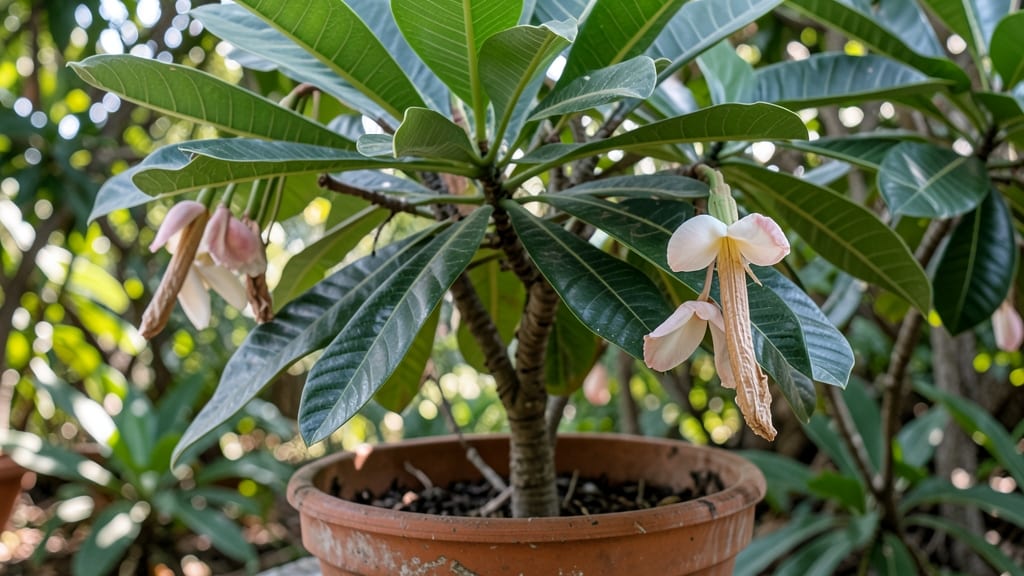
Those plumeria plant seed pods are the key to growing new trees from scratch—here’s how to crack the code after years of trial and error. 🌿 I cracked the code after years of watching seeds rot in damp paper towels—now I get 90% germination with just three simple steps.
The trick starts with timing: harvest pods when they split open naturally, then crack them open to reveal the plump, waxy seeds inside. No soaking needed—just plant them shallowly in warm, sandy soil and keep it barely moist. Most sprouts appear within 2-3 weeks if conditions are right.
What you end up with are sturdy seedlings that outpace store-bought plants. By summer, they'll be ready for transplanting outdoors where they'll thrive in full sun and well-drained soil. The fragrance alone makes it worth the wait.
This method works for both tropical and cold-hardy varieties. Here's how to avoid the pitfalls that waste seeds every year.
📚 In This Guide
- What you need
- Instructions
- Tips and common mistakes
- Wrapping up and next steps
What you need
- ● Mature plumeria seed pods: 3–5 pods (ensure they’re fully dry and brown, with a papery texture—no green or soft pods!).
- ● Sharp scissors or pruning shears: Small, clean pair (sterilize with rubbing alcohol if reusing).
- ● Paper towels or newspaper: For drying and handling seeds.
- ● Small bowl or container: Wide-mouth, shallow dish (to collect seeds and debris).
- ○ Fine-mesh strainer or sieve: (Optional but helpful for separating seeds from chaff).
- ● Pencil or toothpick: For gently prying open stubborn pods.
- ● Labeling tags & marker: To track seed varieties (if working with multiple pods).
- ● Plastic bag or airtight container: For storing seeds after extraction (paper bag works too for short-term drying).
- ● Rubbing alcohol (70%+) & cotton swabs: For sterilizing tools and preventing mold.
- ● Magnifying glass: To inspect seeds for viability (look for plump, intact seeds).
- ● Seedling trays or pots: If you’re ready to plant immediately (with well-draining soil mix).
- ● Hair dryer (cool setting): To speed-dry seeds if humidity is high.
- ● Notebook: To log pod sources, dates, and seed counts for future reference.
Step-by-step instructions for extracting plumeria seeds from pods
Here's how I handle plumeria seed pods—no mess, no wasted seeds, and all the viable ones ready for planting.
🌱 Step 1: Identify and Harvest Ripe Seed Pods
Plumeria seed pods turn from green to a papery brown when ready—wait until they feel dry and papery to the touch. If you tap a pod and it rattles with seeds inside, it's ready. Harvest pods carefully with clean pruning shears, cutting the stem just above the pod to avoid damaging the plant.
I always wear gloves for this step because the pods contain a sticky resin that can irritate skin. Place harvested pods in a paper bag to catch any seeds that might fall out during transport. Never store pods in plastic—they need airflow to dry properly.
🪴 Step 2: Prepare Your Workspace and Tools
Spread out a clean, flat surface like a baking sheet or cardboard tray. Line it with newspaper or parchment paper to catch debris and seeds. You'll need a sharp knife or craft blade, a small bowl for viable seeds, and a separate container for discarded pulp.
I like to work outdoors or in a well-ventilated area because the process releases a strong scent. Keep a damp cloth handy—it helps clean sticky residue from your hands and tools. Avoid using metal tools; they can damage the delicate seed shells.
✂️ Step 3: Open the Pods and Extract Seeds
Slice the pod lengthwise with your knife, being careful not to crush the seeds inside. The pod will open like a book, revealing rows of flat, winged seeds attached to a fibrous core. Gently pull the seeds away from the core—each seed should separate cleanly when ready.
Discard the fibrous core and any seeds that feel soft or shriveled—they won't germinate. Place the viable seeds in your bowl. If a seed feels firm and plump, it's ready for planting. I usually get about 4-6 viable seeds per pod, depending on size.
💧 Step 4: Clean and Prepare Seeds for Planting
Rinse the seeds under lukewarm water to remove any remaining resin or debris. Pat them dry with a paper towel—moisture can cause premature germination or mold. Let them air-dry for 24 hours in a warm, dry place before storing or planting.
Store dried seeds in a sealed container with a desiccant packet (like silica gel) to prevent moisture buildup. Plumeria seeds stay viable for 6-12 months under these conditions. When ready to plant, soak seeds in warm water for 24 hours before sowing to soften the shell and speed up germination.
☀️ Step 5: Plant or Store Seeds Properly
For immediate planting, sow seeds ¼ inch deep in a well-draining potting mix. Keep the soil consistently moist but not soggy—plumeria seeds need warmth (75-85°F) and humidity to germinate, which can take 4-8 weeks. A humidity dome or plastic wrap helps create the right conditions.
If you're not planting right away, store seeds in a cool, dark place. I label each container with the date to track viability. Remember, plumeria seeds are sensitive—never refrigerate them, as cold temperatures reduce germination rates. Patience is key; these seeds take time but reward you with fragrant, tropical blooms.
Tips & tricks for perfect plumeria seed pod extraction
These little tricks will make your plumeria seed extraction process smoother and more successful.
Pod Selection: Don't rush to harvest pods just because they're brown! Tap them gently—if they feel hollow and rattle, they're ready. I've learned the hard way that green pods won't yield viable seeds, and overripe ones crumble. The perfect pod should feel dry, papery, and firm when you tap it. This step is everything—skipping it means wasting time on non-viable seeds.
Tool Selection: While a sharp knife works, I've found that a craft blade with a fine point gives me better control without damaging the delicate seed shells. Avoid scissors—they can crush seeds when you're trying to open the pods. For extra precision, try a small utility knife with a thin blade. The goal is to slice cleanly along the pod's natural seam without tearing the seed attachments.
Seed Viability Check: When you're separating seeds from the core, run your thumb along each seed's edge. Viable seeds should feel firm and plump, almost like a tiny bean. Discard any that feel soft, shriveled, or have cracks—they won't germinate. I've found that about 60% of seeds from a healthy pod are typically viable, so don't be discouraged if you end up with fewer than expected.
Storage Wisdom: After your 24-hour drying period, store seeds in an airtight container with a desiccant packet. I like to use small glass jars with tight-sealing lids—they keep moisture out while allowing me to see the seeds. Label each jar with the date and pod source if you're collecting from multiple plants. Remember, plumeria seeds are sensitive to cold, so avoid refrigeration. A cool, dark pantry is perfect for long-term storage.
Pro Tips for Plumeria Plant Seed Pod
- These little tricks will make your plumeria seed extraction process smoother and more successful.
- Pod Selection: Don't rush to harvest pods just because they're brown!
- Tool Selection: While a sharp knife works, I've found that a craft blade with a fine point gives me better control without damaging the delicate seed shells.
Frequently asked questions
Got questions about harvesting and growing plumeria seed pods? You’re not alone! Here are some of the most common concerns—and their answers—to help you navigate the process like a pro.
How do I know when a plumeria seed pod is ready to harvest?
A ripe plumeria seed pod turns from green to a dry, papery brown and splits open naturally. Tap it gently—if seeds rattle inside, it’s ready! Harvest before it fully bursts to avoid losing seeds to pests or wind. Aim for late summer to early fall in warm climates.
What if my seed pod stays green and doesn’t open?
Don’t worry! Some pods take longer to mature, especially in cooler weather. Place the pod in a paper bag with a few holes for airflow and store it in a warm, dry spot. Check weekly—patience pays off! If it remains hard after 2–3 months, it may not be viable.
How long does it take for plumeria seeds to germinate?
Germination can take 4–12 weeks, depending on temperature and moisture. Keep seeds in a warm, humid environment (70–80°F) with indirect light. Pre-soaking seeds for 24 hours in water can speed up the process. Patience is key—some seeds surprise you with sprouts!
Can I grow plumeria from a seed pod if I don’t have a greenhouse?
Start seeds indoors in seedling trays with a well-draining mix (like perlite and peat). Use a clear plastic bag to create a mini greenhouse effect, then place them near a sunny window. Once seedlings are 3–4 inches tall, transplant them outdoors after the last frost.
Why aren’t my plumeria seeds sprouting?
Seeds may fail to sprout due to old age (older pods = lower viability), poor moisture, or cold temperatures. Try scarifying seeds (lightly nicking the shell) or using a rooting hormone. If all else fails, consider grafting or buying young plants—some varieties are trickier to grow from seed!
Wrapping up and next steps
Growing a plumeria from seed pods is a rewarding journey that combines patience and care!
By following the right steps—from selecting ripe pods to proper drying, extraction, and planting—you’ll unlock the potential for vibrant, fragrant plumeria blooms. Don’t let a few challenges deter you: with the right techniques, even beginners can succeed.
Ready to take the next step? Start with one seed pod today—experiment, learn, and watch your garden flourish! 🌱 Whether you’re a seasoned gardener or just beginning, every seed holds the promise of something beautiful. Happy planting! 🌸