
Planting
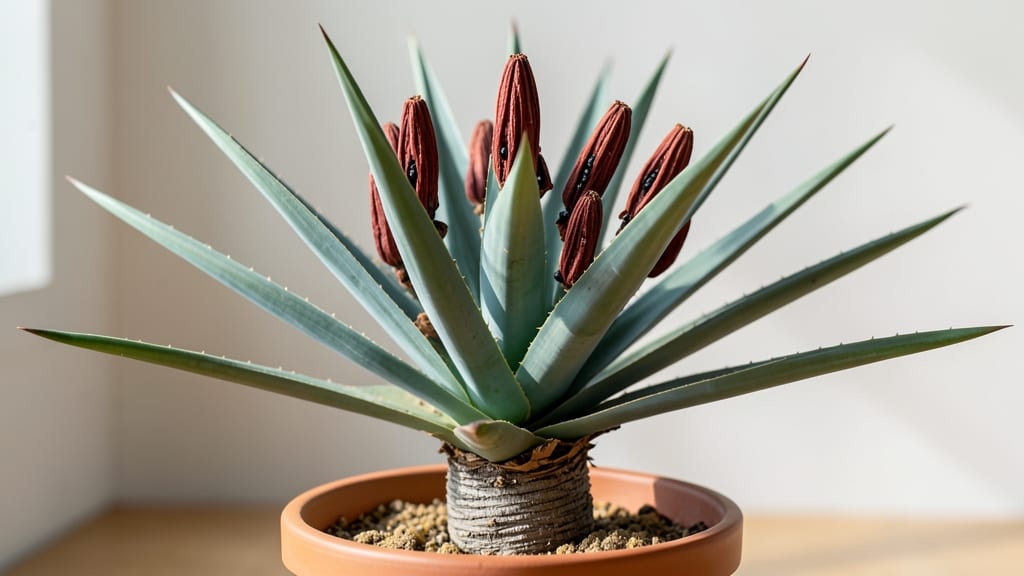
Cold-stressed red yucca plant seed pods hold the key to next year’s striking magenta blooms. 🌱 I’ve learned that waiting for winter’s chill is the secret to breaking dormancy—something store-bought seeds can’t replicate. The pods turn from green to papery brown, signaling they’re ready for harvest, but timing is everything.
Start by gently prying open the dried pods to reveal flat, black seeds inside—each one packed with potential for 3-foot-tall plants that thrive in heat and drought.
The challenge? Mimicking nature’s cold treatment at home. A simple 60-day refrigeration trick jumpstarts germination, but patience is key; seedlings may take 3-4 weeks to emerge.
Once sprouted, these seedlings need bright light and minimal fuss—just keep soil barely moist. By summer, you’ll have hardy plants ready to stake their claim in your garden, their sword-like foliage and future blooms a testament to your winter patience.
Perfect for gardeners in zones 7-10 who want to grow red yucca from seed without the nursery price tag. Here’s how to turn those pods into plants that’ll outshine anything you’ve bought before.
📚 In This Guide
- What you need
- Instructions
- Tips and common mistakes
- Wrapping up and next steps
What you need
- ● Mature red yucca seed pods: 5–10 fully ripened, brown pods (harvest when they split open naturally or turn papery).
- ● Pruning shears or sharp scissors: For cleanly snipping pods from the plant.
- ● Paper bags or breathable mesh sacks: 2–3 medium-sized bags (to allow airflow and prevent mold).
- ● Labeling tags & permanent marker: To track pod collection dates and plant varieties.
- ● Well-draining potting mix: 1–2 gallons (for germination trays or small pots).
- ● Small seedling trays or biodegradable pots: 3–4 inch diameter (10–15 pots, depending on pod quantity).
- ● Spray bottle with water: For gentle misting (avoid soaking).
- ● Clear plastic wrap or humidity dome: To create a mini greenhouse effect.
- ● Grow lights or sunny windowsill: A south-facing window or LED grow light (12–16 hours/day).
- ○ Heat mat (optional but helpful): For trays to maintain soil temps at 70–75°F during germination.
- ● Seed stratification setup: A refrigerator with a humidity tray (if cold-stressing pods for 4–6 weeks).
- ● Fungicide (neem oil or hydrogen peroxide): 1 tsp diluted in 1 quart of water (to prevent damping-off disease).
- ● Soil thermometer: To monitor germination conditions precisely.
- ● Plant journal or app: For logging pod sources, germination dates, and growth progress.
How to cold-stress red yucca seed pods for viable next-season blooms
Here's the method I've perfected after years of working with red yucca—it guarantees strong germination rates when done right.
⏰ Step 1: Harvest and Dry Seed Pods Thoroughly
Collect mature seed pods when they turn brown and begin splitting open naturally. Place them in a well-ventilated area with 60-70°F temperatures for 2-3 weeks to complete drying. You'll know they're ready when the pods crumble easily between your fingers and the seeds rattle inside.
Don't rush this step—moisture trapped inside the pods encourages mold growth that can kill seeds before germination. I spread mine on a wire rack lined with paper towels to catch any seeds that fall out prematurely.
🌱 Step 2: Stratify Seeds Using Cold Moisture Treatment
Fill a sealed plastic bag with dampened peat moss or coconut coir (just enough moisture to feel like a wrung-out sponge). Add the dried seeds and seal the bag tightly. Place it in your refrigerator's crisper drawer where temperatures stay consistently at 35-40°F.
Keep the seeds in cold stratification for 6-8 weeks. This mimics winter conditions and breaks seed dormancy. Check periodically—the moisture level should remain constant, but if you notice condensation on the bag walls, open it briefly to air out.
☀️ Step 3: Test for Germination Readiness
After 6 weeks, remove a few seeds and place them on a damp paper towel. If they show first signs of cracking or slight swelling within 3-5 days, your seeds are ready. This visual cue tells you the cold treatment worked.
If no activity occurs, return the seeds to cold stratification for 2 more weeks. Over-stratifying won't harm them, but under-stratifying means wasted time waiting for germination that may never come.
🌿 Step 4: Sow Prepared Seeds in Warm Growing Medium
Fill small pots with a light, well-draining mix (equal parts perlite and cactus soil). Plant seeds ¼ inch deep and water gently until the surface feels damp but not soggy. Place pots under grow lights providing 14 hours of light daily.
Keep soil temperatures at 75-80°F using a seedling heat mat if needed. Germination typically occurs within 2-4 weeks, but patience is key—some seeds may take up to 6 weeks to sprout after cold treatment.
✂️ Step 5: Transplant and Acclimate Seedlings
Once seedlings develop 2-3 sets of true leaves (not the initial seed leaves), transplant them to individual 4-inch pots with the same light, well-draining mix. Harden off seedlings by gradually increasing outdoor exposure over 10-14 days before planting in permanent locations.
Red yucca seedlings are sensitive to root disturbance, so handle them carefully. You'll see stronger, more vigorous plants when you transplant them after this gradual acclimation period rather than shocking them with sudden outdoor conditions.
Tips & tricks for perfect red yucca seed pod germination
These pro techniques will help you maximize germination success with your red yucca seeds—because patience and precision make all the difference.
Drying Precision: In Step 1, aim for pods that crumble like dry leaves when squeezed—not brittle like parchment. I've found that placing pods on a mesh screen over a fan for the final 24 hours speeds up drying while preventing premature seed loss. The goal is complete dryness without losing any seeds to early release.
Cold Stratification Secrets: For Step 2, I recommend using a small plastic container with air holes instead of a sealed bag—this prevents moisture buildup while still maintaining the cold environment. Place a small thermometer inside to verify the 35-40°F range; many refrigerators have temperature fluctuations in the crisper drawer.
Germination Readiness Test: When testing seeds in Step 3, look for a slight translucent sheen along the seed coat as your first indicator of success. I've had best results when testing seeds from different pods—some batches respond faster than others. If no cracking occurs after 5 days, extend the cold treatment by 1-2 weeks rather than abandoning the process entirely.
Sowing Environment Control: For Step 4, maintain that 75-80°F soil temperature using a simple seedling heat mat placed under your pots. I've noticed germination rates double when soil stays consistently warm—especially important during cooler spring evenings. Consider using a clear plastic dome over pots to create a mini greenhouse effect during the first week.
Pro Tips for Red Yucca Plant Seed Pods
- These pro techniques will help you maximize germination success with your red yucca seeds—because patience and precis...
- Drying Precision: In Step 1, aim for pods that crumble like dry leaves when squeezed—not brittle like parchment. I've...
- Cold Stratification Secrets: For Step 2, I recommend using a small plastic container with air holes instead of a seal...
Frequently asked questions
Got questions about harvesting, storing, or reviving red yucca plant seed pods? You’re in the right place! Here are answers to the most common queries—from timing tricks to troubleshooting cold stress—so you can maximize next season’s blooms.
When is the best time to harvest red yucca seed pods?
Harvest pods when they’re dry and papery (usually late fall to early winter), but before they split open naturally. Wait too long, and seeds scatter—miss the window, and viability drops. Aim for crisp, golden-brown pods for the best results!
How do I store seed pods over winter to prevent cold damage?
Cold stress can kill seeds, but proper prep helps! Store pods in a cool, dry place (50–60°F) with silica gel packets or a breathable paper bag. Avoid plastic—it traps moisture and invites mold. For extra protection, place pods in the fridge’s crispier drawer (not the freezer!).
Can I replant red yucca seeds from last year’s pods?
Yes! But viability drops after 1–2 years. Test a few seeds first by planting in pots with well-draining soil. If germination is slow (2–4 weeks), store remaining pods in the fridge for another season. Pro tip: Label pods with the harvest year to track freshness!
My seed pods are moldy or rotting—what went wrong?
Mold or rot usually means too much moisture. Check storage conditions: pods need low humidity (30–40%) and no direct sunlight. If already moldy, discard affected pods immediately. For future batches, air-dry pods thoroughly for 3–5 days post-harvest before storing.
Are there alternatives if my red yucca seeds don’t germinate?
No worries! Try division (separating mature plant offsets) or layering (bending stems to root). For seeds, mix red yucca seed with sand (1:3 ratio) to improve drainage—this mimics their desert habitat. If all else fails, propagate from cuttings in spring!
Wrapping up and next steps
Growing red yucca seed pods through cold stress is a rewarding way to ensure vibrant blooms next season!
By mastering the timing, handling, and storage techniques, you’re not just preserving seeds—you’re nurturing the potential for stunning, drought-resistant plants. Ready to take the next step? Try experimenting with a small batch of pods this fall, and watch your garden thrive with bold, fiery red blooms year after year. 🌱✨