
Lawn
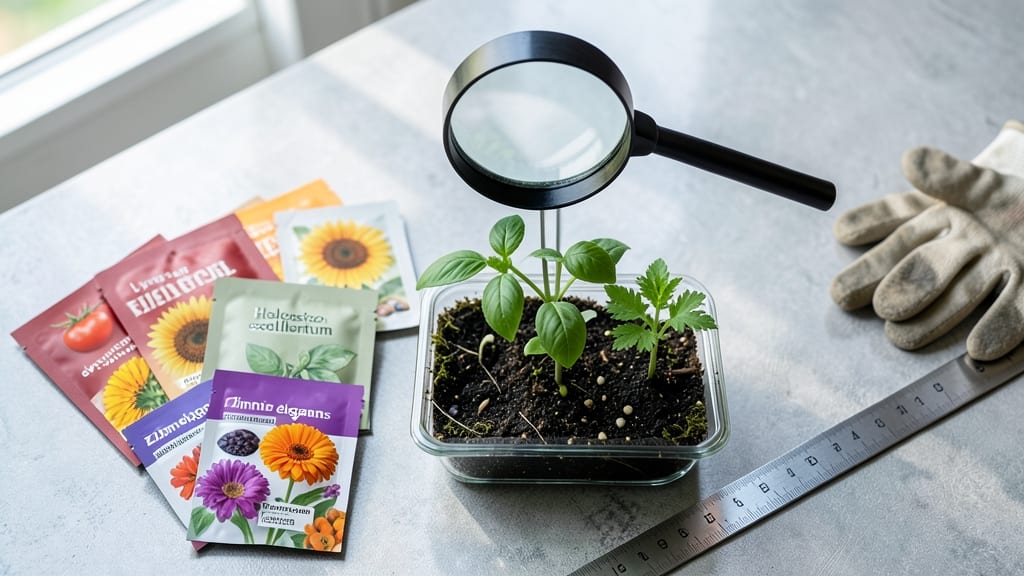
Staring at a bag of mystery seeds can feel like solving a puzzle—until you know what to look for. 🌱 This seed identification guide unlocks the secrets of 50 common varieties, so you never plant the wrong thing again.
The key lies in tiny details: seed shape, texture, and even subtle color shifts that distinguish tomatoes from peppers or marigolds from zinnias.
Most gardeners miss the obvious clues—like the ridged edges of tomato seeds or the flat, disc-like shape of sunflower seeds—because they focus on size alone. With just a magnifying glass and a bright light, you’ll spot the differences that matter.
Think of it as a visual cheat sheet for your garden’s future.
You’ll end up with confident plantings that thrive, not a patchwork of surprises. No more guessing which seed goes where—just clear, reliable identification that turns seed packets into trusted guides. The payoff? A garden that grows exactly what you want, when you want it.
Works for beginners and seasoned gardeners alike, whether you’re sorting through heirloom collections or just trying to match seeds to your planting plan. Let’s get those seeds identified—your garden will thank you.
📚 In This Guide
- What you need
- Instructions
- Tips and common mistakes
- Wrapping up and next steps
What you need
- ● Magnifying glass or handheld loupe (3x–10x magnification for close inspection)
- ● Seed identification guidebook or app (e.g., National Audubon Society Field Guide to North American Seeds or PlantNet)
- ● Ruler or caliper (measuring up to 1 inch for seed dimensions)
- ● White or light-colored tray or plate (for contrasting seed colors)
- ● Small paintbrush or tweezers (for delicate seed handling)
- ● Notebook or digital notes app (to record observations)
- ● Camera or smartphone with macro mode (for high-res seed photos)
- ● Seed collection kit (small vials or envelopes for samples)
- ● Dissecting microscope (for ultra-detailed views of seed structures)
- ● UV flashlight (to check for fluorescent seed coatings)
- ● Moisture meter (if testing seed viability)
- ● Field guide to local flora (to cross-reference plant families)
- ● Waterproof seed storage bags (for long-term sample keeping)
How to identify common garden seeds using key visual traits
Here's my go-to method for telling seeds apart—no fancy tools needed, just what you can see and feel.
🌱 Step 1: Examine Seed Shape and Size
Grab a handful of seeds and compare their shapes first. Round seeds like bean or pea are easy to spot—they're plump and symmetrical, often ½ inch or larger. Flat seeds like sunflower or marigold are thin and disk-shaped, while elongated seeds like tomato or cucumber are oval or teardrop-shaped.
I like to line them up side by side—this helps me see subtle differences in length or width. For example, carrot seeds are tiny ribbons, while lettuce seeds are tiny dots. If a seed feels rough or bumpy, it's likely a wildflower mix or corn kernel.
🌿 Step 2: Check Seed Color and Texture
Color gives huge clues. Black seeds are often radish or mustard, while white seeds might be squash or bean. Brown seeds can be tomato, pepper, or onion, but size and shape narrow it down. Shiny, glossy seeds like sunflower or pumpkin are usually easy to identify.
Run a seed between your fingers—smooth seeds are often vegetables, while textured or ridged seeds are flowers or herbs. Dill seeds, for example, are tiny and ribbed, while basil seeds are oval and smooth. If a seed feels waxy, it's likely a corn or wheat variety.
☀️ Step 3: Look for Distinctive Markings or Attachments
Some seeds have unique features that make them unmistakable. Tomato seeds often have a small gel-like coating, while bean seeds may still have part of the pod attached. Pea seeds are sometimes still inside their pods, which look like tiny green sacs.
If you see wings or feathery attachments, it's likely a maple or dandelion seed. Sunflower seeds often have a small, dark "eye" spot. I keep a magnifying glass handy for tiny seeds like lettuce or carrot, where details matter most.
💧 Step 4: Test for Float or Sink Behavior
Fill a glass with water and drop a few seeds in—this is a quick way to separate viable from non-viable seeds. Most good seeds will sink to the bottom within a few seconds, while empty or damaged ones float. Tomato, bean, and pea seeds usually sink fast.
This trick also helps identify oily seeds like sunflower, which may float briefly before sinking. If a seed stays on top for more than 30 seconds, it's likely not worth planting. I use this method to quickly sort through seed mixes before starting a garden bed.
⏰ Step 5: Cross-Reference with Seed Packets or Guides
Once you've narrowed it down, compare your findings to seed packets or a visual seed guide. Most packets include a small illustration or description of the seed shape and size. If you're still unsure, check the seed coat texture—smooth, rough, or ridged—and compare it to known varieties.
I keep a small notebook where I sketch seeds I'm unsure about and jot down their traits. Over time, you'll start recognizing patterns and making quick ID calls. For example, round, white, and smooth almost always means bean, while flat, black, and shiny is usually sunflower.
Tips & tricks for mastering seed identification
These little details make all the difference when sorting through your seed collection—trust me, I've spent years making these mistakes.
Lighting Matters: Natural daylight is your best friend for seed identification. I always work near a bright window or under a desk lamp—artificial lighting can distort colors and make seeds look different than they really are. If you're indoors, place your seeds on a white surface like a piece of paper or a light-colored tray to enhance contrast and make details more visible. This simple trick helps you spot subtle differences in color and texture that you might miss otherwise.
Texture Test: When you run a seed between your fingers in Step 2, pay attention to how it feels—not just smooth or rough, but also how it interacts with your skin. For example, sunflower seeds have a slightly waxy feel, while dill seeds are almost gritty. I've learned to press gently with my fingernail to test hardness—soft seeds like tomato will dent slightly, while hard seeds like bean will feel firm. This tactile approach helps you distinguish between similar-looking seeds.
Seed Comparison Tool: Create a simple reference chart using index cards or sticky notes. Write the name of each seed type on one card and place a sample seed next to it. As you identify new seeds, add them to your chart. Over time, you'll build a physical library that makes quick comparisons effortless. I keep mine in a small box by my workstation—it's become my go-to resource when I'm unsure about a particular seed. This method works especially well for distinguishing between seeds that look similar but come from different plants.
Magnification Helps: For those tiny seeds like lettuce or carrot, a basic magnifying glass (10x power) can reveal details you'd otherwise miss. Look for fine ridges, tiny hairs, or surface patterns that might not be visible to the naked eye. I've found that even a cheap magnifier from a dollar store works perfectly for this purpose. If you don't have one, try using a smartphone with a macro lens attachment—many phones can zoom in close enough to see important details.
Pro Tips for Seed Identification Guide
- These little details make all the difference when sorting through your seed collection—trust me, I've spent years mak...
- Lighting Matters: Natural daylight is your best friend for seed identification. I always work near a bright window or...
- Texture Test: When you run a seed between your fingers in Step 2, pay attention to how it feels—not just smooth or ro...
Frequently asked questions
Got questions about identifying seeds? You’re not alone! Here are answers to the most common queries to help you navigate your seed ID journey with confidence.
How do I tell if a seed is viable before planting?
Test viability by placing seeds in a glass of water. If they sink (most seeds), they’re likely good—though some lightweight seeds (like dandelions) may float. For extra accuracy, use a paper towel germination test: dampen a paper towel, wrap 10 seeds inside, and seal in a plastic bag. Check in 5–7 days for sprouts!
What’s the best time to collect seeds for identification?
The ideal time is late summer to early fall, when seed pods are dry but haven’t yet split open. For annuals, harvest when the plant starts to yellow or die back. For perennials, wait until seeds turn brown and rattle inside their pods—this ensures full maturity and easier ID.
Can I use a magnifying glass or app to identify seeds?
A hand lens (10x magnification) reveals key details like seed coat texture or embryo shape. For quick digital help, try apps like PictureThis or PlantNet. Upload clear photos of the whole plant and close-ups of the seed/pod for the best matches. Pro tip: Snap pics in natural light!
What if my seed doesn’t match any in the guide?
Start by noting its size, shape, color, and growth habit (e.g., grass-like, spiky, or fleshy). Check local wildflower databases or post to forums like r/whatsthisplant. Include your region—many seeds are native to specific zones. If all else fails, consult a local cooperative extension service for expert help.
How should I store seeds for future ID?
Keep seeds in a cool, dry place (like a sealed jar in the fridge) with a desiccant packet to prevent mold. Label each with the date, location, and plant name. Most seeds stay viable for 1–5 years, but some (like tomatoes) last only a few months. For long-term storage, freeze them!
Wrapping up and next steps
Mastering seed identification is your first step toward a thriving lawn or garden! 🌱 With this visual key to 50 common varieties, you now have the confidence to spot, select, and sow with ease.
Whether you're a seasoned gardener or just starting, every seed you plant is a seed of possibility.
Ready to put your knowledge into action? Grab your gloves, sketchbook, or seed catalog—and start planning your next green project! 🌿 Browse our full seed guide or dive into planting tips next.