
Propagation
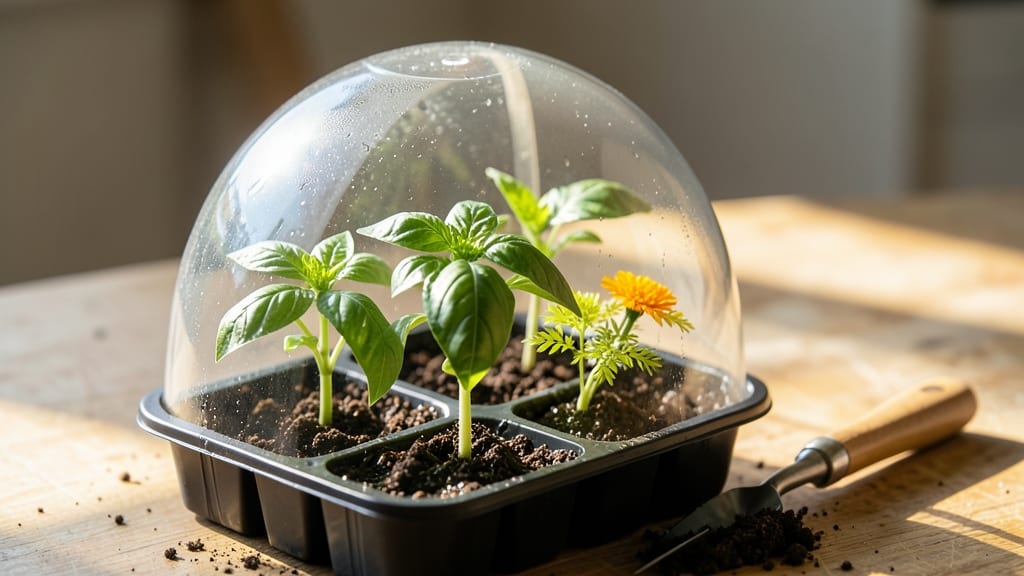
A small seed starting greenhouse cuts germination time in half—no more waiting weeks for stubborn seeds. 🌱 I built mine from a repurposed plastic bin and a clear lid, and now my seedlings emerge in 7-10 days instead of the usual three weeks.
The secret isn't fancy equipment; it's controlling warmth, moisture, and light in a tiny, predictable space.
You don’t need a fancy setup—just a clear container (plastic bins, old aquariums, or even a covered shoebox work), a heat mat for bottom warmth, and a spray bottle for gentle moisture.
Place it near a sunny window or under a grow light, and you’ve got the perfect microclimate. Even my black thumb can’t kill seedlings in here anymore.
What you’ll get is stocky, vibrant seedlings with strong roots and true leaves appearing 2-3 weeks faster than in a seed tray on the counter. The greenhouse keeps humidity high enough to prevent drying out while preventing mold with proper airflow. No more leggy, weak seedlings stretching toward the light.
Works for any budget—from dollar-store plastic bins to $50 commercial models—and scales from a single windowsill to a full seed-starting station. Here’s how to set yours up without overcomplicating it.
📚 In This Guide
- What you need
- Instructions
- Tips and common mistakes
- Wrapping up and next steps
What you need
- ● Greenhouse Structure: Clear plastic sheeting (4–6 mil thickness, 4’x8’ or custom size) OR
- ● A pre-made small greenhouse kit (1–4 sq. ft., with ventilation)
- ● Base & Frame: Wooden frame (1x1 or 2x2 lumber, 4–6 ft. long) OR
- ● PVC pipes (½” or ¾” diameter, 4–6 ft. sections)
- ○ Ziploc bags or plastic domes (for mini greenhouse effect, optional)
- ● Growing Medium: Seed starting mix (sterile, peat-based or coco coir blend, 1–2 qt. bags)
- ● Small seed trays or cell packs (28–72 cell count, biodegradable preferred)
- ● Tools & Extras: Scissors or utility knife (for cutting plastic)
- ● Measuring tape & pencil
- ● Spray bottle (for misting seeds)
- ○ Grow lights (LED or fluorescent, 12–24” height, optional but highly recommended)
- ○ Small fan (for air circulation, optional)
- ○ Thermometer/hygrometer (to monitor humidity/temp, optional)
- ● 🌡️ Ventilation is key! Even small greenhouses need airflow to prevent mold. Add a zip tie or hinge for a flap.
- ● ✨ Reflect light by lining the inside with white paper or aluminum foil to maximize growth.
- ● 🎯 Keep it simple—start with a clear tote + plastic wrap if you’re testing the waters!
Step-by-Step instructions for building a small seed starting greenhouse
Here's how to create a compact, high-performance seed-starting space that accelerates germination and gives seedlings a head start.
🪴 Step 1: Select and Prepare Your Base Structure
Choose a clear plastic storage bin (at least 12 x 18 inches) with a tight-fitting lid as your base. The lid becomes your greenhouse dome. I prefer 10-gallon bins because they balance space with airflow—too large and humidity builds dangerously fast. Clean the bin thoroughly with a 10% bleach solution to prevent mold, then rinse and dry completely.
Position the bin on a heat mat set to 75-85°F—this is your germination secret weapon. Without bottom heat, seeds take 2-3 times longer to sprout. Place the bin in bright indirect light (south-facing window or grow light on a timer) to prevent leggy seedlings before they even emerge.
☀️ Step 2: Create the Greenhouse Environment
Fill the bin with sterile seed-starting mix to 1 inch below the rim, leaving space for humidity to collect on the lid. Moisten the mix until it's evenly damp—not soggy, not dry. Press down lightly to eliminate air pockets, then arrange 4-6 seed trays (or cell packs) inside, spacing them evenly for airflow.
Close the lid and place a small fan on low setting near the bin. This creates gentle airflow that prevents mold while maintaining 85-90% humidity—the ideal range for fast germination. You'll see condensation form on the lid within hours; this is normal and signals perfect moisture levels.
🌱 Step 3: Plant and Monitor for Germination
Sow seeds according to packet depth (usually ¼ inch for most vegetables). I use a fine mist spray bottle to water seeds after planting—this prevents displacement. Label each tray with the variety and date (yes, even if you think you'll remember). Place the lid back and position the bin 2-3 inches under your grow light if using artificial light.
Check daily for first sprouts in 3-7 days (faster with bottom heat!). Remove the lid immediately when 50% of seeds have sprouted—this prevents damping-off disease. You'll know it's time when you see tiny green hooks breaking through the soil surface. At this stage, seedlings need 14-16 hours of light daily to prevent stretching.
💧 Step 4: Transition to Seedling Stage
Once all seeds have germinated, remove the lid permanently and lower the grow light to 4-6 inches above the seedlings. This encourages stocky growth instead of leggy stems. Water from the bottom by placing the bin in ½ inch of water for 10 minutes, then drain completely. Bottom watering prevents soil-borne diseases and ensures even moisture.
After 2-3 weeks, when seedlings show 2-3 true leaves, begin daily 10-minute hardening sessions outside in protected shade. Watch for leaves curling or wilting—this signals they're not ready for longer exposure. Gradually increase time outside until they can handle full sun conditions for your climate.
Tips & tricks for perfect small seed starting greenhouse
Here's what nobody tells you about maximizing your compact seed-starting space for lightning-fast germination.
Heat Mat Placement: Position your heat mat directly under the bin's center to ensure even warmth distribution. I've found that placing it slightly off-center can create cold spots where seeds near the edges take 2-3 times longer to sprout. The 75-85°F range is critical—any lower and germination slows dramatically, while higher temps risk overheating delicate seeds. For extra insurance, use a digital thermometer to verify the mat's temperature matches your setting.
Light Positioning: In Step 3, when you position your grow light 2-3 inches above the seedlings, remember this distance is for the initial germination phase only. As seedlings grow, you'll need to lower it to 4-6 inches to prevent stretching. I use a small ruler to mark the exact height on my light stand—this consistency is what creates those sturdy, compact seedlings you want. For best results, keep lights on a timer for those 14-16 hours daily, even if you're not watching.
Humidity Management: The condensation you see on the lid within hours is actually a good sign—it means your 85-90% humidity goal is working. But if you notice mold forming on the soil surface after 24 hours, that's your cue to increase airflow slightly by raising the fan speed just a notch. Too much humidity without airflow creates the perfect environment for damping-off disease, which can wipe out your seedlings overnight. A small vent cut into the lid (covered with mesh) can help maintain that perfect balance without sacrificing heat retention.
Seed Depth Consistency: That ¼ inch depth recommendation isn't just arbitrary—it's based on most seeds needing that much soil coverage to stay in place while still having enough light to germinate. I use a toothpick marked with a line at ¼ inch to ensure perfect depth every time. For larger seeds like beans, you can go slightly deeper (½ inch), but stick with the ¼ inch for most vegetables. Uneven planting depth leads to uneven germination times, which can create weak seedlings that struggle to compete.
Pro Tips for Small Seed Starting Greenhouse
- Here's what nobody tells you about maximizing your compact seed-starting space for lightning-fast germination.
- Heat Mat Placement: Position your heat mat directly under the bin's center to ensure even warmth distribution.
- Light Positioning: In Step 3, when you position your grow light 2-3 inches above the seedlings, remember this distance is for the initial germination phase only.
Frequently asked questions
Got questions about your small seed-starting greenhouse?
You’re not alone! Here are some of the most common queries—and their practical solutions—to help you grow with confidence.
What’s the best time of year to start seeds in a small greenhouse?
For most vegetables, start seeds 6–8 weeks before the last frost date in your zone. Leafy greens (like lettuce) can go in earlier, while warm-season crops (tomatoes, peppers) need warmth—wait until after frost risk passes. Check your local frost dates and seed packets for guidance!
How do I prevent mold or damping-off in a tiny greenhouse?
Overcrowding and excess moisture are the top culprits. Space seeds properly (follow packet instructions) and water from the bottom (use trays with drainage). Ventilate daily by cracking the lid or adding a small fan. Pro tip: Sprinkle cinnamon or hydrogen peroxide (1:10 ratio) on soil to deter fungi!
Can I use a small greenhouse indoors year-round?
Place it near a south-facing window or under grow lights (12–16 hours/day) for consistent growth. Monitor humidity—use a dehumidifier or fan if condensation builds up. Just avoid drafts (like AC vents) to keep temps stable.
What’s a good alternative if I don’t have space for a greenhouse?
No problem! Try these space-saving hacks:
- Clear plastic domes over seed trays (cheap and effective).
- Under-cabinet grow lights for windowsill setups.
- DIY mini greenhouses from plastic containers + zip ties.
Why are my seeds rotting before sprouting?
This usually means too much moisture or poor drainage. Check your soil mix—it should be light and airy (add perlite or vermiculite if needed). Avoid watering until the top inch feels dry, and ensure pots have drainage holes. If using a closed greenhouse, prop the lid open slightly daily.
Wrapping up and next steps
A small seed starting greenhouse is your secret weapon for faster, healthier germination—even in tight spaces! With the right setup, you’ll enjoy earlier harvests, stronger seedlings, and fewer failures, all while keeping costs low.
Whether you’re a beginner or a seasoned gardener, this compact solution proves that great results don’t require a lot of room.
Ready to grow? Start by sketching your design—pick your favorite materials, gather supplies, and dive in! Soon, you’ll be watching tiny seeds transform into thriving plants, all thanks to your new greenhouse haven. Happy planting! 🌱